A Beginners Guide for Photographing Birds in Flight
Bird photography, specifically photographing birds in flight require a lot of patience and practice. It is not only necessary to have the right camera gear and the knowledge to use them effectively but also to understand what settings work best under which circumstances and how to create beautiful bird photography compositions. In this article, I share with you the important principles of photographing birds in flight. In addition, I expand on each principle.
Choosing Your Equipment
If you are just getting started with photographing birds, the first step is to make sure that you have the right camera equipment. The right equipment can make bird photography an enjoyable experience. Moreover, it can dramatically increase your chances of capturing the birds in action. Here are a few things to consider when selecting the proper camera equipment for photographing birds in flight.
- While just about any lens and DSLR camera can be used to make images of birds in flight, a fixed focal length lens such as a 300mm, 500mm or 600mm lens is a better choice over zoom lenses. Due to the optics configuration, these lenses are faster and sharper than their zoom counterparts.
- Camera with a faster frame rate gives you the advantage of capturing at a burst rate, which produces images of the action in quick succession. This is ideal for capturing the rapid action of birds which may be missed by a slower DSLR. Moreover, you will have a choice of picking the best images from the collection.
- Mounting a long lens and a camera on a tripod with a gimbal head is the best way to avoid camera shake and make sharp images.
- When shooting fast-moving erratic birds or when birds are coming from different directions, it is easier to move and shoot hand-holding. Using a tripod can be restrictive. In this case try to shoot while hand holding your camera and lens. If possible, stabilize yourself against a railing or a wall. Hold the camera and lens and tuck your elbows in firmly to rest against the side of your chest.
I presently use the Canon IDX, 7D Mark II, and the 5D Mark III digital cameras. My camera lens arsenal consists of Canon 70-200 f/2.8 IS II, Canon 300mm f/2.8 IS II, and Canon 600mm f/4 IS II. I have access to 1.4x and 2.0x tele-converters, Wimberley WH 200 Gimbal head. I also use the Canon 7D’s crop sensor because it provides extra reach by allowing you to extend your focal length without the use of a tele-converter.
Camera & Lens Settings
Once you have settled on your equipment, make sure that you know how to use it. It is not only necessary to have the right camera gear and the knowledge to use them effectively but also to understand what settings work best under which circumstances. Here are camera setting options for photographing birds in flight.
- I prefer to shoot in AI Servo mode on Canon (similar to AF-C or continuous mode on Nikon). When set to this mode, the camera continues to track and maintain focus on a moving subject as long as you keep the shutter button pressed halfway down. I also set the camera’s drive to High Speed continuous sshooting mode to capture maximum number of shots. This produces images of birds in quick succession and you capture many more intimate moments.
- I also use manual exposure mode when shooting birds against backgrounds of rapidly changing tonality. If you are in Aperture Priority mode and if the bird goes from being in the light sky to in front of dark trees, the metering will cause the shutter speed to drop, leaving the bird overexposed. However in manual exposure mode, as long as the light is constant on the bird, the exposure on the bird will be correct regardless of the background.
- Conversely, I set the camera to Aperture Priority mode when the light is changing and the background is of uniform and constant tonality. This works well when shooting birds against an evenly lit sky or when the birds are not flying and the light is constantly changing.
- When first starting out in bird photography, I recommend that you use the center focus points to get the hang of tracking birds and shooting sharp images. As you improve your skills, start thinking about composition and choosing different focus points and focus settings.
On Canon DSLR press the AF point selection button and, from the available options, choose the Expand AF Area with the four surrounding focus points activated (as seen in the image above). This works well for flight and action photography. On a Nikon DSLR, depending on the camera, you can choose to select the dynamic 9, 11, 21, 31, or 51 AF points, which work together. The 3D tracking on Nikon works well if the bird is against a solid background (clear blue sky).
- As a rule of thumb, for freezing action or birds in flight, the shutter speed should be at least as much as the focal length of the lens. If you are shooting with a 600mm lens, it should be at 1/600sec or higher. A shutter speed in excess of 1/1250 sec is ideal.
However for creative shooting and showing a sense of motion, shoot in manual mode and choose a slower shutter speed, and pan along as the bird goes by. Start by setting the ISO to a lower number and set the aperture to 1/30sec.
- For advanced shooters, I recommend using back button focusing setting on your camera. In this technique, you assign one of the back buttons (AF-ON) for focusing and leave the shutter button with only the task of taking the final image.
Why use two fingers instead of one? When you use the shutter button for focusing as well as capturing the image, there is a higher possibility to let go off the shutter before the final capture. This can often happen with a fast flying erratic bird which may cause you to experience some camera shake while panning. With the back button function, the focus is maintained even if you let go of the focus button.
Pre-focus your camera lens
Most zoom and fixed focal length lenses are not that good at searching long distances to find the bird. Most often photographers are shooting birds that are at or flying from different distances. Let’s say that you just got done photographing a Cormorant that was 5 meters away, your lens is pre-focused at that, and suddenly a goose flies by at a distance of 30 meters. In this scenario, you will not be able to locate the goose in the viewfinder in time. To deal with these situations, it is best to identify the flight path and manually focus to 30 meters and then let the lens acquire focus. Keep in mind, if your subject is moving towards you too fast, the automatic focus system in your camera will not be able to keep up with the movement when your subject is moving directly towards you. In this situation, it is best to focus on a spot through which the subject will pass through. Then, when the subject is about to reach that spot, start shooting in AI Servo or continuous mode until the subject is past the focus point.
For small birds consistently landing on the same perch this pre-focusing technique combing with high speed drive mode work very well to photograph birds in action.
Creating a Composition
After equipment and camera settings, we need to think about composition to capture some stunning bird photos in action. As with any other nature photos, photography composition can mean the difference between taking a photo and making an image that makes your viewer go WOW. Here are few practical ideas for photographing birds in flight:
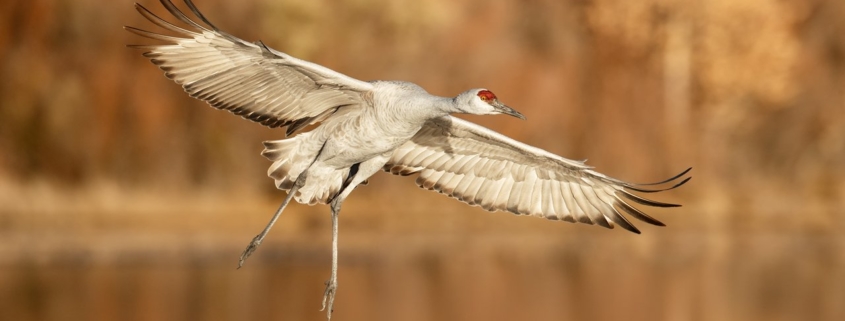
- Avoid putting the bird in the center of the frame. Use focus points to help place the bird off center. Give the bird more space in the direction it is flying and think about the rule of thirds.
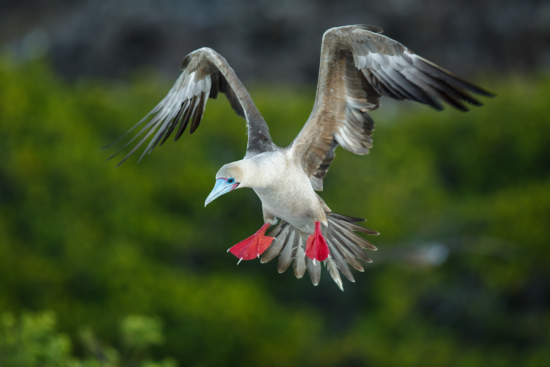
- Look for opportunities where the bird makes an eye contact with the camera. This makes the image visually much more engaging.
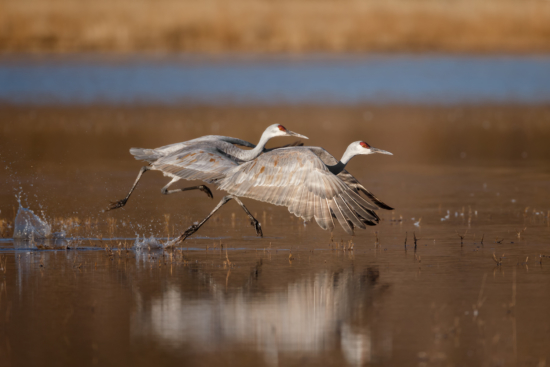
- Aim to photograph birds in flight with their habitat included in the background. This gives some indication of their surroundings and habitat. Moreover, such a background makes the overall image much more visually appealing.
- For birds that are banking in your direction, use the vertical grip available on high-end DSLR’s to create vertical compositions. We are mostly used to shooting horizontal frames. Switching to the vertical grip may not be intuitive in the beginning but with practice, it will become easier.
Best Time for Photographing Birds
Early morning and late afternoons are the best time to shoot because you have the best quality of light. Also, these are the times when birds are most active looking for feed or preening themselves. They truly look divine in that light. That being said, I also strongly believe that relying completely on a front-lit subject can produce rather redundant and boring images. I often like to photograph birds with the source of light behind them. For example, I like creating moody images by shooting silhouettes. You can also try side-lit subjects and, on overcast days, the use of fill flash.
Getting Started
If you are serious about understanding birds and about learning to photograph them then the best place to begin is in your own backyard. By simply creating a bird-friendly environment with a feeder and birdbath, you can capture the moods and behavior of birds. This is a good way to improve your technical and composition skills without having to make a substantial investment in travel.
All of the recommendations mentioned above are meant to help you improve your skills for photographing birds in flight. Please note that I don’t claim that these are the only ways to shoot. I suggest that every bird photographer do three things. Read their camera and lens manual carefully, follow the tips in this article, and develop their own shooting style. It is also important to spend time observing the bird’s behavior. Birds will almost always behave in a certain way before the action is about to happen. Anticipating the action is the key to the critical timing of the shot. Finally, patience is the key to success.
Now that you have a clear understanding of the skills needed to make images of birds in flight look artistic and visually pleasing to your audience.









good article, vry informative. Love bird photography
I do have many different birds in my backyard and it is a pleasure to watch them each and every day.