Understanding White Balance in Photography
White balance is an important concept to understand as it can make a large impact on your photographs. It affects the mood of an image and is critical for color accuracy. Lets start with the basic concepts because they can be a little confusing.
What is it?
First we need to understand color temperature. Color temperature is measured in Kelvin (K) which is a physical property of light. There is a large difference in temperature between light sources. The scale runs from 1,000-10,000 K. Sunlight at noon is considered a neutral color temperature of 5200-6000 K. An incandescent light bulb (warm/orange) has a color temperature of around 3000 K, and shade (cool/blue) has a color temperature of around around 8000 K.
Now that you understand what color temperature is, white balance should be fairly easy to grasp. White balance is adjusting the color temperature in your image. How does it do this? It adds the opposite color to the image in an attempt to bring the color temperature back to neutral. Color temperature and white balance are exact opposites of each other. Yes, that is confusing. A color temperature of 1000 is warm/orange and 10,000 is cold/blue. A white balance of 1000 is cool/blue and a white balance of 10,000 is warm/orange.
Instead of whites appearing blue or orange, they should appear white after correctly adjusting the white balance of an image. The human brain does a phenomenal job automatically adjusting white balance. A white object appears white in different lighting conditions. Our camera, however, needs a little help with this. Cameras capture the light and color temperatures that are actually in a scene, not what your eye sees.
Setting White Balance
There are two ways to adjust white balance – either in-camera before you create an image or in post-processing software after you create an image. I personally set my camera to Auto White Balance and don’t bother with making in-camera adjustments. I make my adjustments to my RAW files in Adobe Lightroom.
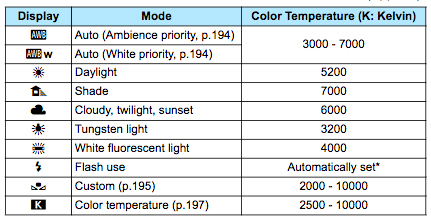
Below is the chart from the Canon 5DIV manual on in-camera selections. Nikon uses similar icons.

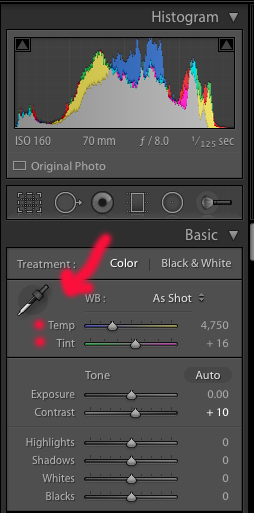
Below is a screen shot from Lightroom. The slider for the white balance is the top slider. The second slider is to adjust the tint. There is also an eye drop tool that allows you to select a “target neutral” directly from your photograph. The program sometimes does a good job when you select auto from the drop-down, but I usually make slight adjustments from there.
White balance can also be used as a creative technique for an image. I usually never leave my photos just neutral. Images taken around sunrise and sunset I usually make a bit “warmer” to convey the warmth of the sunset light. Anything after sunset I usually “cool” down. Cloudy sky photos I usually “cool” as well to convey the dreary cold aspect.
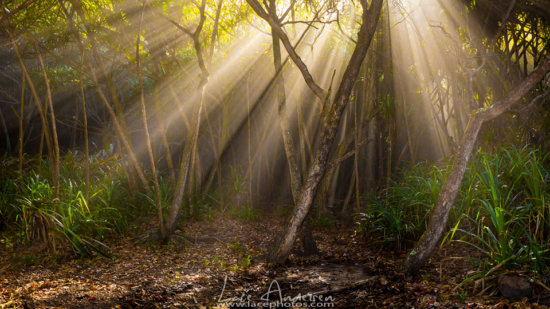
For the image below, I used the graduated filter tool to “warm-up” the top portion and “cool-down” the bottom portion. The original RAW file is on the left.
I hope this helps you navigate the world of white balance. Experimenting with the sliders is the best way to learn.


