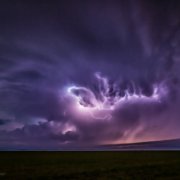
Essential Tips for Lightning Photography
One of the most exciting things to photograph in nature is lightning striking down over the landscape in front of you. The spring and summer months seem to bring the highest chances of lightning storms. However, you can pursue lightning photography at any time of the year. Here are few tips that will help you maximize your chanced of capturing stunning lightning photos:
Check the Weather
In order to have the opportunity for photographing lightning, the first step is checking the weather. Any chance of a thunderstorm gives you a chance to get that shot.

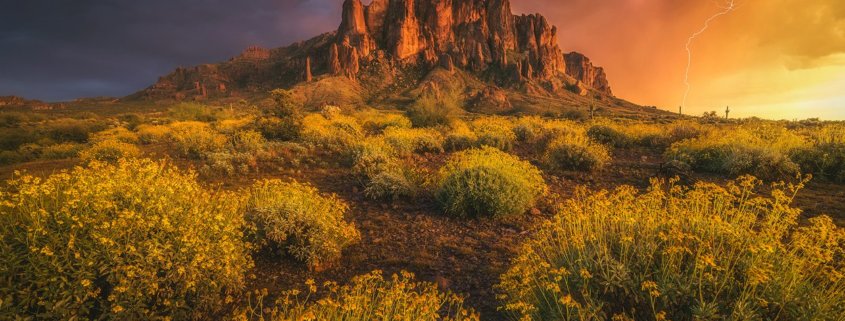
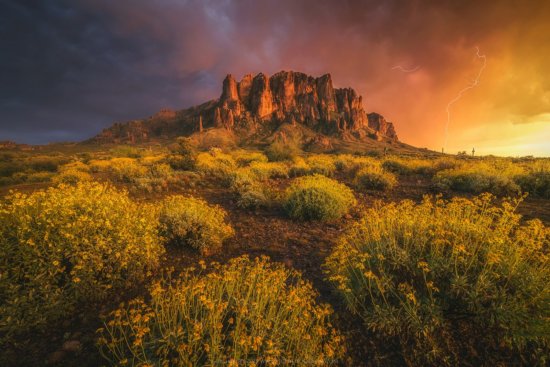
Lightning photography at the Superstition Mountains in Arizona. This photo was created by stacking four images within a five minute period.
When you have found a suitable location with a chance of thunderstorms, it’s time to head out. As with any type of photography pertaining to inclement weather, it is always important to keep yourself safe. Photographing lightning is dangerous, so understand the risks associated with it. No photograph is worth an injury or even your life. Know when it is time to throw in the towel and move on from a storm.
Lightning Photography at Night
From my experience, it is much easier to photograph lightning at night when you are using longer exposures. You may still have to adjust your settings depending on the frequency of strikes, how close they are, and how bright they are. Unlike traditional night photography where high ISO speeds are used, you will want to use lower ISO speeds. Lower ISO speeds around 200 tend to work best as to not overexpose the scene. Stopping down your aperture also allows you to dial in a good exposure if you have incredibly bright and vivid strikes. I generally switch between f/5.6 and f/9 and adjust accordingly.
In order to utilize these longer exposures, make sure you are using a sturdy tripod and a remote cable release/intervalometer. Be sure to switch the image stabilization of the lens off if you are using a lens with that feature. If the storm is still far away, you can start with thirty second exposures and adjust as the storm gets closer. Don’t be afraid to switch focal lengths as well. Zooming in on a particular area where strikes are frequently occurring can create great visual impact and bring the storm closer to the viewer.
Focusing in the dark can always be a challenge especially if it is completely dark where you are. It can be even more difficult when using longer focal lengths. If there are lights off in the distance, try using live view to manually focus on those distant lights. If you are using a wide angle lens, simply focus to infinity.
Lightning Photography during day
Photographing lightning during the day brings a little more of a challenge, but can be made easy by using a lightning trigger. There are numerous brands that make these hot shoe attached devices which vary in both quality and prices. This is the easiest way to photograph those daytime lightning strikes as the lightning trigger senses the strike and trips the cameras shutter. Lower ISO speeds allow for somewhat slower shutter speeds while still giving a strike some “pop”. Fast shutter speeds can result in completely missing the strike even if the trigger trips the shutter.

Photographing lightning over Bradshaw mountains in Arizona. This photo was created by stacking of three images.
Just like a traditional landscape photograph, I would keep my aperture around f/11 for good depth of field. Try to avoid really small apertures like f/22 as this can result in very faint strikes even if they appear vivid in person. In the image below the lightning bolt was actually much more vivid, but I had been shooting at f/22 trying to extend my exposure. I still got the strike, but there wasn’t as much impact as in person.
I would also suggest not using 10 stop ND filters to extend exposures as they too can drown out the vibrancy of a vivid lightning strike. It is a good idea to play back any shots tripped by a lightning trigger. You may not have seen the strike with your naked eyes, but often times you may see it later.
Because you are photographing during the day, the lightning is not acting as the main light source. This will allow you to consistently get properly exposed photos and well-defined strikes without risk of overexposing due to bright bolts. The same goes for lightning photographs made during sunset. During this transition period of light, your ISO and aperture can remain consistent, but your shutter speeds change. You can opt to use a lightning trigger if you own one or just continuously trip the shutter with a cable release. Once exposures are longer than five seconds, I will opt to continuously trip the shutter with my cable release. Neither option is wrong, it is just personal preference.
Lightning photography can be a thrilling, so charge those batteries and get out in some storms. Planning is key and when combined with good technique, can be very rewarding.

