Mastering Coastal Storm Photography
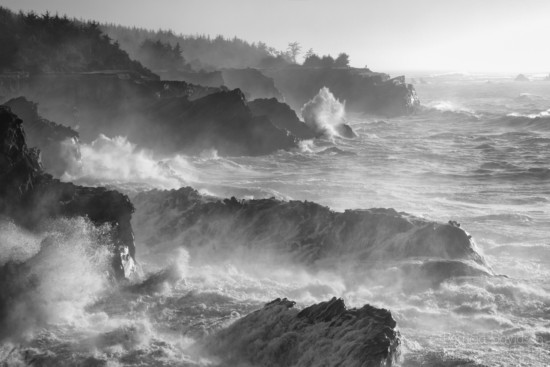
Nature’s raw power is nowhere more visible than on a coastline during stormy conditions. The crashing waves, turbulent skies, and unpredictable light create a visually arresting scene for photographers. Coastal storms can generate sizable waves and dramatic sea conditions, particularly if they crash against the cliff walls.
However, photographing coastlines in such extreme conditions is not without challenges. To help you master stormy coastal photography, here’s a guide with essential tips for using aperture, manual mode, ISO, lenses, and much more.
Shutter Speed: Freeze or Blur the Action
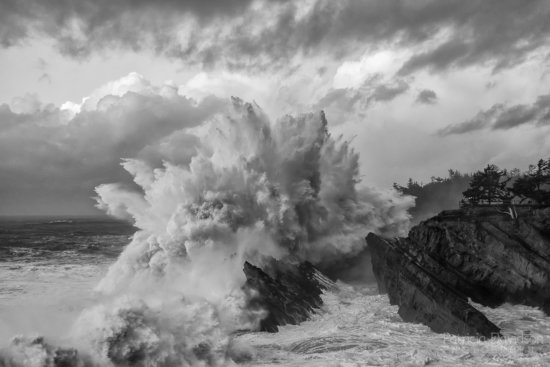
Shutter speed plays a critical role in capturing the mood of stormy coastal scenes. A fast shutter speed (e.g., 1/1000s or faster) allows you to freeze the motion of crashing waves, capturing the drama of the large swells and crashing waves in sharp detail. This is perfect for emphasizing the raw intensity of the ocean.
On the other hand, a slow shutter speed (e.g., 1/2s to several seconds) will blur the movement of water, creating a smooth, ethereal effect as the waves and clouds streak across your frame. Long exposures, especially in stormy conditions, add a sense of calm and surreal beauty to the scene, contrasting with the chaotic energy of the storm. To avoid overexposure during daylight hours, pair a slow shutter speed with a neutral density filter.
Aperture: Control Depth and Detail
A key decision in stormy seascape photography is choosing the right aperture. Generally, you’ll want a smaller aperture (higher f-stop, like f/7 to f/10) to ensure the entire scene is sharp from the foreground to the horizon. In stormy conditions, capturing the intricate details of crashing waves and moody skies is essential, and a small aperture ensures depth of field that brings out both the dramatic clouds and the dynamic water textures.

Coastal Storm Photography captured with Canon 5D using a wide aperture (1/6s@F16, ISO 100) by Jay Patel, Canon Beach, Oregon
However, keep an eye on your camera exposure—if the light fades dramatically due to storm clouds, you may need to adjust other settings to prevent underexposure.
Manual Mode: Take Control
When photographing during a storm, your camera’s automatic settings may struggle with the rapid changes in light and contrast. Switch to manual mode to take full control of your settings. This way, you can adjust your aperture, shutter speed, and ISO independently, which is essential in stormy environments.
ISO: Balance Light and Noise
Coastlines during stormy conditions often have low light due to heavy clouds, but increasing your ISO too much can lead to grainy images. Start with a low ISO (100-800) to minimize noise, and only increase it if absolutely necessary to get a faster shutter speed. In darker conditions, boost ISO to balance your exposure, but be cautious not to introduce unwanted noise into your images.
If you have a tripod (which we’ll cover below), you can use slower shutter speeds with a low ISO to maintain a clean image without sacrificing exposure.
Lenses: Wide for Landscapes, Telephoto for Detail
The choice of lens plays a crucial role in stormy coastal photography. A wide-angle lens (e.g., 16-35mm or 24-105mm) is ideal for capturing expansive views of the shoreline, sky, and waves in a single frame. It allows you to emphasize the vastness of the scene and draw attention to the dramatic scale of the weather.
For those wanting to focus on specific details like distant waves, sea stacks, or clouds, a telephoto lens (70-200mm) can help isolate those elements while compressing the scene for a more intense composition. Be cautious, though, as stormy winds can make it tricky to stabilize a telephoto shot—using a tripod will help here.
Remote Shutter Release: Reduce Camera Shake
When dealing with high winds and the need for long exposures, even the slightest camera movement can blur your image. A remote shutter release or using your camera’s built-in timer helps eliminate the risk of camera shake caused by physically pressing the shutter button. This becomes especially important if you’re using a slow shutter speed to capture silky-smooth water or streaky clouds.
Tripod: Your Essential Anchor
A sturdy tripod is non-negotiable when photographing in stormy coastal conditions. High winds and uneven terrain make it difficult to handhold a camera, especially for long exposures. Look for a tripod that is robust and heavy enough to withstand gusts of wind, and make sure to secure it properly—some tripods come with a hook to add weight (like hanging your camera bag), which helps in windy conditions.

Coastal Storm Photography captured with a wide-angle lens using a tripod & a remote release by Jay Patel, Big Island, Hawaii.
Position your tripod carefully, and if you’re close to the waves, be aware of the tide and water spray to protect your gear.
Circular Polarizing Filter: Enhance Contrast and Reduce Glare
A circular polarizing filter is invaluable for photographing stormy coastlines. It reduces glare and reflections from wet surfaces (like rocks and water) while deepening the contrast in the storm clouds and the waves. This filter will also bring out more vibrant colors in your scene, especially after rain, when everything tends to look glossy and reflective.
Be cautious not to over-polarize when using wide-angle lenses, as it can result in uneven darkening across the sky.
Neutral Density Filters: Capture Motion and Drama
Using a neutral density (ND) filter is key for long exposure photography in stormy conditions. An ND filter allows you to extend your shutter speed even in daylight, making it possible to create stunning, silky-smooth waves or capture dramatic cloud movement. For stormy coastlines, a 6-stop or 10-stop ND filter can help you slow down the shutter speed to several seconds or even minutes, adding a sense of surreal calm to an otherwise chaotic scene.
Shoot in RAW: Maximize Post-Processing Flexibility
Lastly, always shoot in RAW when photographing stormy seascapes. RAW files capture a much wider dynamic range compared to JPEGs, giving you more flexibility when it comes to editing. The complex lighting of stormy conditions—often with dark skies and bright reflections—can make exposure tricky, but RAW files often allow you to recover lost details in both shadows and highlights.
When editing, you’ll also have more latitude to adjust color, contrast, and sharpness without degrading image quality, which is crucial when working with moody, dramatic scenes.
Photographing stormy coastlines offers breathtaking images, but it’s important to prioritize safety when working in such unpredictable environments. Here are key safety considerations to keep in mind:
Essential Safety Tips for Stormy Coastal Photography
Photographing stormy coastlines offers breathtaking images, but it’s important to prioritize safety when working in such unpredictable environments. Before you head out to the coast to take those pictures, there are a few safety conditions you should be aware of.
- Weather Conditions: Always Check the Forecast: Stormy weather is dynamic and can change rapidly, especially along coastlines. Before heading out, always check the weather forecast to anticipate incoming storms, heavy rainfall, or lightning. Use weather apps to monitor conditions in real-time, and be prepared to cut your session short if things take a turn for the worse. Here are some apps I use: The Weather Channel, NOAA World Radar, AccuWeather, and WeatherBug.
- Tide Conditions: Keep an Eye on the Tides: Understanding the tide is crucial for coastal photography. Stormy weather can cause unusually high tides and rogue waves, which can quickly engulf low-lying areas, putting you and your gear at risk. Always research the tide schedule before heading to the shore, and try to avoid shooting during high tide unless you’re positioned safely on higher ground. Like weather apps there are many choices for tide apps as well. I’ve tried several and my new favorite app is TideTrac. You don’t have to have high tides to get some great shots. Some of my favorite photos were captured during low to mid tide conditions.
- Watch Your Back: Stay Aware of Your Surroundings: I’m sure you’ve heard the saying, “Never turn your back on the ocean”. It’s an absolute true statement. In stormy conditions, always stay alert to the ocean behind you. Rogue waves can come out of nowhere, especially during storms, and can knock you over or damage your gear. Rough seas can bring in logs or other debris as well. It’s also a good idea to bring a friend or spotter who can help you stay vigilant. Stay Alert!
- Erosion: Be Cautious of Unstable Ground: Coastlines are constantly shifting due to erosion, and stormy conditions can make cliffs, rock formations, and even sandy shores unstable. Avoid standing too close to the edge of cliffs or on eroded land, as heavy rain or crashing waves can destabilize the ground beneath you. If you’re photographing near cliff edges or overhanging rocks, maintain a safe distance to prevent accidents. Pay attention to warning signs or barriers, as they are often there to highlight dangerous, eroding areas.
Clothing for Stormy Coastal Photography
Dressing appropriately is just as important as your photography gear when photographing coastlines during stormy conditions. The weather can be unpredictable, so wearing the right clothing will keep you comfortable, dry, and focused on capturing the perfect shot.
- Rain Jacket & Pants: Stay Dry and Comfortable: Most people will wear the rain jacket but few think about water repellent pants. A high-quality rain jacket and rain pants are essential for protecting yourself from the elements. Choose gear that is fully waterproof and windproof, with sealed seams to prevent water from getting through. Look for breathable fabrics to avoid overheating while staying dry, as you’ll likely be hiking or moving around to find the perfect shot.
- Hats or Hoodie: Protect Your Head from Wind and Rain: A hat or hoodie helps shield your head from wind and cold. A waterproof hood attached to your rain jacket can be a great asset during downpours, keeping rain from dripping down your neck. If you’re dealing with high winds, a hat with a secure fit or a hood that tightens around your face will prevent it from blowing away.
- Gloves: Keep Your Hands Warm and Functional: In stormy, cold conditions, keeping your hands warm while retaining the dexterity to operate your camera is crucial. Photography-specific gloves with removable fingertips or touch-screen capabilities are ideal, as they give you control over your camera settings without needing to remove them entirely.
- Boots: Waterproof and Sturdy Footwear: A solid pair of waterproof boots with good traction is essential for stormy coastal photography. Wet, slippery rocks and muddy trails can be treacherous, so you need footwear that provides both stability and protection. Look for boots with a high ankle and durable grip to keep you safe when navigating uneven terrain. Waterproofing is a must, as standing in puddles or near crashing waves can leave you with soaked cold feet.
Photographing coastlines during stormy conditions requires patience, preparation, and a solid understanding of your camera’s settings. By using the right gear and techniques—such as controlling aperture, manually adjusting exposure, using filters, and stabilizing your camera with a tripod—you’ll be able to capture the wild, dramatic beauty of nature in its most powerful form. Remember to stay safe, respect the power of the ocean, and always keep an eye on the weather!
Original Article Published in Jan 2015.

