3 Tips for Photographing Moonrise
Each time I travel, whether for photography, business, or a family vacation, I always do some research online to find the best locations to shoot. One thing that I generally research is astronomical phenomena. I like a good landscape or cityscape photo, but one that is enhanced by something interesting happening in the sky can be really special.
One astronomical event that is quite frequent – it happens every 29 days, in fact – is a full moon. When caught high in the sky, a full moon in itself is not terribly interesting. It’s best to shoot when it’s rising because you can include the landscape in your photo and maybe align the moon with some interesting landmarks.
One problem with a full moon is that it is very bright. Unless you do as I advise below, the ground will be too dark and all you’ll get is a shiny moon in a sea of black. Not a very compelling image.
Tip #1: Timing it right
Here is something that many people do not know: you can get a perfect balance between the illumination of the ground and the brightness of the sky and the moon by shooting it the day before the full moon. A waxing moon that is almost full rises about one hour before sunset. At that hour, the sky and the ground are still quite bright but, as the moon rises above the horizon, the ground gets darker and the colors in the sky get more intense.
When the sun finally sets, the moon is at an elevation of 10 to 15 degrees above the horizon, enough to have cleared most elements on the ground (like buildings, trees, or mountains). From then on, the sky gets dark very quickly. Depending on the conformation of the ground, you may only have a few short minutes to get your shot, so it’s better to do some fairly accurate research to know exactly at what time and from which direction the moon will rise.
Tip #2: Plan Ahead & Scout the Location
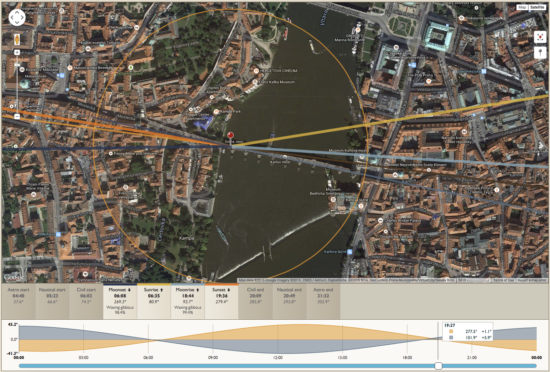
One of the applications I always use to plan these kinds of shoots is The Photographer’s Ephemeris. A few weeks ago, in anticipation of a journey to Prague, I checked the calendar to verify the phase of the moon during my stay. Because this application told me that the full moon was going to be on April 4th, I set my sights on the evening before that – April 3rd.
Next, I tried to find a suitable location from where I could frame some interesting buildings while looking to the east. It didn’t take long, as the screenshot from The Photographer’s Ephemeris here shows, to realize that I could use a long lens and stand at the western end of the historical Charles Bridge to frame the moon rising exactly opposite and above the gate tower at the eastern end.
Some advance location scouting also revealed that I had a perfect vantage point at my disposal – precisely on the balcony of the tower on the western end that mirrors the one on the eastern end. By using an elevated position, I could avoid the thousands of people that crowd the bridge at all times.
Tip #3: Keep an eye on the Weather
All I needed now was the right weather, but luck was not on my side this time. Though most of the sky was clear, lingering clouds on the east meant that the moon didn’t become visible until it was way too late.
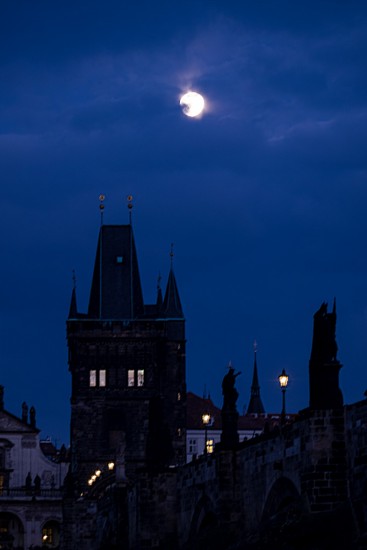
Much later than expected, the moon finally peeked above the clouds. By that time, twilight was giving way to night so I had to use a very slow shutter speed, losing every detail in the face of the moon. I also had to get much lower to the ground and shoot upward. I got one image, but it wasn’t what I had envisioned.
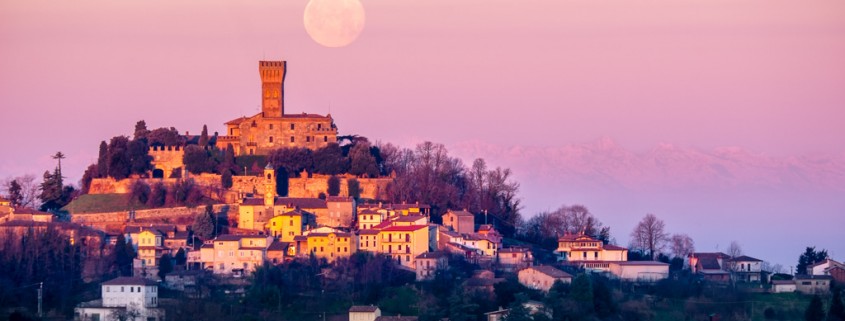
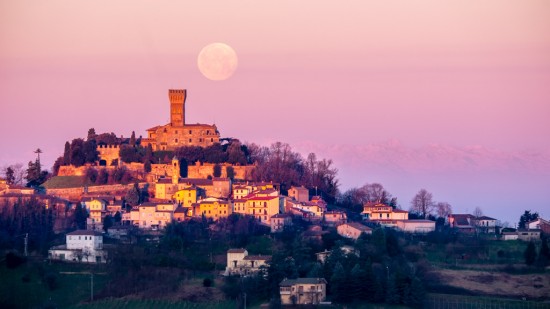
At times, however, the Earth and the skies unite to provide the right conditions and the results can be truly magical. Here is a shot I took using the principles describe above.


Great article, Ugo – thanks for sharing!! Tim Durkan, Seattle :-)
Hi Ugo, I am not sure if you ever encountered a situation where the moon is blocked by mountain or a building when rising. And you want to know the exact time when the moon rises above everything. I did which is why I decided to create my own app myself to solve the issue. The app is called PlanIt! for Photographers which you can find on both Apple’s app store and Android’s play store. Just for reference, you can look at an illustration I created at https://www.flickr.com/photos/wenjieqiao/15006954898.
As you can see, I can simulate where the moon is using a real photo. Or if you don’t have a photo yet, you can add a marker for the building and give it a height, then the app will show the building in the simulated viewfinder. Or if the obstacle is a mountain, just add a marker on the peak of the mountain and the app will figure out its elevation and show it on the viewfinder. Please check it out and let me know what you think. -David