Nature Photography Composition Tips to Create a Point of Interest
When you shoot, do you take a moment to consider the most important element in your nature photography composition? Can you identify it, or is your eye pulled from one element to another? The next time you go out to shoot, take a moment to consider the scene carefully. Choose a single interesting element for nature photography… a leaf, a water droplet, a rock, a tree… and see if you can find a way to make that element stand out in your photo.
Here are few nature photography tips to build an image around a single point of interest.
- Remove distracting elements from the frame by moving around to change your nature photography composition… or by moving them physically.
- Use a wide aperture and shallow depth of field to blur out distracting details in front of or behind your point of interest.
- Use color, contrast, size, or textures contrast to make one object stand out.
- Use leading lines to direct the viewers attention toward your point of interest.
- Watch for patterns – an element that breaks the pattern will attract attention.
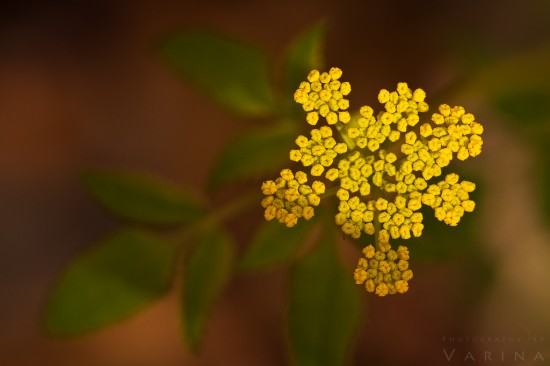
Using light and shallow depth of field to create point of interest for nature photography composition
Here are some real life examples where I used the above tips to create a single point of interest in my nature photography compositions.
Use size to create point of Interest
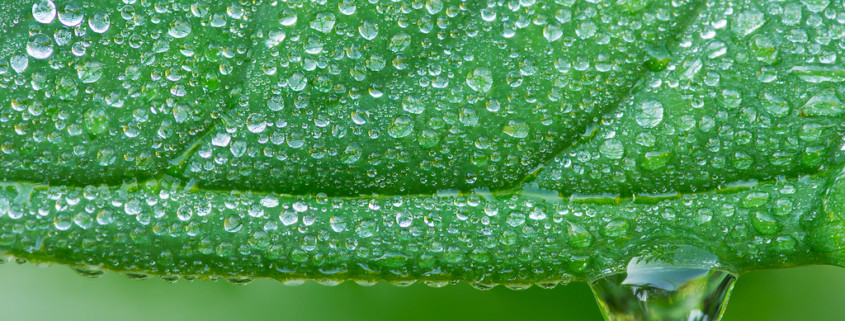
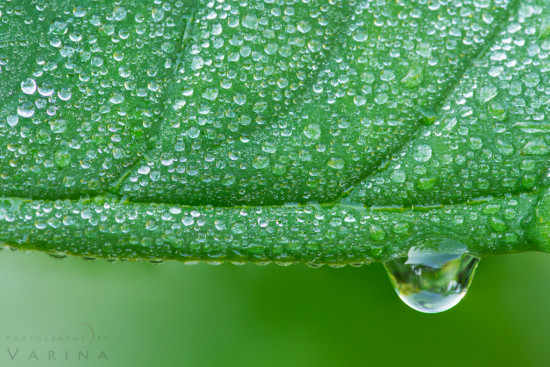
For this shot, I wanted to get in really close – and show off the beautiful, reflective droplets clinging to the leaf. I also wanted a very clear point of interest. So, I started looking for a single element that would work well for me. This little droplet was perfect. It stands out because it is much larger than the other droplets, and because it breaks the line that runs through the lower third of the image – between the leaf and the background.
Here is how I was able to isolate a single element in this nature photography composition.
- I used a shallow depth of field to blur the background to allow sharply focus foreground objects stand out. Blurring the background helped obscure potentially distracting elements, which can pull the eye away from your point of interest.
- Look for contrast. In this case I’m using contrast of size. The large drop stands out because it is so much larger than all those little ones. You can also use contrast of shape, color, tone, and so on.
- All those tiny little droplets make a pattern in this photograph – but I’ve broken that pattern. Twice. First, I positioned the leaf so that it’s edge cuts through the lower third of the photo. That brings your eye to the lower area right away. And then, just to be sure I have you where I want you, I’ve broken the pattern again by including the large droplet in the frame.
Leading the Eye with Focus and Blur
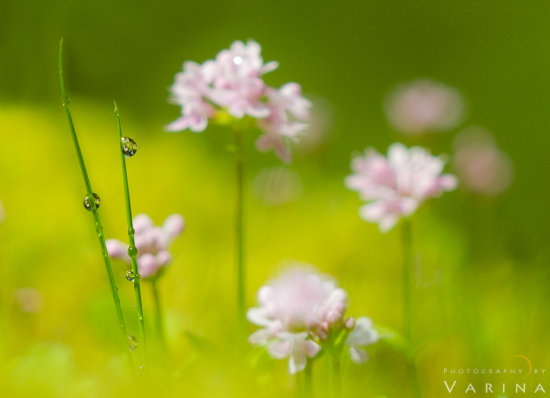
I took this pretty shot early on a rainy morning in a meadow. Oregon’s Columbia River Gorge is overflowing with flowers in Spring, so it’s a perfect time to pull out your macro photography lens and play with the possibilities.
When a single element in an image is in sharp focus and the rest of the image is blurred, the eye tends to settle on the sharp element. The blurred areas lack detail, so the eye shifts away from them. That doesn’t mean they aren’t in integral part of the image – not at all. But a smooth blur allows me to soften the effect of the pink flowers in this composition. The sharp grasses and water droplets draw the eye.
I took this shot with a 180mm macro photography lens. Although the pink flowers were beautiful, it was the water droplets that caught my eye. So, rather than trying to capture the entire scene in sharp focus, I chose to bring the droplets and grasses into focus and allow the pink flowers to go soft. I use this technique to point the viewer toward the object I want them to notice. In this case, I chose those two blades of grass covered in droplets as my “point of interest”. So, my goal is to minimize distractions in other areas of the image. The pink flowers provide a sense of place and a beautiful counterpoint to the main subject – but the eye migrates towards the water droplets rather than wandering around through the image.
Post-production is just as important as in-camera work. In this case, I made sure the white balance was just right – I wanted a nice, clean pink, and a very natural range of greens and yellows. If I’m trying to keep your eye on those little water droplets, the last thing I want is for you to be distracted by weird colors. The same goes for distracting spots. I used Photoshop’s Patch Tool and my Wacom tablet and stylus to remove them quickly. They might have been bugs, but were so blurred that they were unrecognizable – and they certainly didn’t add anything to the photograph. And for printing or web display, I used my tablet to draw a quick selection around the droplets, created a mask, and sharpened just that small area. I left the rest of the image alone for a very soft look.
Use colors to simplify your nature photography composition
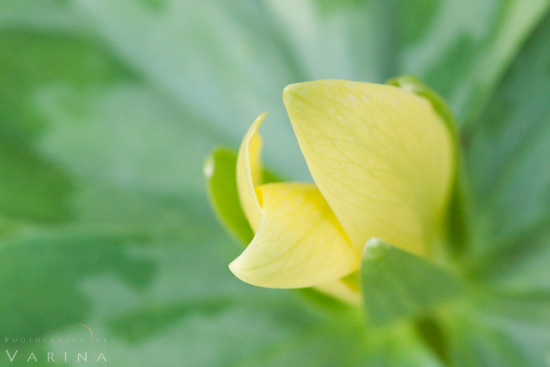
I pay close attention to colors when I’m working to simplify my nature photos and create a clear point of interest. This photo of Trillium (Great Smoky Mountains National Park, Tennessee) showcases an analogous color scheme. Analogous colors are located next to one another on the color wheel – and when they are used together, they produce very little contrast. This minimal contrast and smooth transition between colors tends to produce images with a certain sense of serenity and comfort.
Notice that the entire photo consists of just two colors – the green background and the yellow subject. The simple color scheme provides a clear separation between my point of interest and its background… as always, I am working to lead your eye gently toward my subject.
The creative thought process involved in giving each photographic subject the metaphorical spotlight makes nature photography a fascinating and never-ending challenge for me. We hope you can yse some of these techniques to isolate a single element your nature photography composition. Good luck.

