5 Techniques to Create Dramatic Photos of Piers
As a nature photographer, I don’t usually include man-made objects in my images. That’s just me. But I will often make an exception when it comes to dramatic photos such as docks and piers.
Docks and piers are excellent subjects because they have so much symbolism in them. They feel lonely when they are empty and exciting when they are full. They can evoke memories of adventurous times jumping off the end or memories of quiet times dangling one’s feet off the edge while enjoying a peaceful scene.
This kind of symbolism can be powerful in a photograph. Your photos can be made even more powerful if you carefully compose your image using elements of design.
Leading Lines
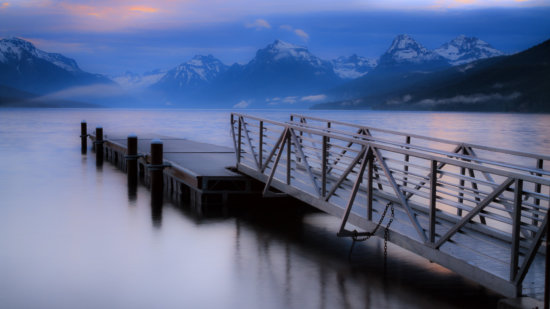
Leading lines are lines that lead the viewer’s eye from the foreground of the scene to the background, ideally leading to an interesting subject. A dock or pier is perfect for this type of composition since the lines created by it naturally lead the eye to the scene beyond.
Remember that when your subject reaches from the foreground to the middle ground or background, you need to use a small aperture like f/11 or f/18 to make sure everything is sharp.
Horizontal and Vertical Lines
If you can get some distance between yourself and the pier so that you are standing parallel to it, you can create repeating horizontal lines using the pier, the railing and the horizon or shoreline. You will also have repeating vertical lines in the pilings beneath the pier.
In the example below, there are additional repeating vertical lines in the cityscape in the distance.
In this case, where there is a lot of distance between yourself and your subject, you can use a smaller aperture if necessary and everything will remain sharp since everything is in the distance.
Diagonal Lines
Try to position yourself on the shore in such a way that the beginning of the dock or pier is in the corner of your frame and leads diagonally into the scene. Scenes with diagonal lines always create dynamic and dramatic photos.
Vanishing Point
By positioning yourself either below a pier or above it looking towards the end, the lines of the pier start at the bottom corners of your frame and move inwards towards the middle creating a vanishing point.
Using a wide-angle lens emphasizes how the lines come together in the distance and make your vanishing point more pronounced.
Silhouette
When you have good colour in the sky, expose for the sky and allow the lines of the pier to become a silhouette. This is especially effective if you can position yourself so that the lines of the pier make an interesting pattern in the frame.
To expose for the sky, use spot metering and meter on the sky. You may even want to under-expose your photo for darker colours.
More Tips
- Try not to change lenses at the beach since blowing sand and salt can easily get on your sensor. If possible, choose your lens ahead of time or take two bodies with different lenses.
- A tripod allows you to use slow shutter speeds to smooth out the water or capture the motion of waves.
- If the sky is much brighter than the foreground, a graduated neutral density filter helps even out your exposure.
- Check the tide tables. Low tide and high tide make a big difference in your image and may mean you are unable to get under a pier. In any case, it’s always a good idea to know if the tide is coming in or going out when you are at the beach so you know whether you are safe on your spot or if the ocean will soon cover it.


