Post Processing advice from Pro Nature Photographers
I often get this question from our students after a workshop – What post processing advice do you have for me? Most of them are expecting me to talk about post processing mistakes to avoid such as overcooked HDR, too much color saturation in Photoshop, or wrong color balance. These may be considered post processing mistakes but oftentimes they are not. Nature photographers often time consider them to be creative post processing choices that they are free make. So, when my answer is not about the post processing itself but rather about setting up the post processing workflow they are often surprised.
The end goal for my nature photography is to be able to be able to share the images with everyone. So, my first advise to beginner nature photographers is to set up your post processing workflow which allows you to process and share your images. Here is how you go about doing that:
Back Up Your Photos
The single biggest expense for a nature photographers is travel. The cost of travel in any given year for professional photographers like us exceeds the cost of all the equipment we own. Even if you are an amateur photographer and take just one trip per year to capture nature photos, you will likely spend over a couple of thousand dollars in travel expenses. For this reason, we take extra precautions to ensure that we do not lose the photos we capture. In order to do that, we back up photos regularly. Here are some things that will ensure that you minimize or eliminate the loss of your photos:
- Back up our images right in the field on a portable hard drive. We create multiple copies of our photos almost daily when we are on location to ensure that we don’t accidentally lose the photos.
- Use a local redundant backup (using RAID technology) at home to ensure you create a fail safe and automated backup all the photos on your computer.
- Use off-site backup and make sure that you store multiple backup copies. This will allow you to recover most of your files even if they get corrupted over time.
Calibrate Your Monitor
Another critical part of setting up your post processing environment is to calibrate your monitor. In today’s world, your photos will be viewed online more than in print. It is critically important to make sure that your photos retain the vibrant colors when viewed on other monitors, tablets, and smart phones that you see on your own monitor.
Here are two of the most popular reasons as to why nature photographers don’t calibrate their monitors:
- Some nature photographers assume that a good quality monitor is automatically calibrated right out of the box.
This is not always the case. Some monitors have calibration software build into them, but most do not. - I can hardly see a difference between a calibrated and uncalibrated monitor. Sometimes the difference is rather minor, but other times the difference can produce dramatic results.
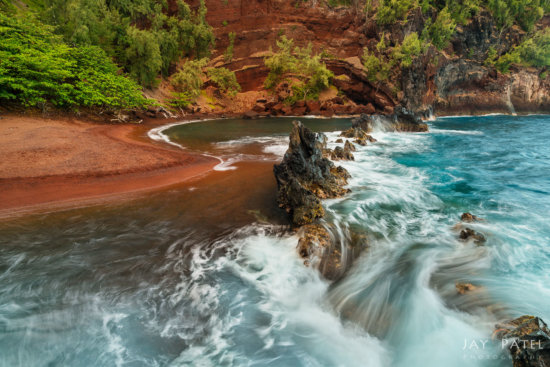
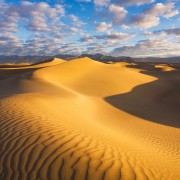
I processed the first image above using a monitor whose brightness was turned up high because it was located in a bright room with lots of windows. Everything in the photo looks great when viewed on the monitor. However, if you share this image on social media and view it in a normally-lit environment, the photo looks under-exposed and poorly-processed as seen in image #2.
You can see that a monitor or LCD calibration is essential even if you are just going to share your photos on social media.
Set Up Your Post Processing Environment
Before you start using Photoshop or Lightroom to process your landscape photos, ensure that your post-processing environment is set up correctly. This includes selecting the correct working color space in Photoshop as well making sure that room’s ambient lighting is correctly set up so that, when the photo is used by others, it retains the brilliant colors and details that you saw on your own monitor.
Why is this important? Because the ambient light and background colors on your screen both have a dramatic impact on how the colors and luminosity are perceived by our eyes. A good color management practice requires the awareness that your background colors and luminosity impact how your image appears. Consider a simple example of two grey circles on black and white backgrounds.
In Image #1 above, the grey circle to the right appears to be darker then the the one on the left because it is being viewed against a lighter background. When we move the circles closer together, you can see that the luminosity of both the circles is exactly the same.
Similar effects also occur with background lighting. If you are processing an image late at night with very little light, your images will look exceptionally bright and colorful even if they are dark or under-exposed. You should process the images in a controlled lighting environment using a neutral dark grey background.
Optimize Your Nature Photos
Once you correctly set up your post-processing environment and calibrate your monitor, you can take an additional step of optimizing your images for online sharing. This optimization not only requires you to be aware of the background colors used by various social media sites, but it also requires you to pick the correct colors space, add appropriate sharpness, and fine-tune your images so that your nature photos look the best on any social media website.
For example, using the wrong color space makes your photos look flat; they will not display the rich colors that you can see in nature. While processing our images, we set our color space to either wide gamut color spaces Adobe RGB or ProPhoto RGB. These color spaces gives us the smooth gradation in color during our post-processing workflow. However, when we share photos, we convert the photos to sRGB color space because most devices are unable to handle wide colors spaces.
The first of the two images above shows a photo processed in Pro when viewed in sRGB. The same photo (Image #2) when converted to sRGB retains its vibrant colors across the devices that can view only sRGB photos.
Keyword Your Photos
Keywords help you find your photographs when you need them – and they are often uploaded as metadata when you use your photos online. We get lots of questions from other nature photographers about how and why we even bother key-wording our photos. Here are a few good reasons why we keyword our photos:
- Maintaining a searchable collection: If you visit my website, you’ll find a search box at the top of the page. You can search for any photos using keywords such as waterfalls, river, Ohio, Yellowstone, and more. Smugmug’s Smart Gallery allow us to automatically create galleries from the keywords and make our websites very user-friendly.
- Searching for photos with a specific theme: Sometimes, we get requests from clients for images that match a specific theme. Maybe a publisher needs a series of images from national parks to illustrate an upcoming magazine article – or maybe an interior designer is looking for calming photographs of waterfalls for the lobby of a hospital. We can search for waterfall photos in Lightroom and every photo with a matching keyword shows up.
- Keywords for stock agencies: Stock agencies usually require that I include keywords with photos I upload. If I keyword my RAW files right away, I can send those keywords along with my finished files when I upload them later.
Key wording your photos becomes more critical as the size of your portfolio grows over time.
Whether you are seasoned nature photographer or just starting out, following these simple steps ensures that, not only do you not lose your photos, but your photos are always organized and look their best when you share them on social media or your own website.


Thanks for the great article but please fix the diagram as RAID 0 (raid zero) is NOT a backup! I do like your suggestion of a multi-tier approach & having multiple drives is very cheap insurance. You can use RAID level 1 or 5 as a primary storage (external or internal drives) but that is not your backup either, that is only a safety net if one drive physically breaks. Other possible problems include fire or theft. One possible solution is the following three tier approach: [1] Have a RAID volume (level 1 or 5) as your primary storage to download your files to. [2] Also have a external portable drive that you store the same file sets, but put this portable drive into a fire & waterproof safe. [3] Lastly, subscribe to a online backup that will passively upload your files to a cloud account and leave your computer turned on to ensure your backups are making it to the cloud account.
In the field, while shooting, many cameras have two card slots so it is not a bad idea to set the camera to create duplicates onto the second card. Having the backup drives in the field as you mentioned also will help.
All good points.
However I wanted to point out that Raid 0 splits (“stripes”) data evenly across two or more disks, without parity information, redundancy, or fault tolerance. So while this is NOT ideal for backup, it is a valid option.