3 Ways to use your GND and ND Photography Filters
Neutral Density (ND) photography filters are a must for any outdoor photographer. They come in all shapes and sizes and they give you greater control over your exposure. You may have only played around with your ND filters… but are you really making the most of them?
Here are some ways to maximize your ND filter investment.
Take Daytime Long Exposures
Some photographers may tell you to avoid shooting during the middle of the day, especially if it’s bright and sunny. The thought is that your shots end up looking sub-par because of the strong sunlight and harsh shadows.
But if you’ve got a set of ND filters, a whole new world of opportunity is open to you.
When you forget your sunglasses on a bright sunny day, what’s the first physical reaction your body has when you walk outside? You squint your eyes. That’s your body’s way of reducing the amount of light entering your eyes so you don’t damage them.
Well, it’s the same thing with your camera. Using something like a 6-stop or 10-stop ND filter on a bright day is like putting sunglasses on your lens.
This reduction of light entering your lens means you can increase the length of your exposure. Using longer exposures like 5, 15, 30 seconds or even longer allows you to:
- Blur moving clouds
- Smooth out waves and choppy water
- Make waterfalls look dreamlike
- Blur moving tourists or even make them disappear
- Capture lightning from a thunderstorm
Don’t waste those daytime hours! Get out there and experiment.
Bring Balance To Your Sunrise & Sunset Photos
If you know anything about using your camera’s histogram, you know that you don’t want any of the data from your image falling outside the box. That is to say, a well-exposed image avoids clipped highlights (on the right) and completely black darks (on the left).
Taking any kind of daytime shot with the sky included in your frame usually results in an unbalanced exposure… unless you use a filter to reduce the sky’s highlights. This is especially true when taking sunrise and sunset photos.

Beautiful sunrise over the sand dunes on Fripp Island, South Carolina created using a GND Photography Filter.
During these times of day, you’ll likely be struggling to expose what’s in the bottom part of your frame without blowing out the highlights in the sky.
A Graduated ND filter is the perfect tool for these situations. Think of a Grad ND as half a pair of sunglasses where only the top half are shaded.
In the photo below, shot in Rhode Island, you can see that I was exposing for the rocks in the foreground. So I had to use a soft grad filter in order to not overexpose the sky.
There are two types of GND photography filters:
- Soft GND Filters: Contains a smooth taper from the dark end to the clear end, which gives you softer transitions in your image.
- Hard GND Filters: Has an abrupt demarcation between the dark end and the clear end, which is useful when you have a very flat horizon line in your image.
Create Mood and Depth In Your Landscape Photos
Two of my favorite things to do with ND filters are blurring motion in clouds and accentuating the movement of tides. This can add both mood and depth to your scene.
Take a look at this stone wall I photographed in Ireland. Notice how the blurred motion of the clouds add a darker mood to the image.
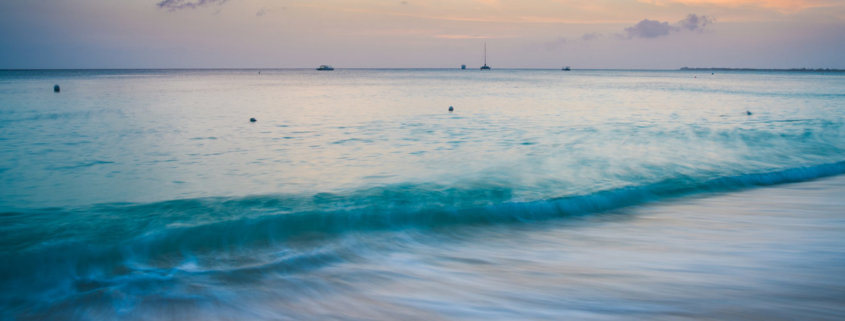
Now take a look at the streaks created by the retreating waves on this beach in Grand Cayman. The lines in the water help draw the viewer into the frame, giving more depth to the image.
These are just a few ways you can use your Neutral Density filters for outdoor photography. What about you? How are you making the most of your ND filters?


