Sample Sponsored Guest Content
By learning how light interacts with the environment, a landscape photographer can envision the type of image he or she wishes to capture. Empowered by this understanding, one can use things such as composition, equipment, and camera settings to create that jaw-dropping photograph. Controlling light in landscape photography can be quite challenging because you can never truly know for sure what Mother Nature has in store. For that reason, the most inspirational and accomplished landscape photographers study use creativity to different types of light.
Here are 3 important ideas that professional landscape photographers use to capture stunning photos in variety of light conditions:
#1: Learn to Capture Glow in Landscape Photography
Before you can successfully “capture the glow”, you must first understand what it means. It’s NOT the same as photographing a reflection. “Capturing the glow” actually means using reflected light in landscape photography.
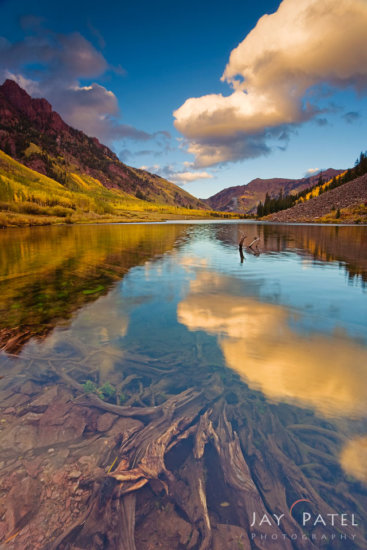
Take a look at the two images below:
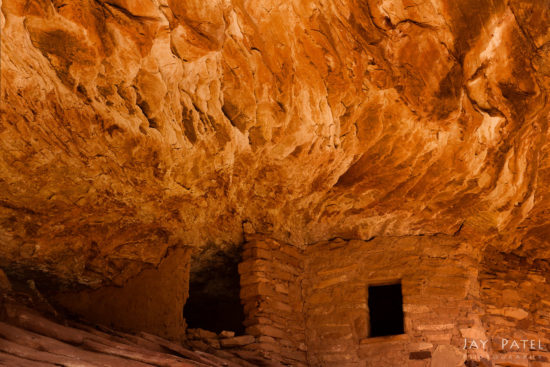
In the first photo (Snowmass Wilderness), I managed to capture the reflection on the pond. In this case, the subject is a direct representation of the scene. This is an example of photographing the reflection because the subject itself is the reflection. In the second image (Antelope Canyon), the subject is lit by the light that is reflected from the surrounding area. This is an example of capturing the glow.
The following sections describe some techniques to effectively capture the glow.
-
Canyon Glow
The second image above (Antelope Canyon) shows the first type of glow where the light, reflected from the surrounding area, gives the canyon walls their colors. While it is possible to photograph this glow during overcast conditions, you need bright sunny days to capture the intense reflected colors. The following (House on Fire) is another landscape captured by using the reflected sunlight from the surrounding areas.
The reflected light in this one is more even; there are no blinding, blown highlights. You can even see some subtle detail in the dark shadows deep in the canyon and in the cracks in the foreground. A long exposure is required for this type of photography; we typically use our carbon fiber tripods to these types of images.
-
Glow on Water
The reflective nature of water can create some of the most intense and breathtaking colors. Here is an example of how a moving water captures the glow of the vegetation that is lit by direct sunlight.
Because water is a moving subject, shutter speed plays an important role in capturing these images. If your shutter speed is too short, it does not capture the colors as you envision them. On the other hand, too long of a shutter speed (or the wrong composition) makes the glow dull or non-existent.
-
Glow on Land
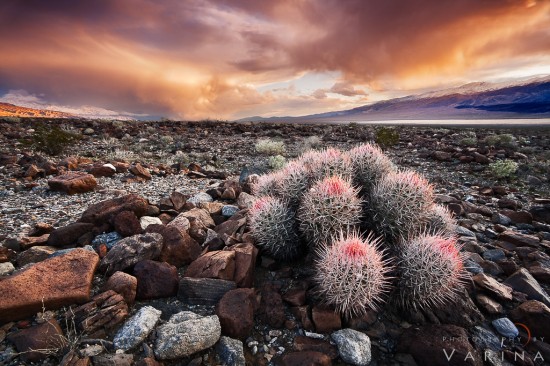
Canyons and water are not the only places where you can capture the glow. While all solid surfaces reflect light, smooth and light-colored surfaces reflect more light than uneven dark ones. Here are some examples of glowing light captured on solid surfaces in Death Valley, California.
In both of the images above, the foreground is lit by light from the clouds and the surfaces take on the color of reflected light. Due to the smooth nature of the surface, the glow is readily seen and captured. Dealing with an extreme dynamic range is necessary when capturing the glow during sunsets or sunrises; our stable Benro Tripods become indispensable for bracketing these images.
Compare the images above to the following one also shot in Death Valley. The uneven, darker surfaces below didn’t capture the glow as effectively as the smooth, lighter surfaces on the sand dunes and salt flats in the previous images.
The next time you are out and about taking photographs, look for the glow created by reflected sunlight to get stunning landscape photos with soft contrast and vibrant colors.
#2: Create Tonal Contrast with Light
We often advise our students to look for tonal contrast while capturing landscape photographs. Tonal contrast is one of many tools that can be used effectively to separate background from figure. It can also add that dynamic element to the image that creates impact. On the other hand, lack of tonal contrast may result in a dull and uninteresting image.
I took the first photograph below during one of our workshops in Escalante National Monument. The workshop was a demonstration on how to use light to create tonal contrast. After our morning shoot ended, I took this shot of the bush just as the sun came up over the ridge. Because of the low angle of the sun, the bush was back-lit while the background was still in deep shade; this created a natural tonal contrast between the subject and background. This tonal contrast helps the bush stand out from its background.
Compare this with the second shot above that I took before the sun came up over the ridge. At this time, both the bush and the background were in deep shade. In this image, we lost the tonal contrast between our figure and the background. Ovrall, the effectiveness of the photograph is greatly reduced.
Creating tonal contrast requires a balance between highlights and shadows so that the camera is capable of capturing the entire dynamic range with one shot. If the dynamic range of the light exceeds that of the camera, you’ll need to use exposure bracketing to capture all the details. The following is an example of a photo that required exposure bracketing:
Here are few tips to help you capture tonal contrast in nature:
- Look for back-lit subjects that stand out against a shaded background. The best time is when the sun is low in the sky. A low angle to the sun helps reduce the dynamic range and makes it easier to capture the image.
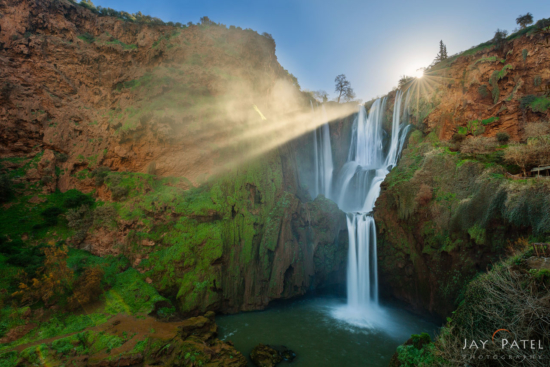
- Combine a sun star effect with an evenly-lit shady area to create an effective tonal contrast (above photo from Ouzud, Morocco).
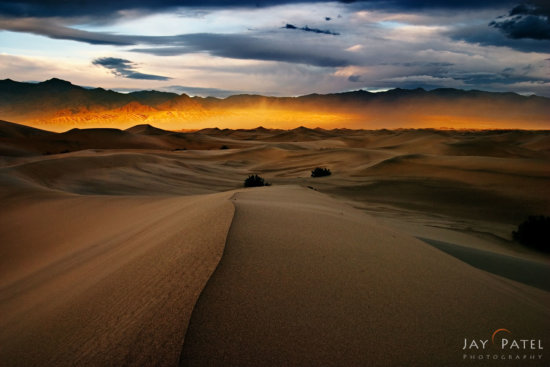
- The Spotlight Effect produced by a break in an overcast skies from which the sun can shine has an great potential to create tonal contrast. The following is a shot I took in Death Valley using this spotlight effect (above photo from Death Valley).
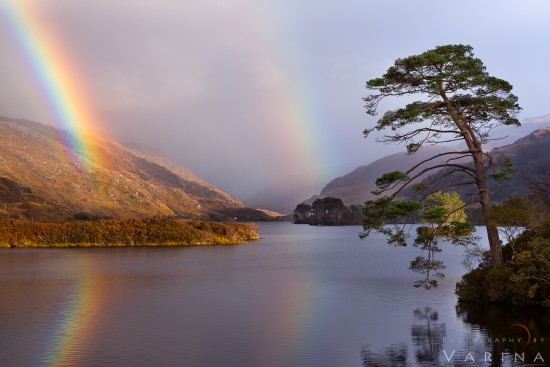
- A passing storm can produce intense tonal contrast. Sometime these storms have potential for creating rainbows that stand out against the dark, stormy skies (above photo from Scotland).
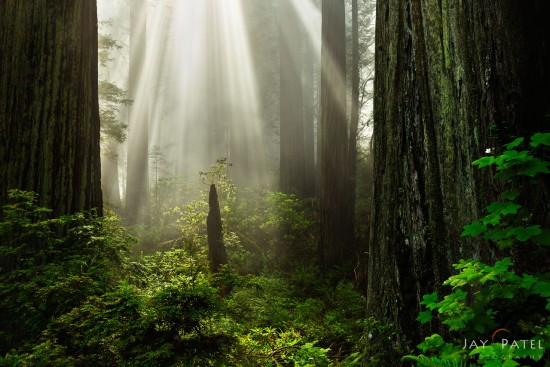
- Sun breaking through the early morning mist can also create soft tonal contrast that produces some very moody photos (above photo from Redwood Forest National Park, California).
While capturing photos with high tonal contrast, make sure to check your histograms to ensure that the entire dynamic range is captured after every photo.
#3: Capture textures with side light in Landscape Photography
I love to photograph textures on sand, rocks, and mud. Side lighting is essential for bringing out these textures in landscape photography. Contrary to popular belief, direct sunlight is not necessary for creating side lighting. Side lighting can occur even when the sun is below the horizon, on an overcast day and even in shade.
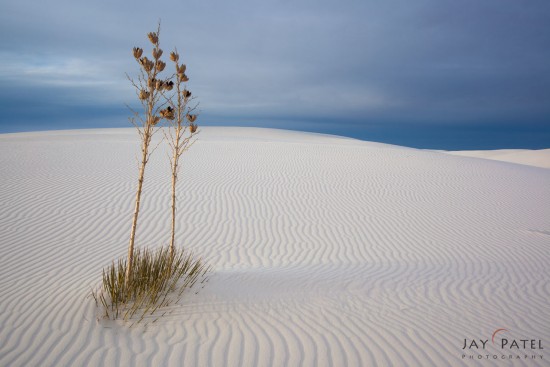
Take a look at this landscape photo that I captured just before sunset in New Mexico’s White Sands National Park. The sky is heavy with deep, blue clouds – but an opening in the clouds at my left shoulder allowed soft, evening light to dance across the dunes. Notice how I’ve used that light in landscape photography to bring out the textures in the rippling sand. When the sun is high in the sky, the soft shadows disappear and the ripples get lost in the brightness.
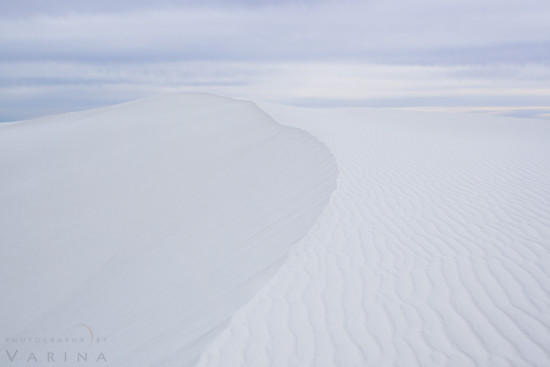
Take a look at one of Varina’s photos (above) from the same park. This shot was taken around mid-day under heavily overcast skies. The light is filtered through the heavy cloud layer and lacks any directional lighting. This image shows a completely different kind of light. Can you see how the side lighting in the first image enhances the ripples in the sand? Varina’s shot is beautiful for different reasons… it’s a stark, minimalistic representation of the scene where texture is less important than form.
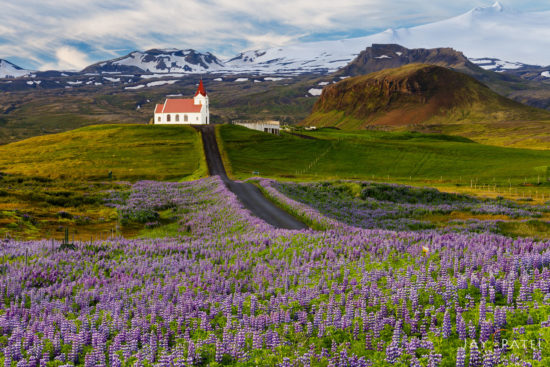
The best time to look for side lighting is during the early morning or late evening hours. Side lighting occurs even after sunset and before sunrise. Here is a photo from Iceland that shows subtle shadows and textures throughout this photo. This image was taken after the sun came up but the light was strong enough to create soft textures. A key advantage of using side lighting before sunrise or after sunset is that the dynamic range of the textures is controlled which eliminates the need for complicated post-processing.
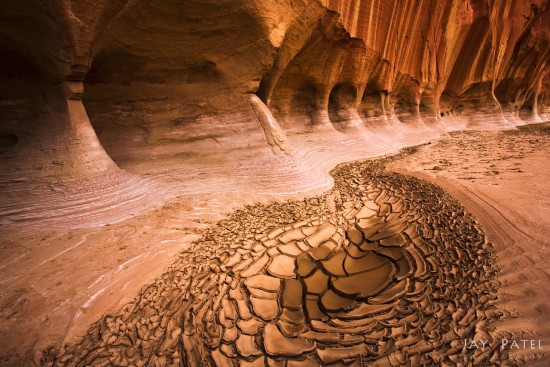
The same technique works when the sun is low on the horizon, on overcast days, or when you’re shooting in the shade. This image from Paria Canyon in Utah was shot in late afternoon when the west canyon wall was enveloped in shade. The light bouncing off of the rocks on the east side created subtle textures throughout the image.
So the next time you find yourself in nature try to think about what kind of light you are dealing with. And based on this type of light try to choose your photography composition, subject matter and camera setting to make the most out of the available light to capture stunning photos.
How do you deal with light in landscape photography? We would love to hear from you. Feel free to share your thoughts in the comments below.
Sponsored Content by Benro Tripods
Disclaimer: This content was generated as part of paid advertisement by our sponsor.

