Capturing the Essence of a Location
An essence of a location is the mood that the environment generates. You can stumble upon a well-photographed object or view point but in order to make it your own, you must convey some feeling to your end-viewer. A photograph reflects as much of the artist as it does what’s around you. It’s a mirror of your vision, experience, and tenacity. Conveying your own thoughts and feelings through an image that you capture is what makes your work stand out. You want the audience to have an emotional response to your photograph and to form a key association with it.
Step 1: Form a Connection
A photographer needs to form a connection to a location. If they just cruise up to a lighthouse, snap a picture, and get in their car and leave, they aren’t taking the time to process their surroundings. They need to ask themselves, “How can I make this well-photographed location unique? How does it make me feel when I’m looking at this landscape?” The secret to true creativity and artistic freedom lies in visualizing the essence of a location; and then translating those feelings by using your camera tools.
Step 2: Explore and Observe before Capturing the Photo
Upon arriving at a shooting location, I usually sit there for 15-20 minutes simply observing my surroundings. I make sure that I allow myself ample time before sunrise or sunset to do this. I explore and scout the location from all angles. Low on the ground, high standing on some rocks, or in the water watching how it moves. I find a couple of compositions that stand out. Usually with seascapes it involves placing reflecting pools, mossy rocks, or textured sand as foreground interest. I like to spend some time connecting an emotion or a thought to a specific scene. If you are finding it difficult to do this, ask yourself what one word describes the mood of this locale? When you come up with that word, the next step is to express it to your viewers.
Here are few examples on how I try to do this.
Example #1: Slow Shutter Speed and Black & White Conversion
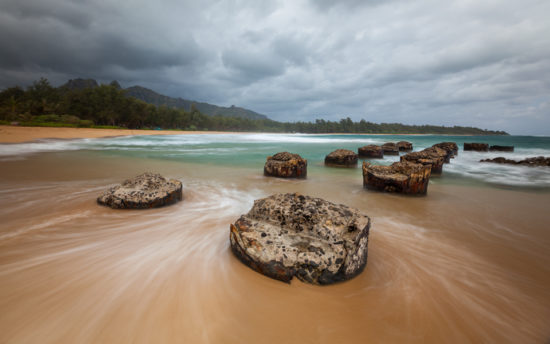
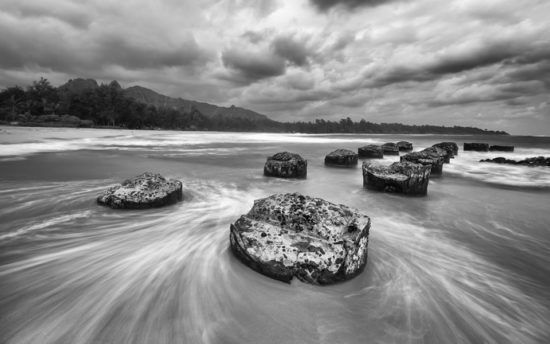
Take the above scene for example. This image has basic RAW adjustments using Adobe Lightroom. I spent a good ten minutes watching how the water moved and circulated around the dilapidated pier posts. The eroded pier and stormy sky made me feel dark and dreary, so I went with a black and white conversion. I used NIK Silver Efex PRO to bring out heavy contrast and structure in the details of the sky and water. This photograph was captured mid-morning and I wanted to try to make the water look as dreamy as possible. I used my 6 stop B+W Neutral Density Filter in order to have a longer exposure to smooth out the water striations around the pier nubs.
Example #2: Long Lens to Focus on Important Elements
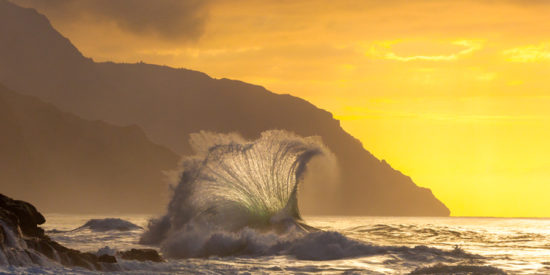
I wanted to capture an exploding wave down the Nā Pali coast, but I didn’t want the usual day time photograph. I wanted to convey a feeling of warmth and peace. This constituted photographing right before the sun went below the horizon. This insured that the wave was still back-lit so the green colors would be revealed and the coast would be glowing orange. I typically hand-hold these shots so that it’s easier to track a swell coming into the coast. The above image was shot at f/9.0 ISO 320 at 1/500 in order to freeze the explosion at its peak. As the sun dropped lower in the sky, I had to constantly increase my ISO to compensate for the loss of light.
Example #3: Use of Reflections
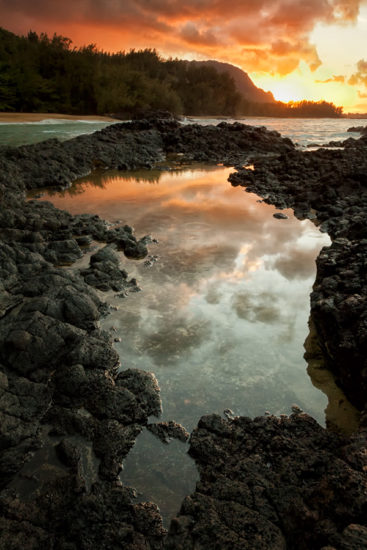
Lumahai is one of my favorite beaches to photograph on Kauai. The evening felt rather romantic with the light trade showers passing over. I wanted to capture the essence of snuggling up with a significant other and drinking wine as the sun set. I searched out a unique perspective by climbing up the lava rock and found a large reflecting pool as the main interest point. I cropped out of the majority of the sky since the clouds were shown inverted in the pool.
So, next time you are out shooting, take the time to focus on the essence of a particular environment and creatively show that mood through your work. Happy adventures!

