5 Effective Tips for Using Light in Landscape Photography
Stunning landscape photography is about capturing the right light at the right time. However, capturing light in landscape photography can be quite challenging because a landscape photographer has no control over the light. While a bit of research can dramatically improve your chances, you can never know for sure what Mother Nature has in store for you.
To capture the photos that you envision, learn to recognize how light interacts with the environment. Weather, time of day and seasons will all impact how the direction and quality of light you may encounter. While weather in landscape photography is unpredictable, with a bit of research and knowledge, you will be able to improve your chances to be at the right location at the right time in the right light. You can use creativity to select your subject matter, equipment, camera settings, and photography composition to create a stunning image. Here are a few tips to get started…
#1: Shooting Reflected Light At Midday
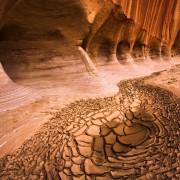
Midday light definitely isn’t ideal for most wide-angle photography. But here’s a situation where bright, harsh light was exactly what we wanted… at least indirectly. In this quick video, Varina shows you the lighting conditions we worked with in Mule Canyon and how reflected light enhanced the colors in the photos we wanted to capture.
In this example, Varina is using the harsh reflected light creatively to come way with a stunning finished image.
#2: Photograph Textures with Side Light
The angle and temperature of light alters the colors and textures of the photo that you are trying to capture. If your goal is to capture textures, your best chance is during the golden hours when the sun is low to the ground.
I took the first shot below (Image #1) of the hot spring in Yellowstone National Park just before the sun rose over the horizon. Without the strong directional sunlight, the foreground textures are less defined which makes the image feel flat and unappealing. In addition, because the water isn’t lit by the warm morning sunlight, it looks dull. Even the steam is bluish-grey without any texture.
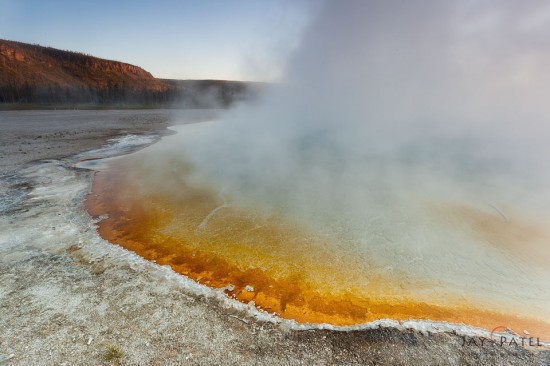
I took the second Yellowstone National Park shot below (Image #2) just as the sun was coming up over the horizon. The soft light is scattered in the water of the hot springs which brings out the warm colors and textures. The golden morning light infused the steam with a warm glow and the side-lighting created well-defined textures in parts of the steam.
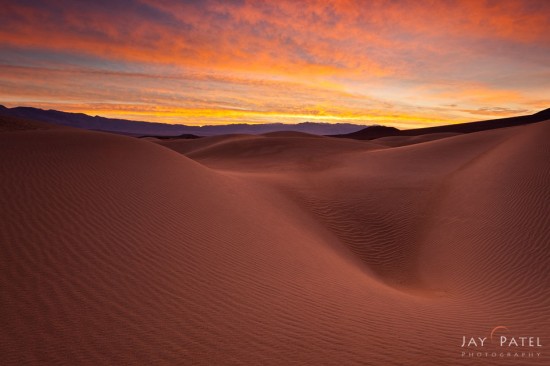
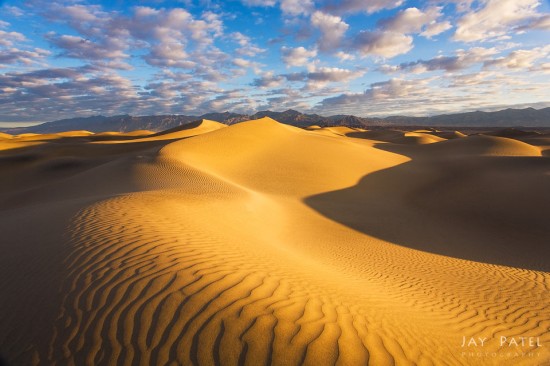
The following images are additional examples of a similar effect from Death Valley National Park.
As you can see from the images above, you can capture warm colors and intense textures just after sunrise during the golden hours. This does not mean that you cannot capture stunning photos during midday or before sunrise but, if you want to capture texture, you’ll have more success when the sun is low in the sky.
#3: Choosing the Right Direction to Photograph
Exposure and light contribute heavily to the colors in an image. Sometimes, the direction of light creates vibrant colors in certain parts of the image. Here is an example from New Zealand where I took advantage of this directional light to come away with a stunning photo with just a single exposure.
In the above example, it is possible for me to take a photo from inside the cave while facing towards the ocean. However, this composition makes getting the proper exposure extremely difficult as the dynamic range of the light exceeds that of my camera. I would have to bracket my camera exposure and then use post processing to combine these bracketed exposures. In other words, shooting towards the ocean involved a far more complicated workflow.
#4: Spot Light Effect for Landscape Photography
Spot light occurs when the sunlight streams through breaks in heavy, overcast skies such as in Image #1 below. For this particular shot, I waited three and half hours for the beam of light to illuminate Yellowstone Falls. The angle of the sun back-lit the mist rising from the bottom of the falls. Because of the tonal difference created by the spot light, I had to under-expose the background to create this stunning photo.
Compare this with the second Yellowstone image. In this image, there is no spotlight effect and the tonal difference between the falls and the background is less dramatic. The overall image appears dull compared to the one with the spotlight effect. I used ND filters and a steady Induro carbon fiber tripod to capture these images.
#5: Photograph Light Beams in Nature
Light beams can create some of the most spectacular photos but catching light beams requires patience, just the right conditions, and sometimes a lot of waiting.
Image #1 below shows light beams in Antelope Canyon. Due to the super-long exposure (sometime as long as 30 seconds), I used my steady Induro carbon fiber tripod. These light beams occur only during the summer months so do your research before heading down.
You can also find light beams in nature when the sunlight streaming through the mist or fog is interrupted by a solid object. In image #2 below, you can see the light beams caused when the Redwood trees interrupted the sunlight. It took multiple trips and just the right conditions to capture these intense beams.
Sometimes you can anticipate the changing light (such as when the sun is about to rise) or when the light beams may occur in Antelope Canyon. But the spotlight effect and the appearance of sunbeams in nature is harder to predict.
In summary, it is true that the light in landscape photography is quite unpredictable. However, this should not stop you. When presented with a difficult situation, you can to use your creativity to select the right equipment, camera settings, photography composition, and the subject to capture breathtaking photos.





 Grant Collier

