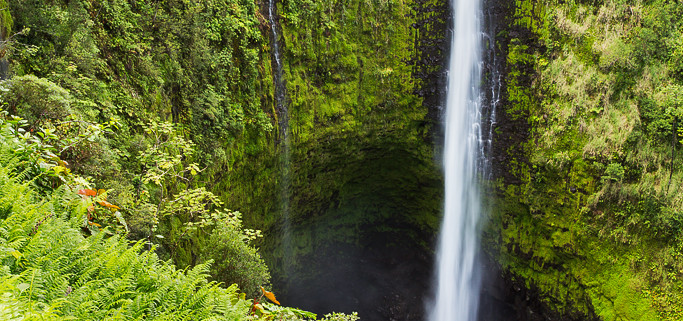
Light and Layers
Akaka falls is located just North of Hilo on the Big Island of Hawai’i. It’s a gorgeous location and well worth the short hike… plus a couple bucks to park and use the trails. When we arrived at the falls, it was bright and sunny. The ferns were brightly lit, but the base of the falls and the left wall of the canyon were in deep shade. But I’d been watching the sky all morning, and I knew that we had enough big clouds in the sky to make the photo work. I set up my camera and tripod (we were testing Induro’s awesome CT113’s that week), and waited until a cloud blocked the direct light from the sun. Then, in that softly filtered light, I took my shot. But I still needed to bracket because the shadows were much deeper down in the valley – and the water was very bright. I took a second shot to expose correctly for the dark shadows, and a third to expose for the bright water.
Once I got home, I opened up my files and got to work. You can see the layers I used in the screen shot above. I stacked my images, and used my Intuos graphics tablet and stylus to draw simple selections. I also made slight curves adjustments to ensure that the layers looked natural together. My goal was to ensure that the scene felt natural, and that details were visible in dark and light areas alike.
A Few Simple Tips:
- Photograph waterfalls on cloudy days, or wait for a cloud to pass over the sun. Soft light is great for waterfall shots.
- Check to make sure you’ve captured the details you want in both the highlights areas and the shadows. You may need to bracket to get all the detail you want.
- Use a tripod when you shoot. Our Induro’s come with us wherever we go. We often use long shutter speeds when we shoot waterfalls. I used a 0.5 second shutter speed to get the soft blur I wanted for the water in this shot.
What other tips can you share for shooting Waterfalls?


