Fallacy of Golden Hours in Landscape Photography
Every landscape photography book I read preached about the merits of shooting at golden hours and avoiding ‘bad’ midday light. So when we are not arguing about the merits of the latest landscape photography gear, we are busy doing research for our next perfect destination. We take time to browse the social media streams of other photographers. We daydream about quitting our day jobs, arriving at our locations, and finding that perfect shot during the golden hours. And why shouldn’t we? Other landscape photographers do it all the time.
I admit… I’m certainly not an exception to this rule especially when I first started with landscape photography. I would drive hours in my car to get to a perfect location during the golden hour. Sometimes this technique worked, but more often it resulted in a great deal of wasted time and cost and very little to show for it. There were even trips that I came away with absolutely nothing – no worthwhile photos at all – because I was looking for that one perfect shot at the golden hour.
After years of photographing landscape all over the world, I’m very happy to announce that I have changed my approach. And the credit for this transformation goes to my wife, Varina Patel. After being married to her for a few years, I couldn’t help but notice that her photography portfolio was far more diverse than mine. I finally took her advice on trying to diversify my own approach to landscape photography.
Here are some important discoveries that arose from this broadened approach.
Landscape Photography at Golden Hours
Of course, we need to talk about landscape photography during the golden hours. Also sometimes referred to as “magic hours”, these golden hours are the small window of time that occurs during that last hour right before sunset and the very first hour following sunrise. These sought-after times of the day can bring dramatic tones and colors to your images.
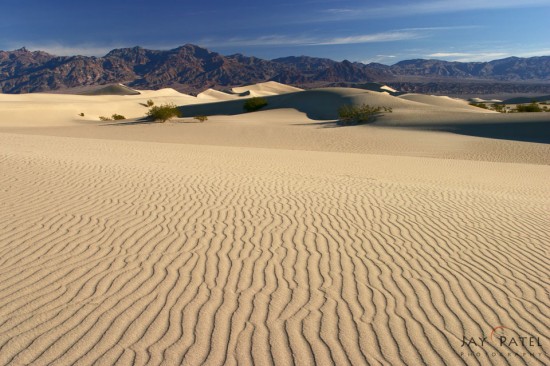
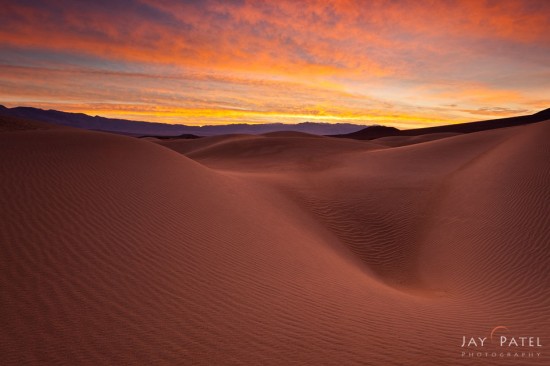
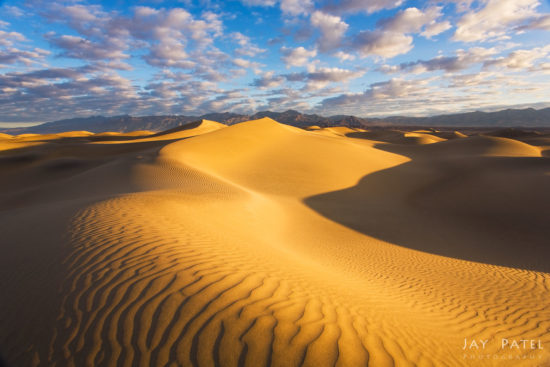
Sunsets and sunrises, especially if clouds are present, can be a great source of this photographic theatre. As an exercise in comparison, check out the following three photos from Death Valley. Two were shot during the coveted golden hours, while one was taken midday. You can likely guess which one is the non-golden hour shot.
The first of the three photos above… yes, that’s the one shot around the middle of the day. The image lacks luster. Simply put, it’s dull.
The very same sand dunes during the golden hours are completely transformed in the other two photographs. The moments before sunrise (with the first of the two golden hour photos) bring the drama… with the light reflecting on the dunes. The effect is other-worldly… almost like we’re on a different planet.
The after-sunrise side lighting in the second golden-hour photo brings texture to the image. It creates more of a three-dimensional effect. Both of these magic hour photographs create an impressive visual impact that is definitely lacking in the midday image.
Looking at the difference between these images, it’s no wonder that shooting during the golden hours is so entrenched in the minds of even seasoned landscape photographers. But… does this mean that you cannot get any good shots during non-golden hour times of the day? I’m here to tell you that you absolutely can. There are many situations, environments, and perspectives outside of these early-morning/late-evening hours that can empower you to create a diverse, jaw-dropping landscape photography portfolio.
Advantages of photographing outside Golden Hours
The decision to diversify my approach to landscape photography opened up a much broader range of opportunities for me – it allowed me to shoot in all kinds of weather and in a variety of lighting conditions. With my shooting time expanded beyond the golden hours, I found myself shooting during midday when the sun was high, during overcast weather, in windy conditions, in rain, and even on cloudless days when most photographers are more likely inside posting old photos on social media.
So, what are some advantages of this photographic shift?
More Licensing Opportunities
After a few months of diversifying my approach to photography, I noticed that my portfolio was full of images that extended far beyond typical golden hour shots. This diversified portfolio attracted bigger and more frequent licensing deals with calendar and publishing companies. I also noticed a slight uptick in our print sales even though we do not market our prints.
Developing Creativity
Another advantage of a diversified approach to photography is that you naturally learn to become creative. For example, if you are shooting on a cloudless day, you may ask yourself how you can come away with awesome photos from that location. This naturally prompts you to look for a broader variety of subject matter and workflows to come up with some creative photos.
Efficient Use of Travel
Ever since I started taking a diversified approach to landscape photography, there has never been a trip where I did not come away with awesome photos to add to my portfolio. They are no longer just golden hour shots. They now include photos of wildlife, macro photos, composites, photos with human elements, and photos that were taken with creative camera settings. The end result is that we no longer worry about “what if the light doesn’t show up?” Instead, we more thoroughly enjoy the experience of simply being at the location.
Now that we’ve recognized some advantages of broadening and diversifying our landscape photography habits, let’s examine a few more ways we can accomplish spectacular images outside of the typical magic or golden hours.
Using Soft Light from Overcast Skies
Soft overcast skies are ideal for photographing grand vista landscapes. The cloudiness functions as a diffuser for the sun allowing an even light to cover your entire scene. Unlike bright sunshine and more defined clouds, overcast skies reduce the dynamic range rather than cause strong highlights and overwhelming shadows
If the sun is not directly overhead, it creates a soft side light. Take a look at the following photo from Iceland as an example. The sun was high up in the sky but off to my left. The soft cloud cover diffused the light and created this charming side-light scene. The effect was an image that appears three dimensional.
This type of light can work with a wide variety of subjects. One of my favorite subjects to shoot during this subdued light is waterfalls. This was the type of soft light that emerged from the heavy overcast skies in the waterfall image below that I shot during a trip to Iceland. The soft even light that overcast skies provide is flattering for many types of landscape subjects. It minimizes the deep shadows, subdues the stark highlights, and is especially flattering for colorful subjects.
Catch Some Light Beams
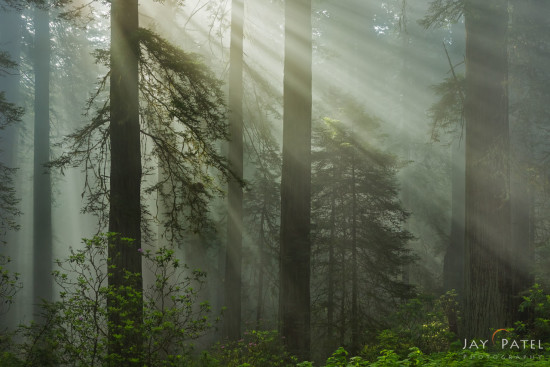
Bright sun, when passing through particles of smoke, sand, water, and other sorts of moisture, can create light beams. Because you need just the right number of particles, light beams are a bit tricky to predict, but the effects can be stunning. One of the best places to capture sunbeams is through the fog in a coastal area. I found just the right environment during a visit to Redwood Forest National Park in California. I waited for the fog to move in. That, combined with the bright sun, created a spectacular show in this lush green forest.
Again, light beams are a bit challenging to predict but, if you can find the right setting and subject matter combination, the effects can be jaw-dropping.
Take Advantage of the ‘Spotlight’ Effect
On a similar track is the advantage (and challenge) of the spotlight effect. Because light is often exceptional before or after big storms (no golden hour required), this is a great time to capture it. To explain the spotlight effect… it’s created when the sun is peaking through a small opening in heavy cloud cover and it highlights or illuminates a small portion of the landscape.

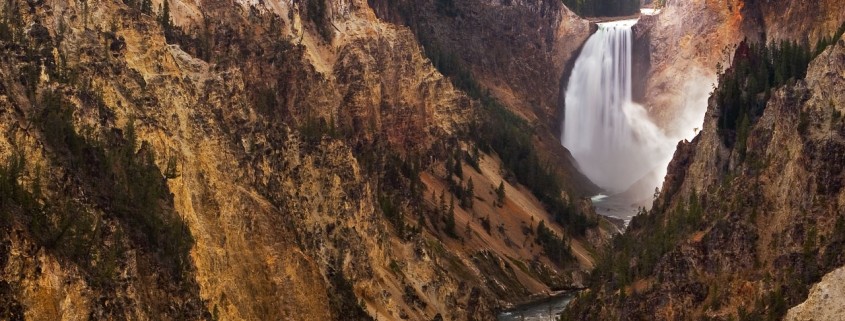
Landscape photography with spotlight effect captured at midday in Yellowstone National Park, Wyoming
Similar to the challenges of capturing light beams, successfully achieving this spotlight effect is often a waiting game. During windy conditions – because the clouds are likely moving – the light beam moves around quickly and often doesn’t fall where you want it to fall. For the image above, I was forced to stood for nearly an 3 hour at the Artist Point in Yellowstone National Park on a cold rainy afternoon until the sun decided to show up and create this stunning spotlighting effect on the waterfall.
Look for Subjects That Work Best with Harsh Light
We’ve spent a significant amount of time talking about landscape photography in subdued light with overcast skies. But I would be remiss if I didn’t at least mention the fact that there are some subjects that works best under harsh light. Tropical water is one such setting. A more powerful direct sunlight can really bring out the colors in the vivid blue tropical waters.
In the photo below which I shot in Fiji, we dropped Varina off on an isolated sand bar and I then took this photo from a helicopter. The sun was directly overhead, and the bright sunlight really brought out the variety of blues in the water.
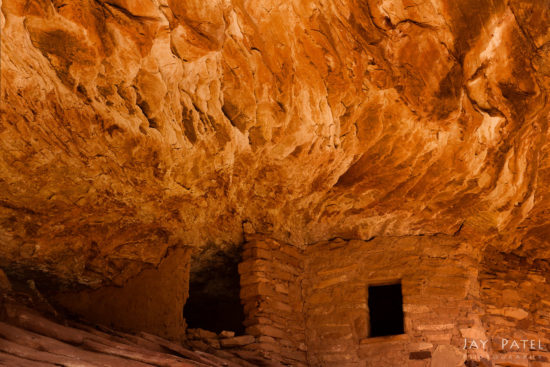
Another place where I like to use harsh light is in the Southwest United States. This type of light, when reflected on brightly colored stone, can create spectacularly vibrant colors in the rock formations. It worked extremely well in the photo below. In this one, the reflected light was fairly even – there are no blinding, blown highlights. You can even see some subtle details in the dark shadows deep inside the canyon and in the cracks in the foreground. Note that a long exposure is necessary for this type of photography. To achieve this, we typically use our carbon fiber tripods for these types of images.
Pursue Macro Photography
So far, we’ve mostly focused on how to use light successfully within or outside of the golden hours. Let’s now look at a different approach to taking quality images during any time of the day. I’m referring to macro photography.
Macro photography subjects are generally quite small, and because of this, light can be controlled in a variety of ways when capturing their images. Whether it be with a small diffuser and reflector (which we always carry with us, folded and neatly stored in our camera bag), a sheet of fabric or plastic, or even your own body, there are a plethora of ways to soften the light when shooting these small subjects.
For the image above, I used camera bags and my jacket to block the sun in every part of the image except for the trillium flower. There’s no end to the types of photographs like this that you can capture at any time of the day.
These days, my portfolio consists of a diverse set of images and almost all of my trips are highly productive. This is primarily due to the fact that I’ve changed, opened up, expanded my landscape photography approach.
So, the next time you are on location waiting for that perfect light… wondering if it’ll show up when you need it… don’t stress. Instead, consider diversifying your approach to landscape photography. Step outside of the traditional golden hours and see where it leads you. Who knows? You may come away with something spectacular and quite unexpected.

