
Astro Photography: How to Photograph the Solar Eclipse
On August 21, 2017, millions of people watched journey to a narrow strip of land across the U.S. to view the first total solar eclipse over the U.S. mainland since 1979. Many of these people will bring their cameras, hoping to capture images of this astounding event. Since capturing these images is quite challenging, I’ve provided answers to common questions below.
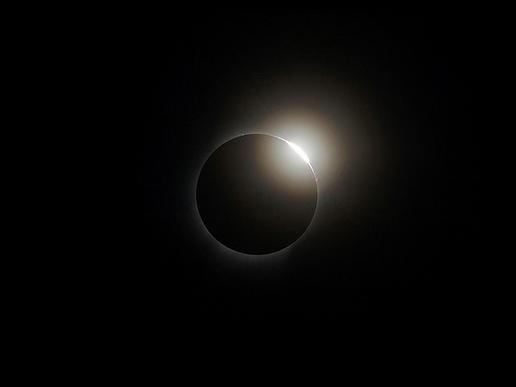
The “diamond ring” is visible, as the moon almost completely blocks the sun in 2008. Credit: NASA / Exploratorium (public domain image)
Q: What equipment should I bring?
If possible, you’ll want to bring a tripod and a digital SLR camera with a long telephoto lens of at least 300mm. Experienced photographers can also use a star tracker, which moves your camera along with objects in the sky. This will allow you to take exposures up to about 10 seconds to capture more detail on the moon’s surface. However, a star tracker is not necessary to capture great images of the eclipse.
If you own a point-and-shoot camera or a camera phone, you can use it to capture a few quick snapshots of the eclipse using your camera’s automatic settings. Since it will be difficult to capture great shots of the eclipse with such a camera, you might be better off shooting the spectacle of all the people watching and shooting the eclipse. During totality, I’d recommend spending most of your time simply viewing the eclipse, as your camera won’t come close to capturing the amazing sight that you will see with your own eyes.
Regardless of the camera you use, make sure your flash is turned off. It will in no way help your images, and it will disrupt the viewing experience of those around you. If you’re not certain how to turn your flash off, you can simply place black electrical tape over the flash.

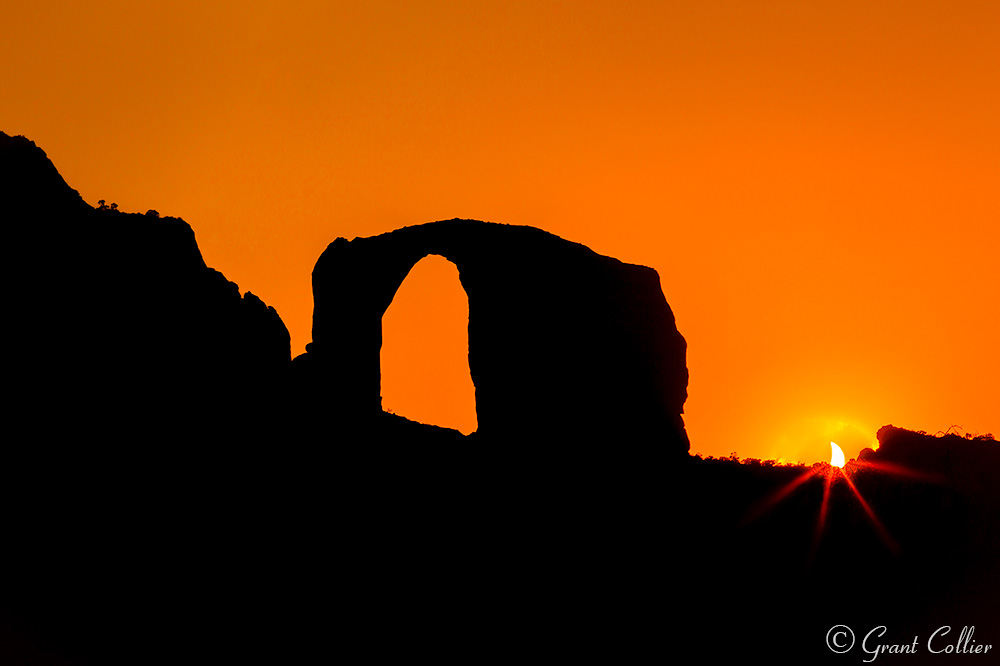
An annular solar eclipse is seen near a large natural arch on May 20, 2012.
Q: What camera settings should I use on my digital SLR camera?
First, make sure your focus is set at infinity. You can do this by auto-focusing on the moon on a night prior to the eclipse, then taping your focus ring in place, and changing the lens to manual focus. If you have a solar filter for your camera, you can focus on the sun before the total eclipse begins. Make sure to remove the solar filter before shooting the total eclipse.
You should set your camera to manual exposure mode. I recommend using the widest aperture on your camera (like f5.6), ISO 100, and taking many, bracketed exposures at shutter speeds from about 1/4000 sec to ½ second (or a little longer if you have a star tracker). This will allow you to capture the enormous range of brightness in the sun’s atmosphere. You can later pick out your favorite exposure or blend all of the images into a high-dynamic range (HDR) image, using a software program like Adobe Lightroom or Photomatix.

Total solar eclipse over Baja California in 1991. Credit: NASA, Steve Albers, Boulder, CO; Dennis DiCicco, Sky and Telescope; Gary Emerson, E. E. Barnard Observatory (public domain image)
Q: Do I need any special filters?
A: You won’t need any special filters on your camera during the total solar eclipse and should make sure all filters are off. However, if you want to capture the partial eclipse before and after the total eclipse, you will need a solar filter. The sun will simply be too bright to capture good images without one, and it could even damage your camera.
You should also use solar glasses whenever viewing the partial solar eclipse. You should take the glasses off during the total eclipse.
Q: Is it possible to include the land in an image with the eclipse?
The sun will be high in the sky throughout the eclipse, so it will be difficult to include the land in your shots. The sun will be a little lower if you are near the West Coast of the United States. You can use software programs like Google Earth, The Photographer’s Ephemeris, and Stellarium to plan for the eclipse to be over a tall natural or man-made feature. Two possible locations I found are Mount Jefferson in Oregon and McGown Peak from Stanley Lake in Idaho.
Since the sun will be so high, you will need to use a very wide angle lens and possibly stitch multiple images together if you want to include the land in your image. If you do this, the sun will be rendered very small in the shot (though the corona will stretch out quite a ways from the sun if you can get a good exposure of it).
To get the best results, you should combine an exposure (or multiple exposures) of the eclipse with an exposure of the rest of the scene. If possible, I recommend doing this with two cameras set up on two tripods. With one, you can use a long telephoto lens to capture a good, close-up view of the eclipse. With the other, you can use a very wide angle lens to capture the scenery.
You can later downsize the close-up shot of the eclipse and blend it into the image captured with the wide angle lens. This is obviously quite challenging and very difficult to do in the short time you have to photograph the eclipse. I therefore only recommend it for photographers who have shot other eclipses or taken a lot of images at night.
A partial solar eclipse sets over the horizon in Arizona.
Q: What other creative options do I have for photographing the eclipse?
If you have a solar filter for you camera, you can take images of the various stages of the partial eclipse, and then create a composite image showing all of these stages, along with the total eclipse in the center.
You could also create a time lapse video by taking an image every 30 seconds or so during both the partial eclipse and every second or so during the total eclipse. Then create the video by playing all of the images you took at 10-30 frames per second.
If you attempt either a composite or a time lapse, be sure to take your solar filter off during totality and put it back on when totality ends.
Find more information on the eclipse, including where to view it at: eclipse2017.org
About Author Grant
Grant Collier has been working as a professional photographer since 1996 and has been shooting photos at night since 2003. He is the author of 12 books and has recently released a book called Collier’s Guide to Night Photography in the Great Outdoors. He has also produced a new instructional video called Collier’s Guide to Post-Processing Night Photos.

