4 Tips For Shooting Low to the Ground
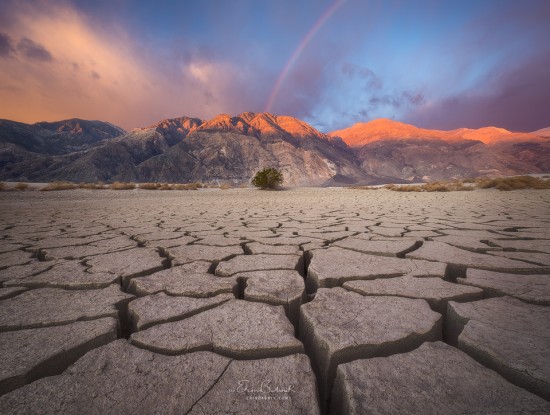
Choosing a low vantage point can create a very immersive viewing experience. It can provide a sense of what is underfoot at a location in addition to whatever features appear in the distance. Although it can be a very effective choice for communicating what is special about a location, shooting close to the ground presents some significant compositional and technical challenges. The following tips can help ensure more successful results when pursuing photographs of this sort.
Tip 1: Find a foreground that offers plenty of visual interest.
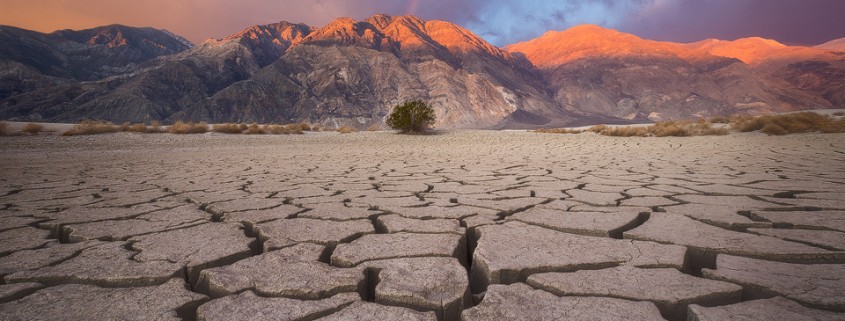
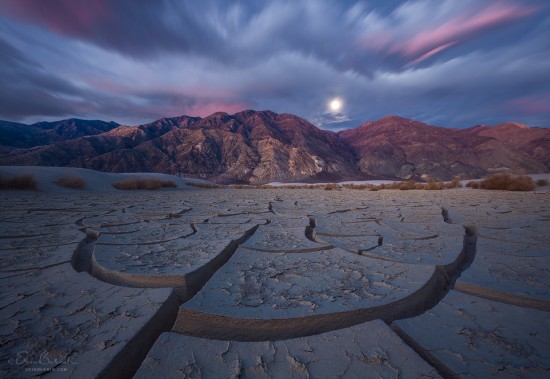
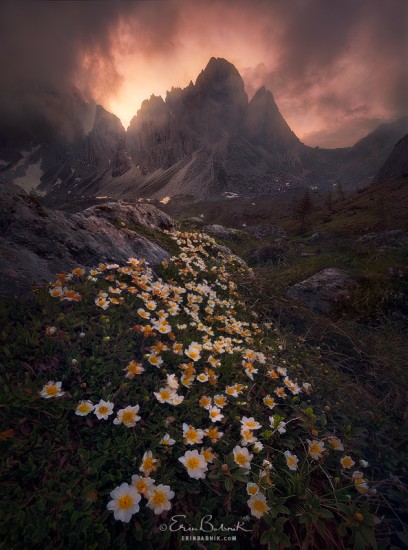
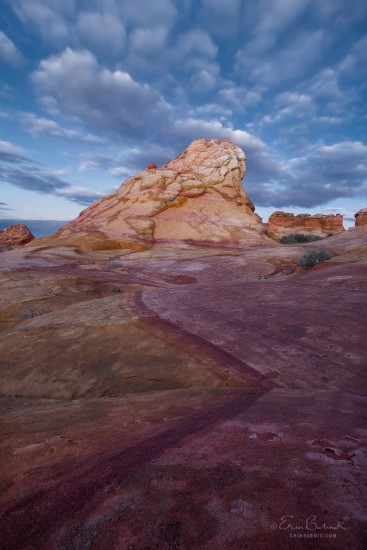
A low vantage point brings the foreground close and thereby gives it prominence within a composition. Without interesting features and details in the foreground, the choice to emphasize it will seem arbitrary, making the resulting composition less compelling. If an unremarkable foreground takes up a lot of space in the frame, the important parts of a scene are likely to seem too far away, giving viewers the urge to be somewhere other than where the photograph has ‘put’ them. Therefore, it’s best to shoot low to the ground only when the foreground warrants the emphasis.
Tip 2: Balance the foreground with the background.
Another tendency of a low vantage point is a diminution of the background. By giving more space in the image to the foreground, the low view may shortchange what lies beyond unless care is taken to provide good front-to-back balance. It’s important to ensure that the background is large enough in the frame to ‘read’ well and that its features are positioned such that they have adequate presence. For example, be sure to leave enough space at the top of the frame to contain background features so that they won’t appear marginalized or crowded against the top edge.
Tip 3: Ensure that there is a good transition from the foreground to the background.
In order for the eye to move beyond a prominent foreground, it needs some extra encouragement. A foreground that reads as a large cul-de-sac or barrier tends to trap eye movement up front and therefore breaks up an image, making it look like two separate images instead of a single integrated, continuous space. Therefore, it helps to have features, tones, and/or colors that connect areas of the foreground with the rest of the image, guiding the eye deeper into the scene so that it easily reaches the background. Remember… the middle ground of an image is an important transitional area; be careful not to squeeze it out by placing your camera so low that the middle ground loses its visual force.
Tip 4: Use a small aperture or focus stacking for greater depth of field.
Placing a camera close to the ground frames areas both near and far, a situation that requires special care in order for everything to be in focus. While some landscape photographs can be very compelling with a shallow depth of field, most benefit from focus that allows all areas of interest to read clearly. Out-of-focus areas are distracting unless the choice of them seems deliberate and the amount of blur is emphatic enough to be obvious. One solution to ensure adequate depth of field is to use a small aperture and careful focus placement to maximize depth of field. Very small apertures, such as f/22, do introduce some softness due to the effects of diffraction, but slight softness is preferable to having areas that seem to be unintentionally out of focus. Another solution is to use the technique of focus stacking, which allows the use of wider apertures. Focus stacking has the potential to produce sharper results, but it is an advanced technique that requires more effort both while shooting and in the processing of an image.
In the right situations, shooting low to the ground can emphasize interesting qualities of a location that might otherwise get lost in an image. These four tips can help you to make the most of those situations. If you have any tips of your own or questions about these four, please feel free to leave them in the comments below.



Hola Erin! I am glad to see that you joined this group of very talented artists. The group is stronger now. Thanks a lot for sharing these tips. They do confirmed what other photographers have stated previously. I hope to see more of your artistic work as well as your teaching contributions. Muchas gracias, Arturo
Thanks for the kind comment, Arturo!
Thanks a lot Erin for these beautiful shots and the techniques behind!
Hi Sébastien. Thanks for taking the time to say that!
Thanks for sharing a Wonderful Article to read and understand specially when someone like me was struggling with Foreground..
Thanks for the feedback, Minhaj. I’m glad that you found the article useful!