6 Creative Nature Photography Tips to Capture Striking Photos
Do you want to capture creative nature photography? Not the kind of nature photography you’ve seen hundreds of times. But original, striking, breathtaking nature photos?
Here’s the thing: Capturing original nature photos might seem like a struggle. But there are actually a few simple ways that you can start doing creative nature photography–right now!
In this article, you’ll discover 6 ways that you can consistently capture creative nature photos. Let’s get started.
1. Use a Black Background for Photos That Pop
If you want to capture stunning macro photos…why not start by using a black background?
You see, one of the main reasons why nature photos fail is because they have messy backgrounds. But if you make sure to include a black background, you’ll avoid this problem–while making your subject really pop off the screen. Black macro photography backgrounds are especially great for brightly colored subjects. Bonus points if your subject is white!
Now, there are a few ways that you can create black backgrounds. Here is how you do it indoors:
- First, you can bring some dark-colored fabric (or a dark-colored board) into the field. This works well when you’re photographing smaller subjects, such as flowers and other plants.
- Once you’ve found a good subject, place the background behind it. If you can, position the background in the shade (while leaving your subject in the sun).
- You may want to underexpose your subject slightly–and then bring the tones of your subject up during post-processing and bring down the blacks during post processing. Why? You need to ensure your background is totally black. You don’t want any detail peeking through. This will ruin the whole photo!
The second way to create a black background requires some careful work in the field. You have to find a subject that’s sitting bright light–and is in front of a dark-colored background (one that’s in the shade). Then, if you underexpose your subject, the background will be rendered nearly black. You can take it the rest of the way in post-processing–and you can lighten up your main subject just a touch.
2. Use Intentional Camera Movement for Lovely Abstract Images
Here’s one of my favorite techniques for creative nature photography: Use intentional camera movement.
Let me explain:
Intentional camera movement (ICM) requires a long shutter speed–and involves moving your camera when you take a photo. When done carefully, ICM results in a subtle, pleasing blur. And it’s a fantastic technique for getting truly unique images.
But how do you do intentional camera movement the right way?
- Find your subject. I recommend using something with bright colors–a tree in autumn, or a spring flower.
The best ICM subjects also tend to have lines. Stems and tree trunks work great for this. - Dial your shutter speed down low. The precise value depends on your subject, but I recommend trying speeds in the 1/2 to 1/25th window.
- Compose your photo as you normally would. And make sure you create a composition that has impact.
- Hit the shutter button….and as soon as you hit the shutter button, pan your camera.
Now, I recommend that you take lots of pictures and pan your camera in multiple directions. Repeatedly check the results on your LCD–and make adjustments accordingly. However, as a starting point, you should pan your camera along the lines of your subject. So if your subject is a stand of trees, pan your camera down (parallel to the tree trunks). If your subject is a flower, move your camera down the stem.
The best intentional camera movement photos tend to strike a balance. They offer some abstract blur. But they also show some definable features. Bottom line? Whenever you get the chance to shoot ICM photos, go for it. It may require a bit of patience, but the results will be worth it.
3. Use Freelensing for Artistic Nature Photography
Freelensing is one of the most valuable tools in a nature photographer’s toolbox. Why? Because you can capture stunning images–that are far different than standard DSLR or Mirrorless photos. You see, freelensing allows you to change the plane of focus of your photography. It results in certain parts of the photo being blown out of focus. And that’s how you can capture truly artistic photos.
But how do you do freelensing? Fortunately, freelensing doesn’t require any extra equipment. But I highly recommend you use a backup camera and lens (50mm works well). This is because freelensing exposes your sensor to the outside world.
Here’s what you do:
- Set your lens’s focus to infinity.
- Then turn off your camera. Detach the lens–and hold it carefully, so that it’s sitting on the camera, without actually being attached.
- Turn your camera back on, and start taking photos.
Couple of things to note:
- You shouldn’t focus via the lens’s focusing ring. Instead, you focus by tilting the lens in different directions. This will cause the plane of focus to change–and hence move your subject in and out of focus.
- Also, the farther you pull the lens away from the camera, the more magnified the image will be. At the same time, pulling the lens away will increase ‘light leaks’–the artistic white streaks you get at the corners of freelensed photos. So for more artistic photos, pull away the lens a bit more and allow in some light leaks.
Now, when it comes to doing freelensed nature photography, I recommend you find a clear subject. Get close to that subject–and then experiment with different planes of focus. I’d also recommend choosing your background carefully. If you find a colorful background, freelensing will create some really interesting bokeh.
Just make sure you play around with this setup, and you’re guaranteed to get some unique nature photos.
4. Capture Reflections for Stunning Nature Photos
This tip is basic, but it bears keeping in mind. Another way to capture gorgeous nature photos? Use reflections.
I recommend you seek out reflective surfaces–such as lakes and puddles of water. But make sure the water is deep enough that no ground is poking through.
Some more advice: To get the best reflections, you have to shoot your subject at a downward angle. If you get too parallel to the water, the reflection will be lost.
I’m a big fan of these in bird photography. If you can capture a beautiful bird plus a reflection, you’ll get a truly stunning image. I suggest you put the surface of the water (that is, the line of symmetry) in the middle of the frame. This will emphasize both the subject and the reflection. But you should also experiment with other compositions. Try putting the line of symmetry along one of the rule of thirds gridlines, and see what happens!
Now, you can capture reflections in two ways:
- First, You can capture photos that include both the subject and the reflection.
- The second way to capture reflection photos is to only include the reflection–and cut out the subject completely. Then, if your subject is upside-down, you flip it in post-processing. Now, this can make for a disorienting photo. But when done well, it can look incredibly beautiful.
I suggest that you try to keep the photo as simple as possible, because you don’t want to confuse the viewer. If you can pull that off, then your reflection photos will be beautiful.
5. Shoot Through an Object for Gorgeous Nature Photography
If you’re still struggling to find creative compositions, don’t worry. Because I have another trick for you: Shoot through an object.
Let me explain:
- Find your subject. Compose the shot with your subject in mind. And then…
- Put something between you and your subject. Something that’s not too dense. Ideally, something that’s colorful. And put it close to your lens. Use a wide aperture–in the f/2.8 to f/5.6 range.
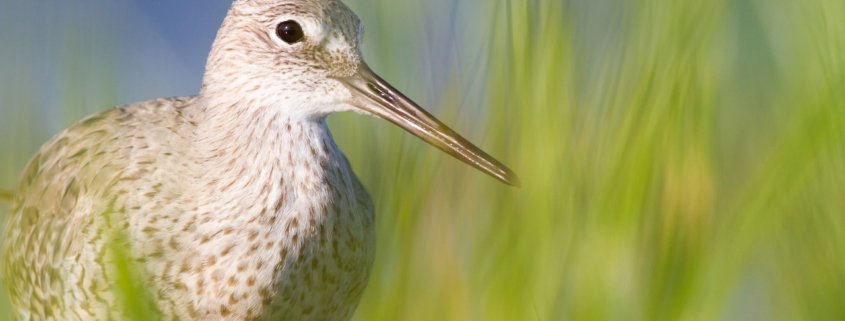
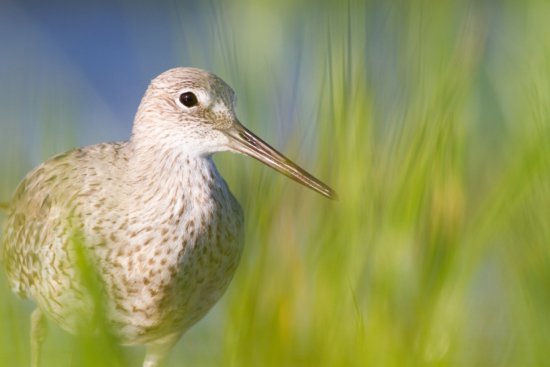
Because here’s the idea: If you put an object between your camera and your subject, but you focus on the subject…you’ll get a beautiful wash of color in the foreground. And this will really add to the photo. It will enhance the subject–and it won’t take away from the overall image. Generally, vegetation is the best thing to shoot through. Plus, you can find it almost anywhere.
When I’m shooting flowers, I love to shoot through the petals of nearby flowers. When I’m shooting birds, I like to get down low in the grass. That way, I can photograph through the vegetation and get a beautiful wash of green. That’s why I love this technique. It captures unique, gorgeous photos.
6. Use An ‘Echoed’ Subject for Stunning Nature Photos
Here’s a final tip for original nature photography. If you want truly stunning images, try including an ‘echoed’ subject in the background.
What do I mean by this?
Once you’ve chosen your subject, look for a second, identical subject in the background. And make sure that the second subject appears–but out of focus. This works best in flower photography, where you have a lot of control over your subjects. It creates a balanced composition, one with lots of gorgeous color.
Now, I recommend you use a very wide aperture, so as to blow the background out of focus.
I also recommend you avoiding including too many ‘echoed’ subjects in the background. Two works great. Three might still be okay. But lots of subjects will just cause chaos. And your photos won’t work.
Just remember: Find a subject, and include something similar in the background. You’ll love the resulting photos.
Creative Nature Photography: The Next Steps
Now you know how to capture creative, unique nature photos.
You’ve discovered the secrets to tricks such as freelensing, intentional camera movement, and ‘shooting through.’ You also know how to create gorgeous backgrounds. Now it’s your turn–to get out and shoot! If you use these tips and tricks, I guarantee your photos will be amazing.
Have any more tips, tricks, or secrets for creative nature photography? Share them in the comments!


