Beginner’s Guide to Slow Shutter Speed Photography
When I first started learning photography, the sheer number of settings and technical concepts felt overwhelming. Once I finally understood the relationship among aperture, shutter speed, and ISO, I couldn’t wait to get out and start taking photos. One of the most exciting creative techniques I discovered early on was slow shutter speed photography, also known as long exposure photography.
This technique doesn’t require a huge investment in gear, but it does unlock a world of creative expression. By slowing down your shutter speed, you can transform ordinary scenes into extraordinary works of art—directly in-camera, with minimal post-processing required. For beginners, long exposure photography is an ideal stepping stone into creative techniques, allowing you to explore how your camera can capture time and movement in ways your eyes alone cannot.
In this guide, I’ll share essential tips to get you started with slow shutter speed landscape photography, the gear you’ll need, the best conditions to shoot in, and common mistakes to avoid.
What Is Slow Shutter Speed Photography?
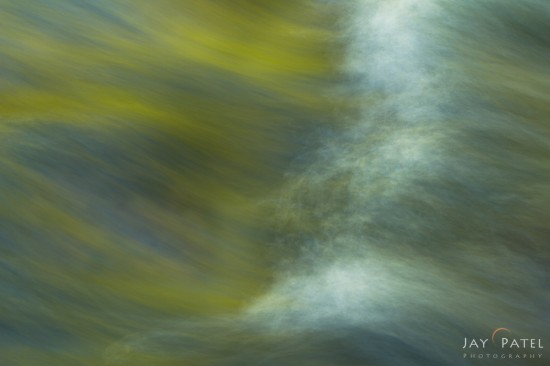
A slow shutter speed simply means that your camera’s shutter stays open longer, allowing more light to hit the sensor. This creates motion blur in moving elements like water, clouds, or leaves while keeping static subjects sharp. Depending on the effect you want, a “slow” shutter speed might mean anywhere from 1/4 of a second to several minutes.
This technique is often used in landscape photography to:
- Soften waterfalls and streams into silky, flowing textures
- Smooth out waves in seascapes, creating a glass-like water surface
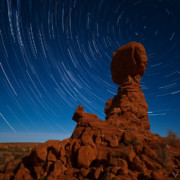
- Capture dramatic cloud streaks across the sky
- Add a dreamy, surreal effect to otherwise ordinary scenes
Essential Photography Gear
Since long exposure landscape photography involves keeping the shutter open for longer periods of time, avoiding camera shake is crucial. Here’s the essential beginner-friendly gear you’ll need:
- Tripod – A sturdy tripod is non-negotiable. Even the steadiest hands can’t hold a camera completely still for multi-second exposures.
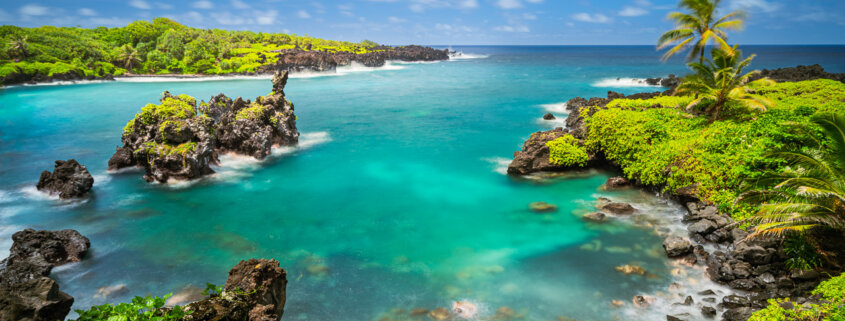
- Neutral Density (ND) Filter – This reduces the amount of light entering your lens, allowing you to use longer shutter speeds even in bright daylight. A good starting point is a 4-Stop to 6-stop ND filter, which offers enough flexibility for experimenting with creative effects like flowing waterfalls and streaking clouds. Once you’re comfortable, you can explore stronger filters such as 10-stop ND filters for ultra-long exposures. For example, when photographing a Hawaii seascape at midday with an ND filter, you can smooth the crashing waves into soft streaks while keeping the volcanic coastline sharp.
- Remote Shutter Release or Self-Timer – Pressing your camera’s shutter button directly can cause tiny vibrations, resulting in blurry photos. A remote shutter release (wired or wireless) eliminates that risk. Alternatively, you can set a 2-second self-timer on your camera.
Optional gear for slow shutter speed photography:
- Graduated ND filters for balancing exposure in skies and landscapes
- Lens hood to reduce light leaks during long exposures
- Camera bag with weight hook to stabilize your tripod in windy conditions
Movement is the Key
The secret to successful long exposure landscape photography is movement. If nothing in your frame is moving, your photo won’t look much different than a normal snapshot. Here are the best conditions and subjects for slow shutter speed photos:
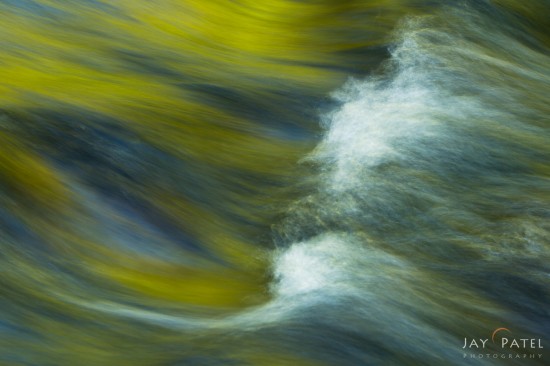
- Waterfalls and Streams – Slow shutter speeds turn rushing water into smooth, silky flows. For example, a Hawaii waterfall photographed with a slow shutter speed transforms into soft, flowing lines of white water framed by lush green tropical forest.
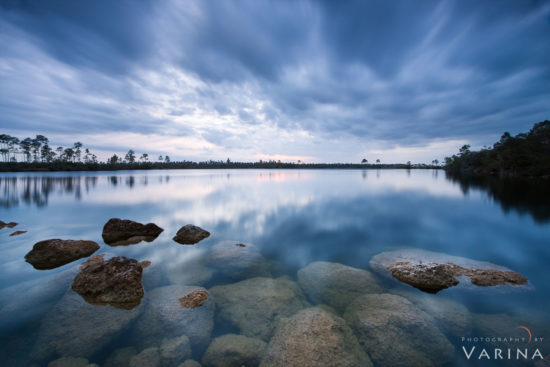
- Oceans and Lakes – Long exposures can “iron out” ripples, making the water look glassy and reflective. A great example is photographing the Everglades lakes in Florida, where the still, glass-like surface contrasts beautifully against sharp, jagged shoreline rocks.
- Clouds – On windy days, streaking clouds add drama and mood to your landscapes.
- Forests and Fields – Breezy conditions make grasses, flowers, and leaves sway, creating painterly effects. You can enhance mood by creating a dreamy effect with foreground flowers moving in the wind while keeping the background sharp.
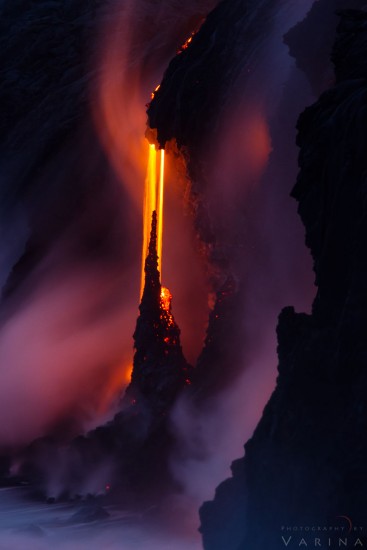
- Unique Natural Phenomena – Slow shutter speeds aren’t just for water and skies. They’re powerful for rare landscapes too, such as capturing lava flow streaks in Hawaii—turning molten rock into glowing rivers of light.
Pro Tip: Beginners often overlook light direction and contrast. Strong side lighting at sunrise or sunset can add drama, especially when combined with the dreamy motion blur of water or clouds.
Camera Settings for Slow Shutter Speed Photography
When learning slow shutter speed techniques, start with your camera in shutter priority (Tv or S) mode. This allows you to set the shutter speed while the camera adjusts aperture and ISO.
- Shutter Speed: Start experimenting around 1/2 second for waterfalls and streams. For cloud movement, try 10–30 seconds, or even several minutes if you’re using a strong ND filter.
- Aperture: Typically f/8 to f/16 works well, giving you a large depth of field for landscapes.
- ISO: Keep ISO as low as possible (ISO 100 or 200) to reduce noise in long exposures.
- White Balance: Shoot in RAW to fine-tune color later, but cloudy or daylight settings often produce natural tones.
As you gain experience, switch to manual mode for full control over exposure settings.
Experiment with different Shutter Speed
The best way to learn long exposure photography for beginners is by experimenting. Start during blue hour (just before sunrise or after sunset) when light levels are naturally lower. Try photographing the same scene at different shutter speeds to compare the effects.
For example, a 1/2 second exposure of a running stream might retain excellent details and colors in the water, while a 2.5 second exposure turns it into smooth low contrast photo. Both are valid artistic choices—it all depends on the story you want to tell.
Also, don’t be afraid to make mistakes. Overexposed skies, underexposed shadows, or blurry elements are all part of the learning process.
Common Mistakes to Avoid in Slow Shutter Speed Photography
Beginners often run into avoidable issues when first experimenting with long exposures. Here are the most common mistakes—and how to fix them:
- Camera Shake – Even on a tripod, a gust of wind can ruin your photo. Use a remote release or self-timer and hang weight from your tripod for stability.
- Overexposed Images – Slow shutter speeds in bright daylight can blow out highlights. Always use an ND filter, or shoot during low-light times of day.
- Light Leaks – With mirrored cameras, light can sneak in through the viewfinder during long exposures. Cover it with the built-in eyepiece shutter or a small piece of tape.
- Color Casts from Cheap Filters – Some low-quality ND filters introduce unwanted tints. Invest in a reputable brand to avoid extra editing work.
- Ignoring Composition – It’s easy to get caught up in the “wow” factor of silky water or streaking clouds. But strong compositions—leading lines, foreground interest, balance—are what make long exposure photos truly impactful.
- Not Checking the Histogram – Don’t trust your camera’s screen alone. Review your histogram to avoid clipped highlights or crushed shadows.
Final Thoughts
For beginners, slow shutter speed landscape photography is one of the most rewarding techniques to explore. With a little gear, some patience, and a willingness to experiment, you can capture dreamlike, artistic images that stand out from standard snapshots.
The best results often come when you combine movement + light + strong composition. And remember:
- Movement is essential.
- Good light makes all the difference.
- Stability and proper gear will save you frustration.
- Mistakes are part of learning—embrace them.
So grab your tripod, ND filter, and camera, and head out during sunrise, sunset, or blue hour. Try smoothing out a waterfall in Hawaii, capturing dreamy flowers swaying in the wind, or photographing glassy lakes in the Florida Everglades. Over time, you’ll develop not only technical skill but also an artistic vision for how to use time as a creative element in your photography.

