3 Steps for Getting Started in Landscape Photography
Falling into the category of beginner landscape photography is an exciting and even daunting period for every photographer. So it is no wonder that one of the questions we get asked most frequently by beginners is: How do I get started in Landscape Photography?
That’s a somewhat broad question, but today, I’m going to take a stab at answering it. There are three simple steps to help you get started in Landscape Photography:
- Get the right photography equipment
- Learn to shoot
- Master post-processing
This article gives an overview of each of these steps…
If you’re looking for a complete step-by-step roadmap, this article is part of a broader beginner resource. You may also find it helpful to explore our comprehensive Nature Photography for Beginners Guide, which gives step-by-step guidance into camera settings, composition fundamentals, and post processing techniques.
Step #1: Get the Right Photography Equipment
First – and obviously – you need a camera with which to take a picture.
What kind of camera do I need?
Before you go out and spend tons of money on photography equipment, ask yourself what kind of landscape photographer you are. Are you just a beginner hoping to take some good photos on your next vacation? Or are you looking to pursue landscape photography as a serious hobby?
If you are just looking to take some good landscape photos on your next vacation, an inexpensive consumer-grade mirroless or a DSLR or a small point-n-shoot camera is just fine. If the conditions are right and you know what you’re doing, you can even take pretty decent landscape photos with a smart phone camera.
On the other hand, if you are going to get up at ungodly hours, put up with nasty weather, drive long distances, fight grizzly bears, and rescue the princess just to get the next great landscape photo… you’ll probably want a DSLR (Digital Single Lens Reflex) or Mirrorless camera.
Choose a company you feel you can trust and look for positive reviews online. If you want something a little better than the a consumer-level camera, you can consider investing in a mid-level DSLR or mirrorless camera. These cameras are a bit more rugged than your average consumer-level camera and fare better in harsh outdoor weather.
What camera lenses should I purchase?
You can spend more money on fancy lenses than on your camera body. However, for beginner landscape photography, we recommend purchasing a normal zoom lens. A focal range of about 24mm – 70mm on a full frame camera should work well for you. If you have a 1.5 or 1.6 crop factor camera (if you don’t know what that means, just check the camera specs or ask the seller) a 17mm – 40mm lens covers that range. A camera lens that covers a wider range works just fine, too.
A basic zoom lens has some limitations. You want something longer and faster for wildlife photography or something with close-focus capabilities for macro photography. A zoom lens allows you to explore concepts like depth of field and hyper focal distance – while getting some really nice shots. It works well for landscape photography and as a general purpose lens.
What other photography equipment do I need?
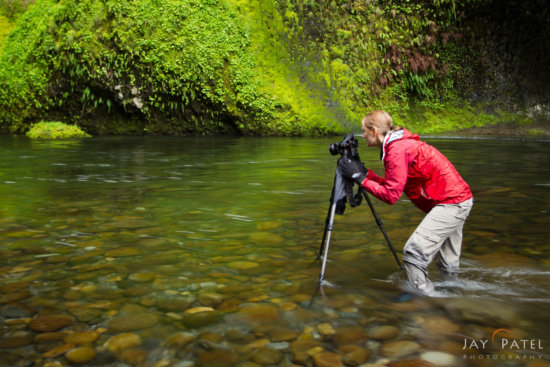
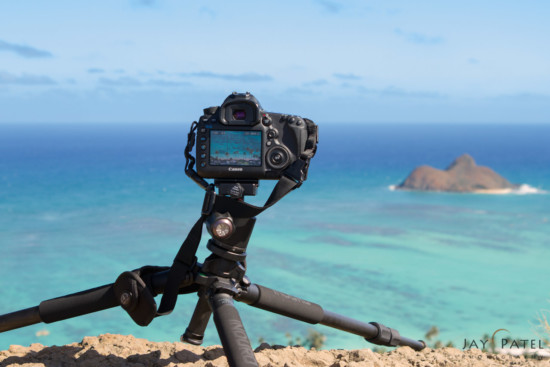
For landscape photography, you also need a tripod and a ball head. Light conditions vary dramatically throughout the day. And, if you are shooting early in the morning or late in the evening, low-light conditions make it necessary to keep your camera steady for long shutter speeds.
Because you will be photographing the great outdoors (of course), we recommend you get a metal or carbon fiber tripod whose legs move independently of one another. These tripods are more rugged and hold the camera more securely than a plastic tripods. A ball-head with a quick-release latch allows you to easily take your camera off your tripod to make adjustments or to preview an image.
What about all those fancy photography filters and other stuff?
It’s true that we do carry a few filters (GND, ND, circular polarizer), a remote release, a back-up camera, and a variety of special camera lenses (macro, telephoto, etc.), but you don’t need them to get started in landscape photography. The more equipment you start with, the more confusing it iscto decide which pieces to use when you are shooting.
Having just one camera and one lens allows you to concentrate on understanding how to use your new equipment effectively.
Now that you have your brand new camera, lens, and tripod, you are ready to conquer the world of landscape photography. So, how do you go about taking a good photo? It’s time to learn how to use your landscape photography equipment.
Step #2: Learn to use your Photography Equipment
You can learn to use your camera with the help of the Internet or by taking classes at a local photography club. Most photography classes start with a focus on composition, but we prefer to start out by teaching exposure.
Learn about camera exposure
If you are not familiar with ISO, aperture, and shutter speed, that’s where you should start. Get a book at the library (if books are too old-fashioned for you, there are plenty of eBooks that provide the information you need) – or check out basic photography classes at your local camera club.
I always encourage beginners landscape photographers to set their camera to manual mode and work to understand how ISO, aperture, and shutter speed work together. I also advise students to learn to use the histogram to determine the proper camera exposure for landscape photography. Technical skills take patience and practice – but once you understand them, they help you take great photos no matter the conditions. Learning camera exposure also teaches you to recognize light conditions that are suitable for taking a good photograph.
Get familiar with focus settings
Start by understanding the focusing settings and focus modes that are available on your camera. Your manual provides some basic information, but an internet search probably offers far more useful information. Find out how to adjust your focus point and how to use the Liveview focusing option if you have it, learn about different focus modes on your camera, and more.
Besides focus setting, there are lots of variables that can effect focus in your images… from using a tripod, to understanding aperture and depth of field and more. Take the time you need to practice different focusing techniques. You need these skills to get sharp landscape photos.
Learn about nature photography composition
Camera exposure and getting sharp focus are a technical skill grounded in math. Once you understand it, you’ll be able to use the principals for every image you create. Photography composition, on the other hand, is an artistic skill that has almost limitless potential… and it’s something you never stop learning.
Some beginner landscape photographers find artistic skills even more difficult to master than technical skills. Even those who are intuitively “artistic” find that their vision and understanding evolve over time. Do keep in mind that the “rules” of composition are not set in stone. Once you understand why they are useful, you can break them as often as you like. Remember – you are the artist. So, you make the rules.
Once you can control your camera exposure, understand how focus setting works, and you know a bit about photography composition, you are ready to try your hand at landscape photography. However, I highly recommend spending time with your photography equipment before you go on a workshop or head for a faraway, exotic location.
The next step for beginner landscape photography is to master post-processing.
Step #3: Get Started with Post Processing for Nature Photography
Beginner landscape photographer should start by learning the differences between RAW, JPEG, and TIFF images. If you are not familiar with the world of post-processing, I would suggest you do some research and find out what options are available to you before you decide to spend time and money learning about processing tools.
Start with RAW Format processing
The first step in trying to learn processing is converting your RAW images to TIFF or JPEG. Most SLR cameras come with a RAW converter that you can use for conversion. In addition, there are lots of third-party RAW converters on the market. In many cases, they give you more options for converting a RAW landscape photo. Find out about your options and decide which RAW converter you want to use.
Once you select a RAW converter, try to analyze your image and decide what adjustments are necessary. Doing so helps you streamline your processing workflow. We use the histogram and our own memory of the scene to guide our adjustments.
Learn to make local adjustments in Photoshop and Lightroom
The next step in beginner landscape photography is to be able to focus your adjustments to specific parts of the photo – rather than applying them indiscriminately. I’d suggest waiting to take this step until you are very comfortable with using the RAW converter.
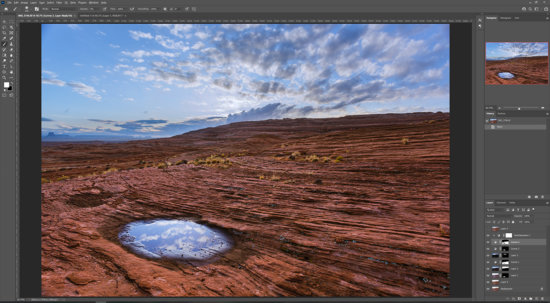
While most RAW converters allow you to adjust specific areas of the RAW image with special controls, the workflow is often cumbersome and not very user-friendly. This is especially true if you are trying to make several targeted adjustments to a single image. To make adjustments to specific parts of an image, you need software that allows you to draw selections and create layers and masks.
What software should I use for Nature Photography?
In today’s digital imaging era, RAW post-processing software options for beginner landscape photography are wide open. I recommend choosing a single post-processing software and getting to know its abilities before adding additional tools. Mastering Lightroom for beginner landscape photography is a great place to start.
I use Lightroom or Adobe RAW Converter for processing RAW images. Photoshop allows me to make targeted adjustments to my landscape photos. I make almost all my targeted adjustments with layers and masks in Photoshop.
Some beginner landscape photographers start out believing that they can just fix their errors in Photoshop. That attitude will make you a lazy photographer – and can often mean you’ll spend a lot more time in post, trying to make corrections that could have been avoided if you’d taken the time to do it right in the first place. Rather than relying on post-processing to make things right, challenge yourself to capture the scene in-camera. That won’t always be possible, but you’ll train yourself to recognize good light and make the most of your equipment.
With the right equipment and some basic post-processing skills, you can get out there and start exploring the natural world. Good luck – and bring back some fantastic photos!


