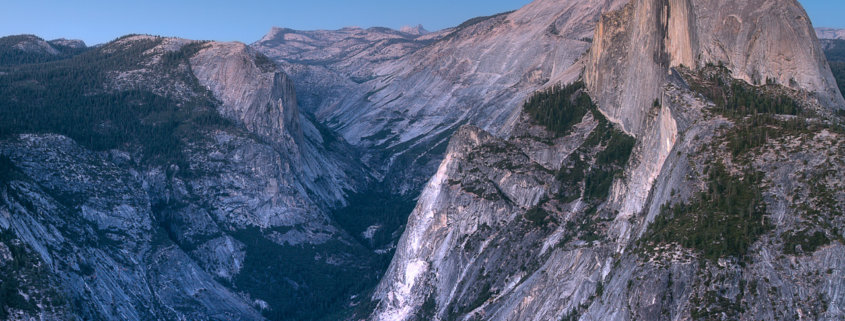
5 Effective Tips for Low Light Landscape Photography
We know that light is an essential ingredient to making good photographs. But they often require super long camera exposure. Long exposure photography can be challenging for beginner landscape photographers. On the other hand, low light situations often create an ethereal atmosphere that is ideal for making dramatic images with impact.
These tips will help you resist the urge to pack up and go home when the light is fading and may result in some rewarding and dramatic long exposure photos.
1. Preparation
The first step to making compelling low light images is to scout your landscape photography location ahead of time. You don’t want to arrive on the scene with a vague idea of how it looks and what exactly is going to be in your frame.
Visit during daylight hours and experiment with compositions until you have exactly what you want in your low light or night shot. Then take note of the location, the height of the camera, and the camera angle you used.
2. Pre-Focus your Photo
Long exposure photography often requires you pre-focus your camera before you can take a photo. If you begin your shoot in the evening hours when the light will steadily diminish, remember to set your focus first and then switch your camera or lens to manual focus. This will prevent your camera from trying to re-focus when there is not enough light for it to succeed.
If you arrive early in the morning while it is dark, you will not have this luxury. In this case, you can use a flashlight to illuminate something that is one third of the way into your frame to allow your camera to achieve focus. Then switch to manual focus.
3. Even out the exposure
Depending on how much light you have, you may need to even out the exposure of your scene. If it is night, this is not a concern. But if there is some light in the sky and your foreground is in shadow, it will be difficult for your camera to get both the foreground and background properly exposed.

Focal Length: 16mm, ISO 400, f/11, ISO 400 – Low Light Landscape photography created by manually blending 0.6s to 1/13s camera exposure.
In this case, you can use a graduated neutral density filter to darken the top portion of your frame. Another alternative is to use exposure bracketing. This is when you take multiple exposures (usually one regular exposure, one under-exposed, and one over-exposed) and combine them later in post-processing.
4. Use a tripod
When you are working with low light levels, you will be using longer shutter speeds in order to gather enough light to make a proper exposure. This means you will need to use a tripod to keep your camera steady.
Many beginning photographers resist using a tripod because they are heavy to carry around. But when you start using one, you’ll quickly realize that your image quality will improve greatly. It’s well worth the investment to get a sturdy lightweight tripod.
To keep your camera as stable as possible, extend the leg sections from the top down so the thinnest, innermost section is extended last, and only if it’s necessary. The wider sections of the legs at the top are more stable than the thinner sections at the bottom. Also, do not extend the center column since it makes the tripod top-heavy and unstable. For best results, make sure the feet are firmly planted. If it’s windy, you can anchor the tripod with weights, or by hanging your camera bag from the bottom of the center column.
5. Prevent camera shake blur
Even when you’re using a tripod, it is possible to get camera shake blur caused by touching your camera to release the shutter, the motion of the mirror moving up and down, or even your own image stabilization system which might detect its own vibrations.
To prevent these issues from happening, make sure you adjust these settings whenever you put your camera on a tripod:
- unless your camera is a mirrorless system, turn the mirror lock-up on;
- use your 2 second timer or a cable release to trip the shutter without touching the camera;
- turn off your image stabilization.
Don’t forget to put these settings back when you remove your camera from the tripod. When you do this every time you use your tripod, it will quickly become a habit you wont even have to think about.
6. When you don’t have a tripod
What do you mean you don’t have a tripod? Okay, I know, it happens. In this unfortunate event, you do have some options.
Since you will be hand-holding your camera, you wont be able to use a long exposure, therefore you’ll need to use either aperture or ISO, or both, to gather enough light.
The first thing you can do is use your fastest lens. A fast lens is one that has a very wide maximum aperture like f/1.8 or f/2.8. With this wide aperture setting, more light will enter the camera allowing you to use faster shutter speeds.
The second thing you can do is increase your ISO. This will cause more noise in your image, but it’s better to have a sharp image with noise than a blurry image. You can reduce the noise in post-processing if you have to.

Handheld Low Light Photography – Focal Length: 24mm, 1/200s@f2.8, ISO 800 – Acacia tree by Anne McKinnell
Doing photography in low-light conditions is a challenge, but it can also be the ideal time to create unique and dramatic shots.


 Grant Collier


Dear,
Interesting topic, but some questions that don’t make sense to me.
– A mountain picture with the following camera settings: 28mm, ISO 100, 16s@F16, ISO 100. There is nothing near the camera, all a far away Mountain View. Why is chosen for f16? Closing to f8 would deliver a sharper image and a shorter exposure time
-Next image, same question, camera settings: 18mm, 0.8s@F22, ISO 100. The aperture even closed to f22 what normal would deliver less sharpness, F22 with 18mm would give an approximately sharp image from 50 cm until infinite. The closest trees are far away, so there is absolutely no need for that large dept of field.
Why is chosen for these settings?
Best regards,
Paul