4 Challenges to overcome for Shooting the Northern Lights
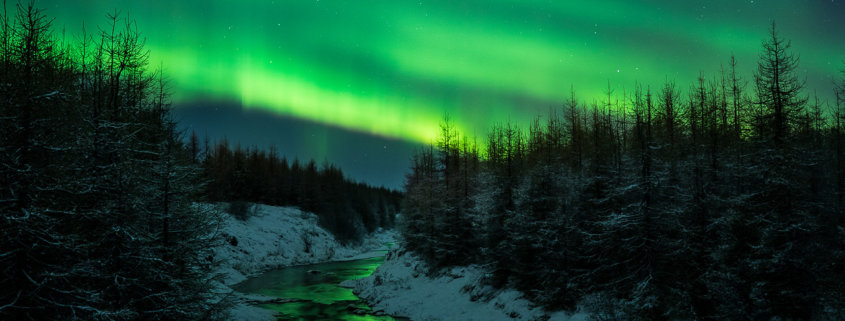
The northern lights are a fantastic thing to see and were on my bucket list for many years. When I finally got to see them, I ran into some challenges while trying to capture the best possible images. In this article, I explain some of the challenges I faced and how I dealt with them.

Mortsund, Norway
Focus
For me, the biggest challenge was focusing in the dark. With the northern lights, more often than not, you have access to little or no light. In this situation, I recommend that you shoot wide, using infinite focus to ensure everything is sharp.
It’s important to know that some lenses can extend beyond infinity; this can cause some struggles with getting the focus just right. One solution is to focus on a far-away light. If this isn’t possible, use a flashlight. If you are not alone, have a buddy hold the flashlight at a distance and point the light at you. If you’re alone, you’ll have to place the flashlight at a distance yourself and then return to your camera to focus on it.
Composition
If you are seeing the northern lights for the first time, you may feel overwhelmed. I know I was. Feeling this way, you may forget the most important thing in photography… composition.
Considering that the location is dark (likely pitch black) you may have to do some guesswork in regards to composition. Remember that interesting images need a nick background and, if possible, a nice foreground. This may take a lot of trial and error; ensure that you’re checking each image after you shoot it and recomposing if necessary.
Because you use long exposures for these shots, spend the extra few sections between shots to assess your surroundings for the most interesting subjects. I often go to the same location during daylight hours so that I have a better knowledge of the place. This allows me to pre-check the location and thus feel less stressed when the true photography action starts.
Camera Settings
The camera settings vary depending on the strength of the aurora (KP) which can range from 1 to 9. I recommend a fast lens and one that is F2.8 or below. Once you have your focus correct and your composition set, if the strength of the aurora varies, your settings will need to change as well.
I usually start with an ISO of 800-1000 and a 15-second exposure, then determine how much aurora I have as well as the background/foreground. Some people prefer to shoot at a higher ISO and lower shutter speeds to preserve more of the aurora’s movement… but that’s a personal preference. I personally prefer longer exposures so that I have less noise in my images.
Don’t be afraid to experiment or change the settings if necessary. If you end up with a faint aurora, it will be tough to edit a very dark image.
Moon
I like to capture my images during a half or full moon because it’s easier on the background/foreground. While this makes it easier to focus, you may have a problem with shadows on your image. Be aware of the moon location and your position. The following picture below is an excellent example… because I wasn’t paying attention, I ended up with my camera and tripod shadow in the shoot. While this particular case is easy to edit with Photoshop, that won’t always be the case.
After I noticed the shadow problem, I decided to use the moon to my advantage and do some experimenting. Since the aurora was so intense, I decided to shoot straight towards the moon at f8 to get the moonstar effect (30s, ISO 1000).
These are just some of the challenges I faced while shooting the northern lights. There are many others that I encountered and I’m sure you have too. Preparation is the key to success when it comes to aurora shooting… along with a bit of luck also with the weather and the solar flares.
In the comment section below, please let me know about other issues you faced while shooting the northern lights.


 Grant Collier


