Mastering Wide Angle Lens for Nature Photography
Wide angle lenses have long been a favorite tool for nature photographers. Their expansive field of view allows us to capture sweeping landscapes, dramatic skies, and immersive perspectives that make viewers feel like they are standing right there beside us. From towering mountains to endless deserts, the wide angle lens is often the best way to do justice to the grandeur of the natural world.
But here’s the catch: nature photography with a wide angle lens is not as simple as pointing the lens toward a beautiful scene and pressing the shutter. In fact, the very feature that makes these lenses so appealing—the wide field of view—can easily introduce problems with exposure, distortion, focus, and composition. Without proper technique, your image may end up looking flat, distorted, or cluttered.
In this guide, we’ll explore nature photography tips for wide angle lenses that will help you avoid common mistakes and create breathtaking images. Whether you’re a beginner looking to experiment with wide angle compositions or an experienced photographer refining your craft, these strategies will help you master wide angle landscape photography.
What is a Wide Angle Lens?
A wide angle lens is any lens with a focal length of roughly 35mm or less (on a full-frame camera). Popular choices among landscape photographers include 16-35mm zoom lenses or primes in the 14mm–24mm range. These lenses capture more of the scene in a single frame, which is why they are the go-to option for photographing sweeping vistas, waterfalls, starry skies, or towering trees in the forest.
Because of their short focal length, wide angle lenses exaggerate the sense of depth and scale in an image. Foreground elements appear larger and more prominent, while distant objects shrink in comparison. This distortion can be both a challenge and a creative opportunity.
If you’ve ever taken a photo where the mountain range looked much smaller in your image than it did to your eyes, you’ve already experienced the quirks of wide angle photography. The following tips will help you harness those quirks and turn them into strengths.
1. How to Manage Exposure with a Wide Angle Lens
Exposure challenges are amplified when shooting wide angle nature photography. Because the lens captures such a broad scene, it often includes areas of extreme brightness and deep shadows. Think of photographing a forest where sunlight filters through the canopy or shooting a beach scene with the sun setting on the horizon.
Wide variations in light can exceed your camera’s dynamic range, leading to blown-out highlights or underexposed shadows. Her are some tips for handling exposure with wide angle lenses:
- Check your histogram. Don’t just rely on your LCD preview—always review the histogram to ensure highlights and shadows are within range.
- Use exposure bracketing. Capture multiple exposures and blend them in post-processing to balance extreme lighting.
- Experiment with graduated neutral density (GND) filters. These filters are excellent for balancing bright skies with darker foregrounds.
For example, when photographing the redwood forests in California, I captured three different exposures—one for the highlights, one for the shadows, and one balanced. Later, I blended them in Photoshop to reveal the full tonal range without losing detail.
2. Get Close to Your Subject
One of the most effective wide angle lens composition techniques is to move closer to your subject. Because wide angle lenses push background elements farther away, distant mountains or forests can look tiny compared to what you see with your eyes.
By getting close to rocks, flowers, driftwood, or other foreground subjects, you can create dramatic depth and scale in your landscape images.

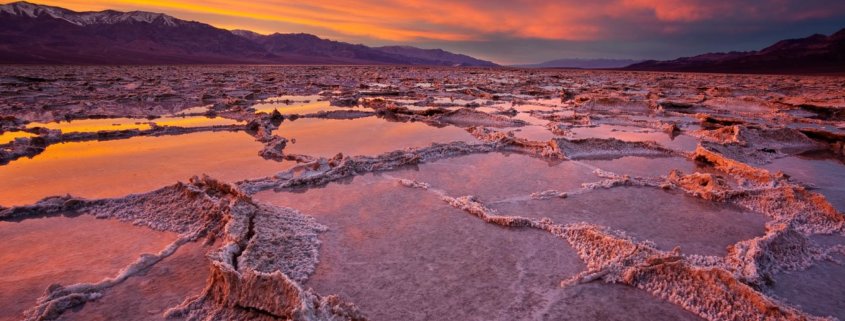
Focal length: 17mm, Closest object is more than three feet from the camera,, Badwater, Death Valley, California
For example, in Death Valley, I positioned my camera just a few feet away from the cracked desert floor. The patterns became a bold foreground element, while the distant mountains anchored the background. This simple adjustment transformed a flat image into one with striking visual impact.
Pro tip: If you can’t get close to your subject, consider switching to a longer focal length to avoid losing details in the distance.
3. Master Focus with Wide Angle Lenses
Wide angle lenses have an impressive depth of field, but that doesn’t mean everything will automatically be sharp. To ensure crisp detail from the foreground to the horizon, you’ll need to understand hyperfocal distance—the point of focus that maximizes sharpness throughout your frame.
Focus techniques for wide angle landscape photography:
- Use hyperfocal focusing. Many apps and charts will tell you where to focus depending on your aperture and focal length.
- Try focus stacking. If hyperfocal distance isn’t enough, take multiple shots focused at different points and blend them in post-processing.
- Always zoom in on your LCD preview. Double-check sharpness before moving on.
When shooting in Paria Canyon in Utah, I blended two images—one focused on the foreground river rocks and another on the distant cliffs. This focus-stacking technique ensured that both elements were tack sharp.
4. Find Creative Ways to Handle Wide Angle Lens Distortion
Wide angle lenses naturally introduce distortion. Straight lines can bend, vertical structures may converge, and objects near the edges of the frame can stretch.
If you tilt your camera upward, tall trees or buildings appear to lean inward. Tilt it downward, and verticals may lean outward. Sometimes this looks unnatural—but distortion can also be used creatively.
- Keep the camera level when you want natural-looking images.
- Correct distortion in software like Lightroom or Photoshop.
- Use distortion as a tool. A waterfall shot in Maui looked more dramatic because I tilted the camera slightly down, exaggerating the flow. Similarly, pointing upward while photographing the northern lights in Iceland added drama to the sky.
5. Use the Right Filters for Wide Angle Nature Photography
Filters can improve wide angle photography—but they can also cause problems.
- Vignetting: When stacking filters on a wide angle lens, the edges of the filter holder may appear in your frame. The solution? Use slim filters or zoom in slightly.
- Uneven polarization: A circular polarizer can darken part of the sky unevenly, especially at focal lengths wider than 24mm. To avoid this, use the polarizer sparingly or blend exposures in post.
For example, in Death Valley, I noticed uneven polarization across the sky when using a polarizer at 17mm. I corrected this by shooting without the filter and blending exposures instead.
6. Understand Your Lens’ Limitations
No lens is perfect. Wide angle lenses often:
- Lose sharpness at the edges. Even stopping down may not fix corner softness.
- Have a “sweet spot.” Most lenses are sharpest between f/8 and f/11.
- Degrade at very small apertures. Diffraction often becomes noticeable beyond f/16.
Knowing these characteristics will help you get the best performance from your lens.
7. Simplify Your Wide Angle Compositions
Because wide angle lenses capture so much, compositions can quickly become cluttered. Instead of overwhelming your viewer with too many elements, look for ways to simplify and create minimalist wide angle photography.
Here are three effective methods:
a) Use Fog and Mist
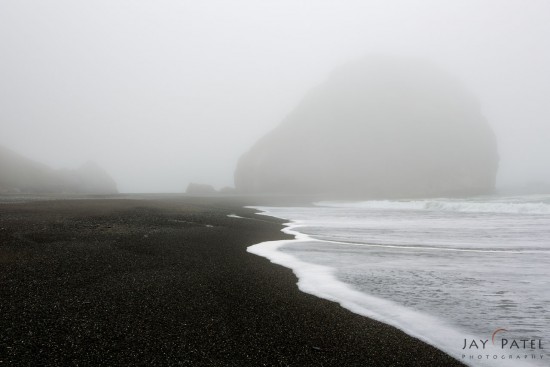
Fog naturally reduces contrast and obscures distractions, helping you create moody, minimalist images. A foggy day in Redwood National Park allowed me to photograph a lone haystack rock with muted tones, free of busy details.
b) Shoot on Overcast Days
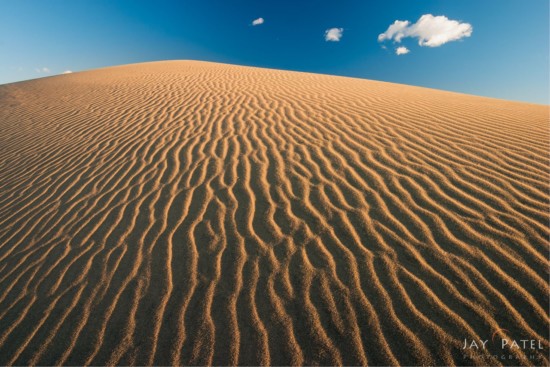
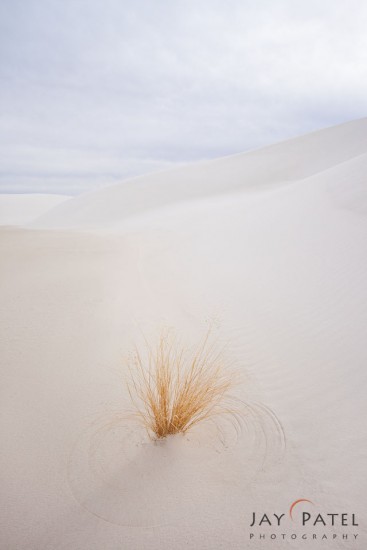
Cloudy skies create softer light and reduce contrast, allowing certain elements to stand out. At White Sands National Monument, I framed vegetation against a flat-toned background to emphasize form and texture.
c) Experiment with Long Exposures
Using an ND filter to smooth out water or clouds is another way to simplify your composition. At Bahia Honda in Florida, a 56-second exposure transformed the ocean into a soft wash of color, emphasizing the sky and horizon.
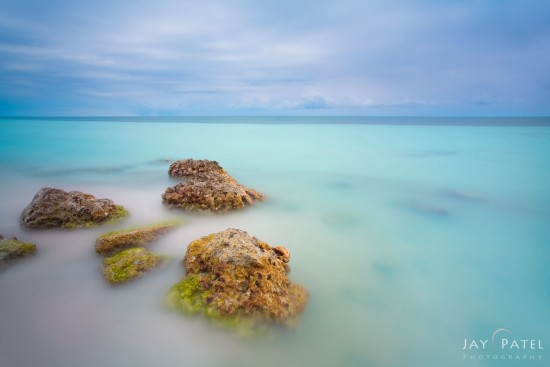
Minimalistic wide angle nature photography with 56 Second Camera Exposure with a ND Filter, Bahia Honda, Florida
Final Thoughts: Mastering the Wide Angle Lens
Learning to use a wide angle lens effectively is one of the most rewarding steps in your nature photography journey. These lenses allow you to create immersive, dynamic images that capture the grandeur of the natural world.
By paying attention to exposure, composition, distortion, filters, and lens limitations, you’ll avoid common mistakes and elevate your images. Whether you’re photographing towering redwoods, desert landscapes, or dramatic coastlines, the wide angle lens can help you tell more powerful visual stories.

