6 Practical Tips for Time-Lapse Photography
Although I make my living shooting two-dimensional nature photos, I’ve long been fascinated by the ability to add a third dimension to these images – the dimension of time. Anyone with a basic camera can add this third dimension by taking numerous images in a row and then playing them at 15 to 30 frames per second. While the basic concept is pretty simple, managing camera exposure, photography composition, motion, shutter speed and other technical factors for time-lapse photography can be quite challenging.
Here are few tips to get started:
#1: Shoot Wider Than You Need
When composing an image for time-lapse photography, I recommend shooting with a wider lens than you need. This allows you to later do panning effects while processing the video. When doing panning effects, you have to crop some of the original image, so by shooting wide you’ll give yourself plenty of room to later crop the video.
#2: Use Manual Camera Exposure
If possible, you should shoot in manual exposure mode on your camera when taking time-lapse videos. This ensures that each exposure has the same camera settings. If you don’t shoot in manual exposure mode, your camera may automatically change the setting between each exposure. This can cause flickering, where your video suddenly brightens or darkens while playing.
Even when shooting in manual exposure mode, you can still get some flickering. This is because cameras don’t get precisely the same exposure each time, even when using the same settings. The reason for this is somewhat complicated, but is basically because the camera switches back to a wide open aperture in between each shot.
One of the simplest ways to avoid this is to use a lens with a manual aperture ring, like the Rokinon 14mm manual-focus lens. You can also avoid this by first setting your aperture in manual mode. Then, hold down the depth-of-field preview button and start to remove your lens by turning it very slightly. This disconnects the lens from the camera and keeps it set at a fixed aperture.
WARNING: Just be careful to only slightly turn the lens and make sure it is stable and won’t fall off. This won’t always work, as some cameras won’t operate with the lens disconnected.
#3: Avoid short shutter speeds
When shooting time-lapse videos, you should try to make sure that each exposure is around 1/60 second or longer. Very short exposures can cause your videos to look less smooth and start looking choppy.
#4: Decide on time between each camera exposure
For time-lapse photography you need to set your camera to take repeated exposures of the scene at a regular interval. You can do this with a remote timer that you attach to your camera or by using the built-in time that some cameras offer. One of the biggest decisions you need to make is how long to wait between each shot. If you have a rapidly-changing scene, like crashing ocean waves, you’ll likely want to set it to take one shot every second. If you have a slowly changing scene, like slow-moving clouds, you might want to wait around 30 seconds between each shot. The longer delay dramatically speeds up the action in your video. Ultimately, the delay you want to use is an artistic decision and is something you will get better at deciding as you shoot more videos. If you’re not sure, you can use a shorter delay and, if necessary, speed up the video in post-processing.
#4: How many shots do you need?
Most time-lapse videos are played at 30 frames per second. This means that you need to take a lot of images to get a video of any sizable length. I usually take around 240 images, which results in an 8-second video. If you have time, you may want to take even more photos. You then have the option of shortening the video by speeding it up or by only using the best sequence of images that you captured.
#5: Time-lapse photography at night
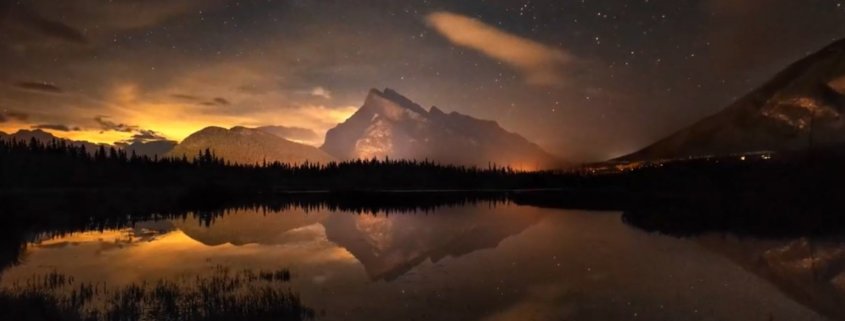
One of my favorite times to shoot time-lapse videos is at night. You don’t have to worry about flickering at night, as you have to shoot in manual and the very long exposures effectively negate any slight difference between exposures. You can read a short article I wrote on Visual Wilderness on how to take photos at night. Once you’ve set up your camera to get a good exposure a night, you simply need to take repeated exposures for about 1-4 hours to shoot a time-lapse video.
Another reason I like shooting time-lapse videos at night is that I can process the images in many different ways to create both videos and still photos. I can stack many images to reduce noise in a still photo, while keeping the stars as points of light. I can also stack the images in a different manner to create a still photo with long star trails.
#6: Creating a time-lapse video
Some cameras have a built-in time-lapse option that processes a time-lapse video for you. However, I recommend instead taking lots of individual exposures and processing them yourself on a computer. This gives you more control over the final appearance of the video. There are many software programs that can help you process time-lapse videos. For Mac users, iMovie is a good and fairly simple option. I used to use Windows Movie Maker, but it has become outdated and hasn’t added support for 4K videos. Nowadays, I simply use Photoshop. It’s a little more complicated, but it can get the job done. There are also some programs that can help reduce flickering.
If you have suggestions on software to process time-lapse videos, feel free to share in the comments below.


