How to Edit Photos on the Road
Landscape photography often requires a considerable amount of travel. Many photographers (myself included) are deciding to either travel full-time or take extended length trips. Spending time on the road allows us to be flexible to changing weather conditions, and getting to know locations in-depth. This incredible freedom does not come without challenges, one of which is how to edit photos when you are exploring. You see, spending a few weeks, months, or years on the road does not involve constant photography, but much to the contrary in fact. There are many days of blue skies where you just want to sit inside and catch up on photo editing.

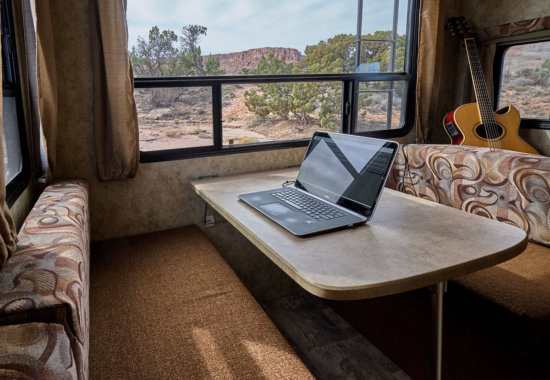
My mobile workspace in our RV
Choosing a laptop
Most laptop screens are lacking in color gamut and resolution. It is extraordinarily important to select a laptop that has a great display. Features that are important to look for are high resolution, large size, and that it covers at least the sRGB color gamut. I would recommend a minimum of a 15″ display. This may sound small compared to a desktop monitor, but with today’s incredibly high-resolution screens the 15″ suddenly seems quite large. I have been using a laptop with a 15.6″ 4K display for the past three years and have edited hundreds of photos with no issues.
Currently, the laptops I would recommend would be the latest MacBook Pro 15″ which has a wide gamut display that covers the P3 gamut, which is even wider than the ProPhoto RGB gamut most photographers use. For Windows users, one of the best options is the Dell XPS 15 which nearly covers the full Adobe RGB gamut. Whether these wide gamut screens are valuable is arguable. Virtually every screen out there will not display this range of colors, and most printers will only print sRGB. The important takeaways are to ensure the laptop you pick covers the full sRGB gamut at a minimum, along with being high resolution.
Calibrating your screen
The next step is to calibrate your display. This requires a physical calibration unit that you place on your screen and it analyzes the colors being displayed to correct them. Calibration ensures colors will display correctly on all calibrated screens, and print properly. I use the Datacolor Spyder, but the X-Rite ColorMunki is a great option as well. The software that comes with the calibrators work okay for most users. If you want to ensure your laptop matches your desktop computer, I would recommend installing DisplayCAL which is a highly advanced software.

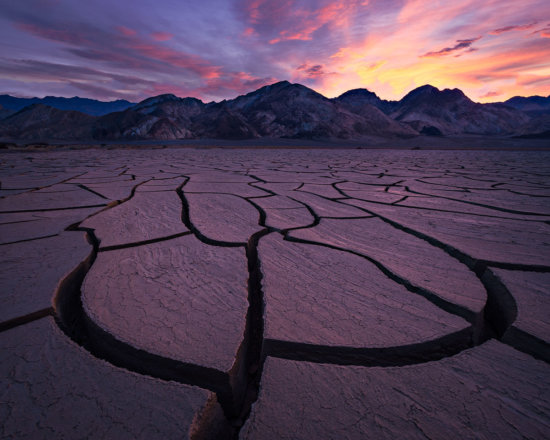
Here is an image that I processed on my aging Dell M3800 laptop. Editing this image involved blending multiple images, warping, focus stacking, and focal length blending.
Locations to Work
Whether you are traveling in your car, or in an RV, you can always find places to work. In an RV, it is quite simple to stay inside and work as I do. All this requires is solar power or a generator to keep the power hungry laptop going all day. If you are in a van, etc. you can set up an area to work, just be sure to put shades over the windows to prevent glare and too much ambient light.
If working out of your car does not sound appealing, your next option is to use public places to work. Libraries and coffee shops are great options which usually have power outlets and decent lighting. Libraries typically do not care how long you spend there, but coffee shops, on the other hand, are running a business and seating can be limited. Be respectful of this and leave if it is too busy, or keep buying coffee on a regular basis as a way of paying for the use of their space.
Backing Up Your Photos
Keeping a solid backup plan can be challenging on the road. I have found a simple, yet effective solution to keep my photos safe. I store my most recent photos on my internal SSD hard drive which makes editing very fast. Weekly I will backup these photos to an external hard drive. This backup protects you against hard drive failures but does not protect against theft or catastrophe.
To protect against this, you will need an offsite backup. This could be cloud storage, but unless you have access to high-speed wifi, this method will likely fail. What I do is clone my external hard drive to another external hard drive and leave this copy at a family member’s house in a fire safe. If my laptop and hard drive were stolen, I would still have a backup. If you do not visit anyone frequently enough, you could ship the hard drives back and forth if you have family or friends willing to do this for you.
Laptop Safety
Lastly, leaving your laptop in your vehicle is not the best idea, especially considering trailhead break-ins are quite common. In the field we have no options, so we must be careful. I have gone three years without a break-in, but I am careful to hide anything of value when leaving my vehicle, as most thefts are opportunistic. If you have a car, put your laptop in the trunk or hide it well. Make sure your laptop is covered by your insurance as well in case the worst happens.
Feel free to share your own workflows and experience while editing photos on the road in the comments below.


Hi Matt, sorry for the delay! I do not use a wacom myself primarily because I am left handed and I use my left hand for a myriad of keyboard shortcuts, so I could never get used to it. For most people I do recommend them though!
Good read. Question, you mention having too much ambient light, but we usually struggle to find enough. If there is not enough, will the screen backlighting appear brighter than what the photo actually is?
I have become a very good judge of brightness levels for different lighting conditions. I keep my background set to white in Lightroom and Photoshop which makes it easy to set the brightness to just the point where the white isn’t dingy. It’s completely un-scientific but it works for me. If you’re using a calibrator you can use that to monitor the room brightness and adjust as needed. Ideally everyone would have a blacked out room with consistent lighting, but this isn’t realistic for most people, and especially if you live in an RV!