Six Tips for Improving Color Management
Color management is a complicated beast which can create numerous problems with your processed images. If what you see on your monitor doesn’t match what is printed or if your images look different on different screens, you may need to fine-tune your color management workflow. Here are some tips on how to do this.

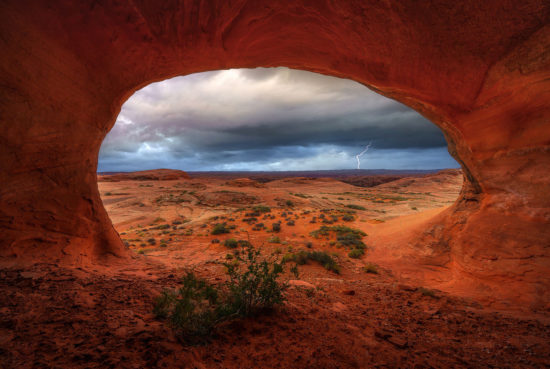
Example of color managed landscape photo optimized for web display – by Mark Metternich
Calibrate Your Monitor for Web and Social Media Sharing

Pro Tip: Start by calibrating your monitor for better color management
For best results, calibrate your monitor for web or print separately. Also, calibrate for specific output using some general industry standards. If you are serious about image quality and monitor accuracy, I suggest getting a quality calibration device for your monitor. For me, this means a X-Rite Product (I currently use and strongly advocate for the X-Rite i1Display Pro to calibrate my monitor) or a new Spyder product.
In my intensive research over the years, I have asked countless photo enthusiasts (semi-pros as well as known professionals) about their calibration practices. To this day, it often surprises me how many photographers are not taking careful control of their color management practices.
Calibration for Printing and Web Display
When monitors have the ability for a range of over 300+cd (from nuclear bright to unviewable dark), what might be the best, average, “middle target” for web calibration? What might be a target that works well for the general masses who may be viewing our images (on their monitor, iPads, or phones)?

Color Management Tip: How to set target Luminance for Web Display
Although it is generally accepted that no official industry standards exist to set your luminescence value, between 120-130cd (cd is technically candelas; also known as luminance or brightness) in a diffused, lighted room (not really dark, not really bright, and no direct light reflecting off of your screen) seems to the accepted middle-of-the-road. It’s seems to be what the late, great, color guru and book writer, Bruce Fraser used to talk about when he said “we need to shoot for the middle of a very wide barn door opening.”
I reached this conclusion of the 120-130 cd target by talking with the techies of several top calibration companies, asking many top professional photographers (nearly all my favorite nature photographers), and my own 14 years of personal experience. Of course room brightness has a profound effect on this target but, for now, we’ll keep it simple and recommend 120-130 cd for web output, in a mellow, diffused lighted room.

Target Luminance for Prints
If you are serious about your print accuracy and quality, there’s no way around the importance of calibrating your monitor separately for a fine art print. This means a substantially darkened monitor (compared to web calibration); 60-70 cd is the target (lately I have been using 65) that has worked best for me over the years for fine art gallery prints I do for photographers. As part of my service, I work with their master TIFF or PSD files to match (look right) for print; or I completely rework the image from scratch (RAW) for the client. I have used this target with success for all my limited edition gallery prints as well.
This darker target is extremely critical to avoid the very common dark print problem. This method basically helps the print retain the same punch, luminance, or liveliness that we see on our monitors. By having a darker monitor, you naturally process brighter and, because prints turn out much darker than monitors, this is a great way to compensate.
Control Your Ambient Light During Processing
As a part of your color management workflow it’s important to control your processing room brightness. A slightly darker, diffusely lit room (but not really dark) room generally works best for critical processing. Room brightness can affect luminance targets significantly.

Color Managed Landscape Photo to display on Social Media – by Mark Metternich
We’ll keep things very simple here. We need to control luminosity in the room in which we choose to do critical editing. We do not want any reflective light (light reflecting off your monitor from behind you). One of my favorite and highly acclaimed nature photographers told me that he never processes his images in the middle of the day. He waits until soft light begins or it’s dark. Then his room lighting of choice comes mostly from behind his monitor, not behind him. I cannot argue with the quality of his work, so there is something to be learned by this tip, in my opinion.
White Background for Processing RAW Images

Color Management Workflow: How to preview your images for different background
Here’s a secret tip from the pros: When processing from RAW to finish, use a white background (custom canvas color) for prints…
After calibrating your monitor darker (60-70 cd), change your working canvas color to white. White backgrounds can be a little irritating to get used to at first, but the way they drown out the image with surrounding light causes us to naturally compensate by processing our images more lively. This compensation translates well when making a print. Ever since being introduced to this technique years ago by a master printer, my images haven’t lacked that original pop or luminance.
I start my photo development in raw (either in Adobe Lightroom’s Develop module or in Adobe Camera Raw). Either way, I always choose white for my working space background canvas. If you can’t get used to white as your background, a very light grey can also be used. I still find white to be the ticket for mastering prints.
For web images (images made for forums, social media sites, and websites, for example) it’s a good practice to match the color of your working/processing background canvas specifically for your web output. If you go out of your way to match your own Lightroom or Photoshop background/canvas color to their background color while working on your image, you should be able to very get close to spot-on accuracy for each individual output. This can often mean making a different version for each social media site that has a different background color; although, often a slight “levels” tweak will do the trick.

Find out exact background for web
How do you know the exact color of the background of the site to which you am posting? One way is to take a screenshot of the background color and then, in Photoshop, use the eyedropper tool to check the color. A Google search can help you figure out how to do this.
Soft-proof Your Final Images Using ICC Profiles
Soft-proof your precious prints using an ICC profile. For some of you, this may sound a bit like rocket science so I will keep this as simple as possible.
Here are some key steps:
- Acquire an ICC profile from your printing lab (or use the ICC profiles that come with your purchased printer).
- Place them in the right location on your computer. As an example, I exclusively print on proprietary Lumachrome HD (acrylic mounts) out of Nevada Art Printers and I acquire excellent custom ICC profiles right off their website.
(A quick web search here can be helpful if you do not know how to put these profiles in the right place on your computer.) - When working on your print in the raw converter (I use and recommend Adobe Lightroom or Adobe Camera Raw), select the soft proofing checkbox.
- In Adobe Lightroom, after you check this box, you then can make sure the simulate paper and ink box is also checked (in Lightroom, it appears under your histogram after choosing soft proofing).In Adobe Camera Raw, it is less intuitive. You must choose to work in the actual ICC profile while in raw (choose which color space/ICC profile to work in and also select the simulate paper and ink checkbox). How do you do this?
- Directly under your image there is a workflow options bar.
- Single click on it to open the workflow options window. This is where you can choose your ICC profile and check the simulate paper and ink.


Color Management Tip: Setting ICC Workflow Options


Color Management Tip: Setting ICC Workflow Options for Prints


After all raw adjustments are made to the image and it is ready for import into Photoshop, return to the workflow options window and put the image back into the color space of your liking (Adobe RGB, ProPhoto RGB, SRGB…). Yes, what color space to work in is another can of worms to open up and talk about!


Soft Proofing in Photoshop for a better color management workflow


Soft Proofing Options for Prints: Select Black Point Compensation, Simulate Paper Colors


Also, once you import from Adobe Camera Raw or Lightroom into Photoshop, you must again continue to soft-proof until workflow is finished. This is done by going to the upper main pull-down menu and clicking View/Proof Setup/Custom and then choosing Device to Simulate to access the same ICC print profile to simulate. Again, you must check simulate paper color checkbox and have the black point compensation checkbox selected. You can leave everything else at default.
Embed Your Colors Space in Your Images
When you save your print or web photo in Photoshop, make sure to embed your image color space into your image (this is an option when saving an image). This helps some browsers know better how to interpret your image. Images for web are almost exclusively sRGB today.


Photoshop “Save for Web” – Embed ICC Profile


Embed ICC Profile in Photoshop for better color management
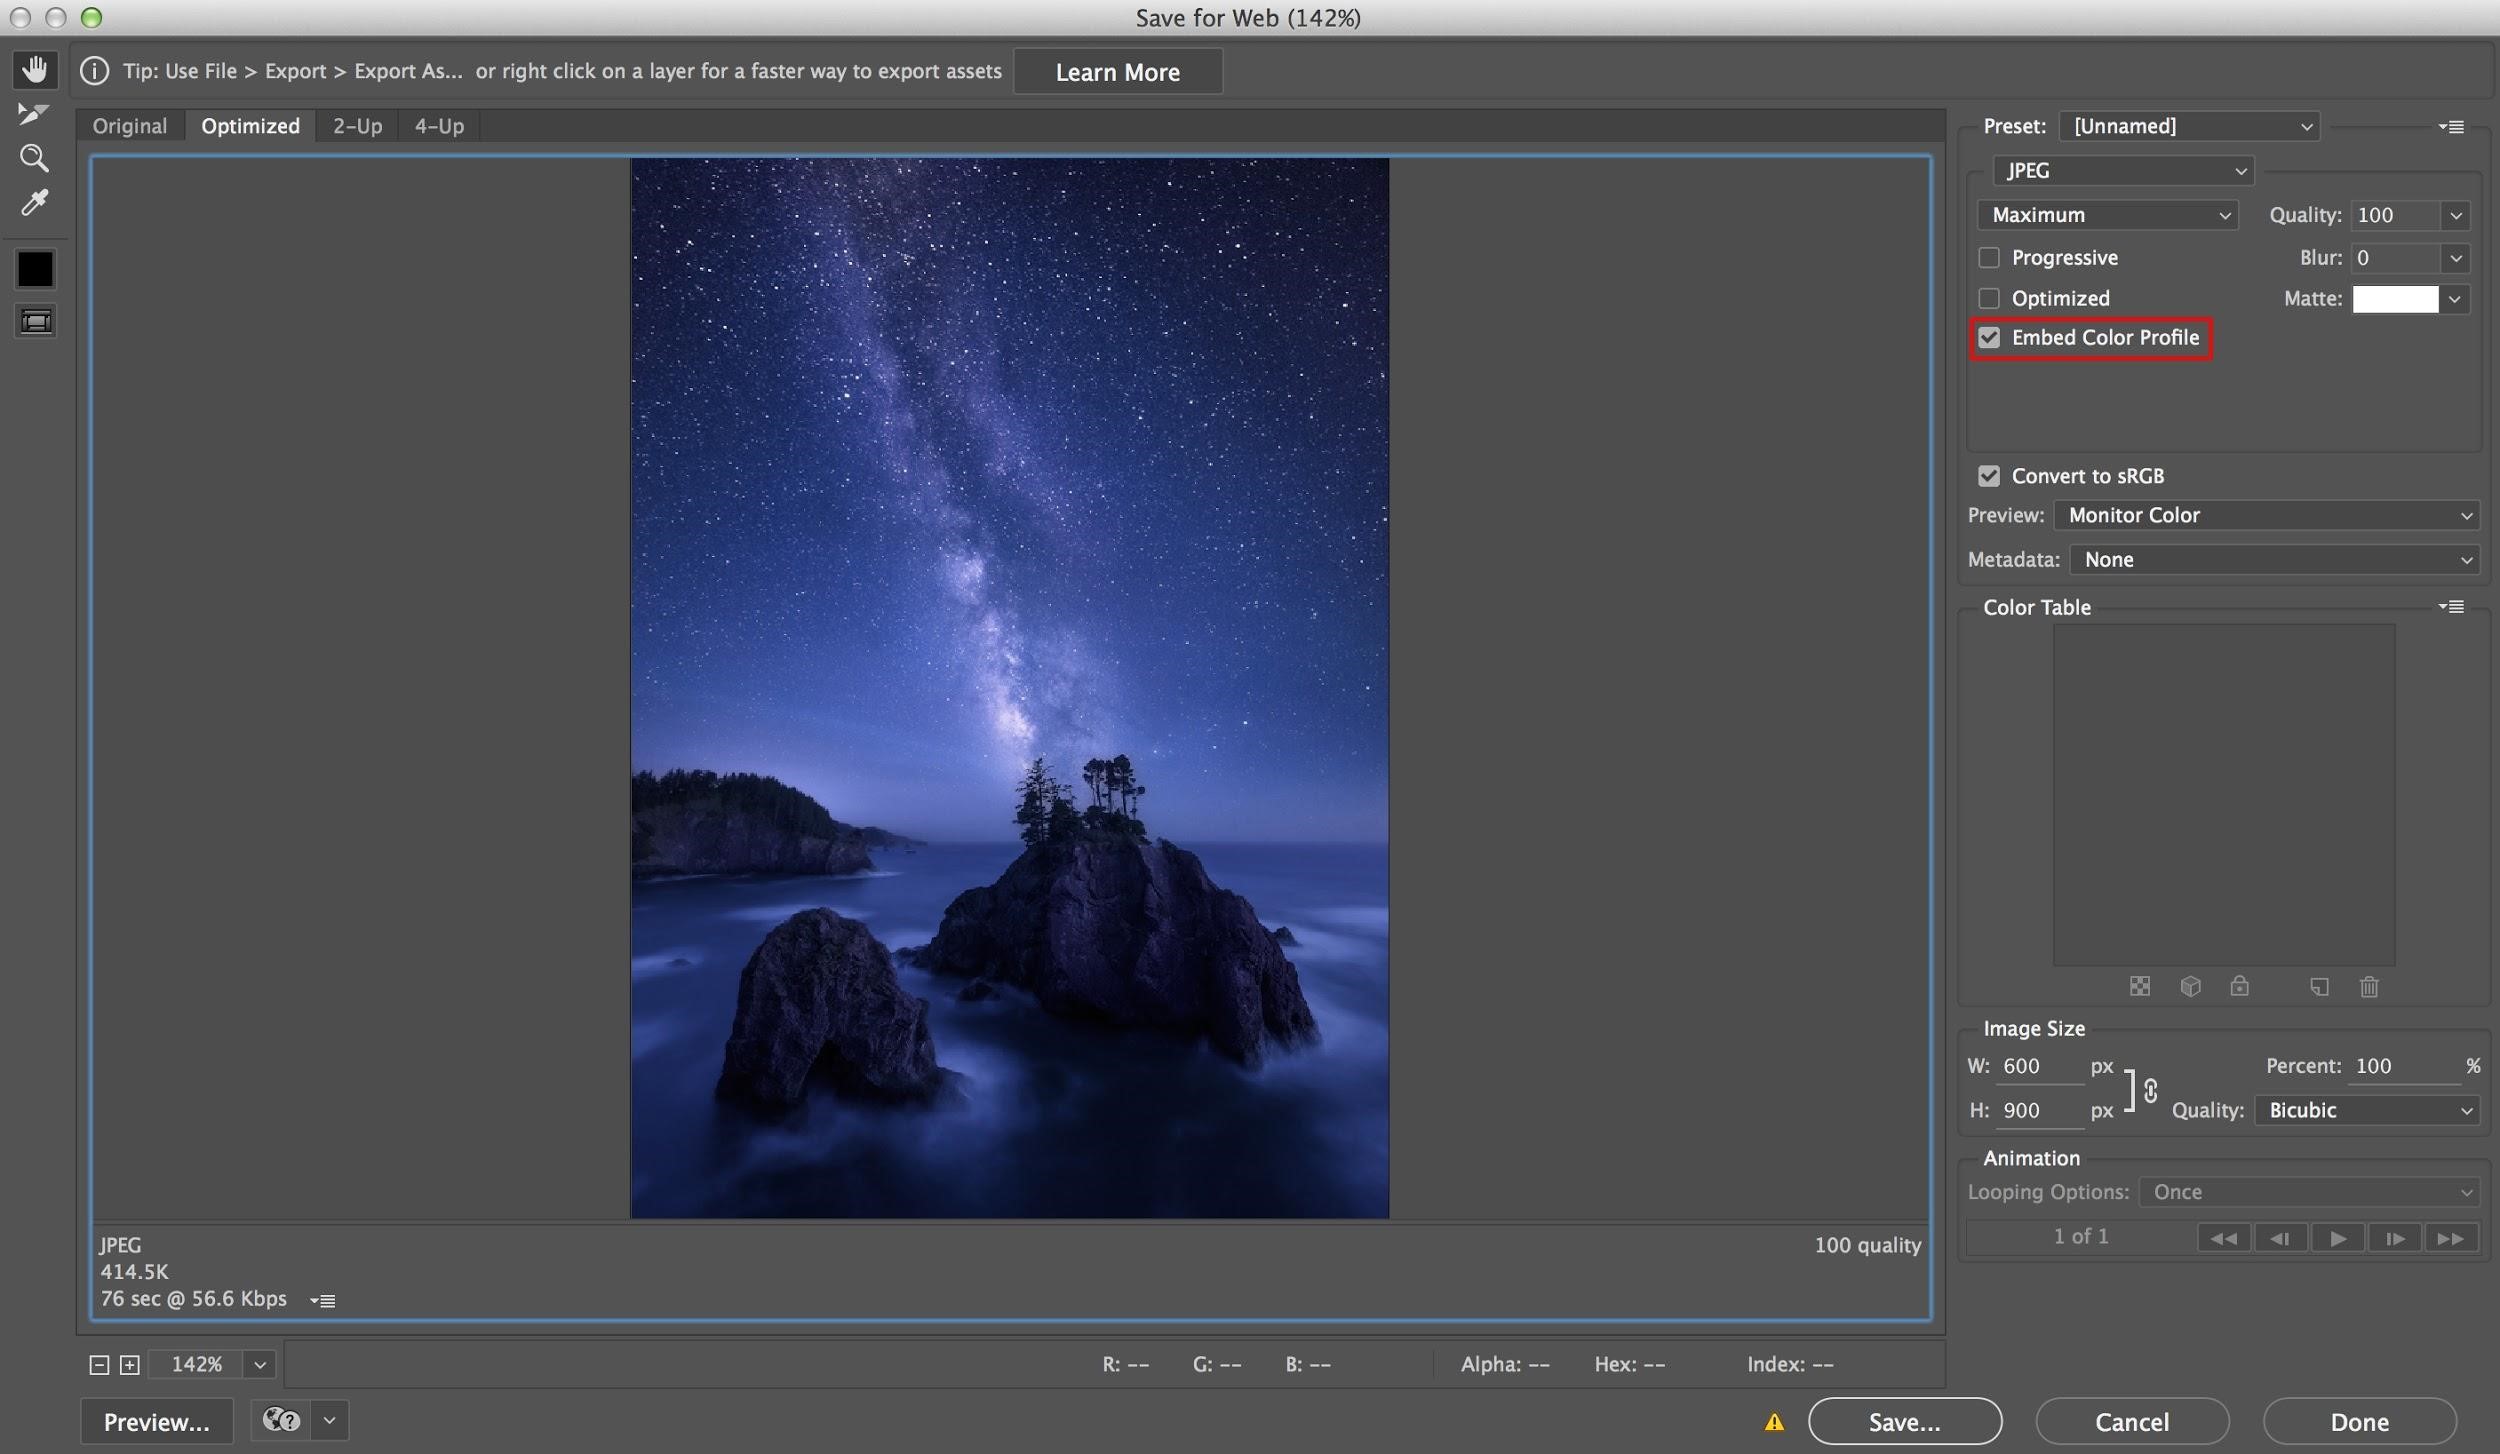

I work in sRGB for web but I also critically embed the sRGB profile into my image automatically using the Photoshop Save for Web function. When it comes to print, I also embed the color space I work in. This is double insurance that the printer you use will know how to best handle or interpret the image.
What color management workflow do you use? Have you discovered some tips to recreate accurate color across your prints and on your monitor? If so, feel free to share them in the images below.
About Author Mark Metternich
Mark Metternich is a native Oregonian now living in Jacksonville, Florida. He has been a full-time professional landscape photographer and avid photography educator for over 15 years and is considered by many to be an expert in this field. Throughout the year, Mark leads many adventurous photography workshops in the US and abroad, creates educational materials (such as his many highly acclaimed video tutorials in post-processing), he teaches post-processing privately via Skype screen sharing, offers post-processing services for photographers especially those interested in masterful/critical print preparation and/or gallery photographers, is a freelance writer for select photography publications, public speaker to camera clubs and professional groups, as well as produces and sells limited edition fine art landscape prints from his landscape collection.


Yay! I love when others have success!!!!
Hi Mark
Have re calibrated my monitor for Web & Print as discussed and now have the option of selecting ICC depending on application. When i selected between the two ICC i noticed there wasn’t a major change in darkness – even tough I could see a change in histogram for colours. Is this normal?
NB: My monitor doesn’t have kelvin selections only cool, normal, warm.
Do you use White background in Photoshop as well as Camera Raw?
Hi Anne-Mark Rhind. Thank you for your question. Sorry I have been in the SW wilderness for 2 months and then displaced because of the hurricane. Tardy… :(
I adjust my monitor brightness manually for the targeted luminosities. Clicking between ICC’s won’t do that part for you… You will see a big difference if you darken your monitor to 70 vs 125…
I think “Normal” will likely be the ticket.
Yes, white on both for prints. At a minimum very light grey. But I recommend white for sure.
I hope it helps.
Mark
Hi – I found this to be really helpful, but a bit stuck on the target luminance setting. I don’t have that setting in my calibration software. Is that where you made that change? I’m using Datacolor’s Spyder5 Express. Then there’s also just my basic monitor brightness on the monitor itself. Right now that is set to 75%. I don’t imagine that “75” maps to cd luminance value, right?
Hi Chris. Sorry for the tardy response. I have been traveling in Africa and the Pacific Northwest and was just too busy to check messages here…
I did have client that owned the “express” version of the Spyder colorimeter and it chose the luminance target automatically and I do not think it can be over written. So no manual control there (and am assuming the same fro their “5” version). A great reason to upgrade! I would suggest the iOne Pro by X Rite if you do so. Please let me know if I can be of any other help. :) Feel free to email me as well. MarkMetternich@gmail.com
Hi, this is so helpful. Thank you so much! But you did not cover another common problem. About D65!
Can you shed some light on that too?
Hi Irfan. Thank you for responding. I have never had a problem with using D65 (White Point at 6500) so I am not sure what problem you are referring to. Could you elaborate a bit more? If you are asking what White Point I recommend, that would be 6500. The short end of it is that the brain neutralizes grays or neutrals (in raw and photoshop) and thus I have never had an issues with just sticking to 6500 for all of my work regardless of room temp. The White Point is designed to offset room temp. But if one chooses to go with what the calibrator recommends, that will work too.