3 Factors that Impact Colors in Landscape Photography
We have heard it a thousand times… “Those colors in your landscape photography must be Photoshopped.” I’m willing to bet that most of you have heard the same thing. We’re used to the question, so it doesn’t bother us much – but it’s a worthwhile point for discussion.
Now, before we get into this, we don’t think there’s anything wrong with taking artistic liberties with the colors of your landscape photos in Photoshop or Lightroom. This is art and the landscape photographer makes the rules. But, it seems that sometimes people fail to realize that nature itself can “over-cook” the colors… in a good way, of course. The key is to realize that brilliant colors in landscape photography can occur under certain condition. When you learn to take advantage of those conditions, you won’t need help from Photoshop or Lightroom. Let nature do it for you!
Take a look at two images below. I used a circular polarizer for both images and processed them with the same RAW parameters. I even used the same version of Adobe Lightroom. The colors are quite different, right? So, what’s going on here? If all of the parameters are equal, why do the two images look so different? In this case, it comes down to two major factors – seasons and light conditions.
The first landscape photo above (Image 1) was taken in mid-summer. On that day, the skies were bright blue. Strong directional light from the upper right overexposed the greens on the left and the shady right side ended up underexposed. The dry weather also meant that the moss had died out for the season, so the rocks are brown. Deep green, summer foliage surrounds the waterfall.
The second landscape photo (Image 2) was taken in the spring. I took the shot between rain showers, when everything was wet. Overcast skies meant filtered, non-directional light so the whole scene is bathed in very soft light. The diffused light makes everything seem to glow just slightly. At this time of year, the waterfall is at it’s peak and the moss and spring foliage have a fresh golden color. A bit of morning mist adds a moody effect.
Colors in the nature are impacted by a variety of factors such time of day, time of year, seasons, light, and weather as well as your camera skills and equipment. Here are a few more landscape photos where we have used one or more of these factors to manipulate colors without over-cooking them in Photoshop.
Seasons
There’s nothing wrong with getting creative in Photoshop, but before you start pushing those sliders, take a moment to look around you. Nature provides some pretty intense colors without any help. When I want to capture beautiful colors, I start by thinking about the seasons.
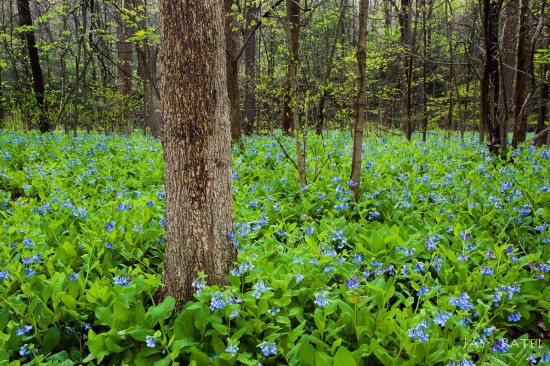
I took this shot at Brecksville Reservation in Cuyahoga Valley National Park. We timed our photography excursion to coincide with the height of the spring flowering season – and the blue bells were in full bloom. Those seasonal colors looked amazing with softened light from an overcast sky. Overcast skies provide perfect shooting conditions for capturing vibrant colors without the aid of Photoshop.
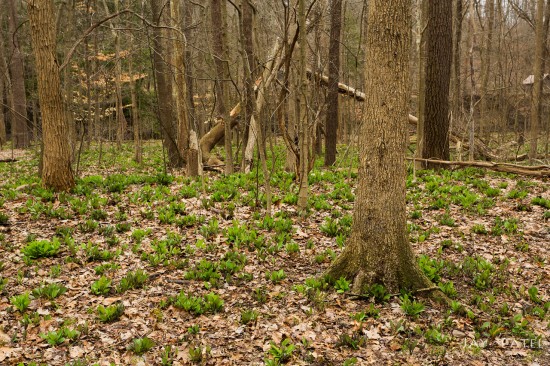
We often visit a location several times to see how the seasonal change is progressing. I took this shot of the same spot during one of our previous scouting visits. As you can see, the rich green colors from the location are missing, and the bluebells aren’t quite ready to bloom. The image is dominated by shades of brown and does not look as appealing.
Of course, visiting a location repeatedly is easy if you live nearby… but what if we’re visiting a faraway place? In that case, we’ll talk to local photographers or park rangers. We also look at photos from the location and research weather, climate, and seasonal changes online. We choose locations based upon the information we gather and the time of year when we’ll be traveling.
Camera Settings
Seasons and weather are not the only way to manipulate colors in your landscape photos. Colors in landscape photos are also affected by your camera settings.
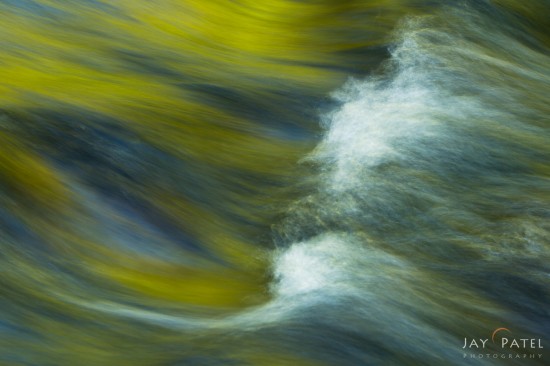
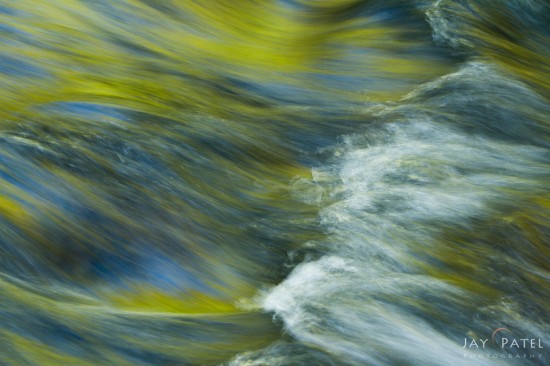
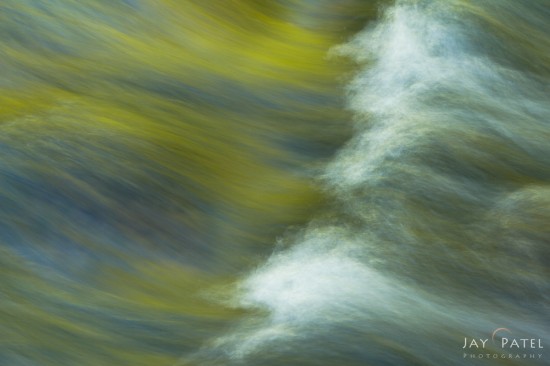
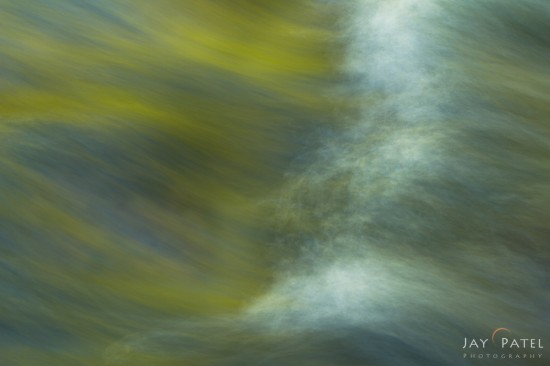
Have you tried playing with different shutter speeds to see the changing impact on an image? I spent some time experimenting with my camera during our recent trip to Hawaii while taking abstract shots of a stream. My objective was to create an abstract that captures both the reflected color on the surface, and the flow lines in the water. The key to getting the look I wanted was to find just the right shutter speed.
So, how do I determine the “right” shutter speed? It comes down to experimentation – I took a series of shots with different shutter speeds and compared them. I used a 4 stop ND filter to get a very slow shutter speed – between 1/6s and 2.5s. I used my Induro Tripod and a 2 second timer to make sure that the camera was rock solid steady during the exposure. I took 4 shots between those shutter speeds, and checked them for contrast and exposure using the histogram on back of the camera.
The most brilliant reflected colors occurred at high speeds of around 1/6s and o.5s. At that speed, I could capture the reflections without losing color as the white flow lines started to mix with the smooth surface. A longer shutter speed meant that the overall contrast was reduced – along with the intensity of the colors. I could easily see the differences on the back of my camera – and the histograms confirmed it. In the end, the choice came down to two photos – taken with shutter speeds of 1/6s and 0.5s. I liked the flow lines in the 0.5s shot better than the ones in 1/6s shot. Don’t be afraid to play around with different camera settings to see what you get.
Time of Day
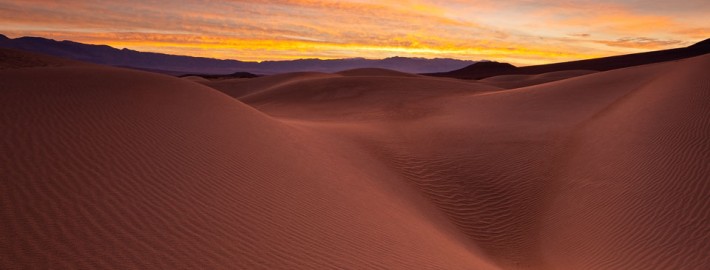
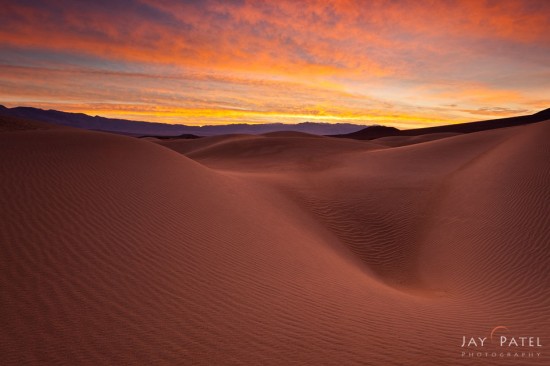
Colors of day light changes dramatically with time of day and some surfaces “reflect” this changing colors. Normally the word reflection is usually used in reference to reflections on wet surfaces… but light is often reflected from other surfaces as well. In nature, this phenomenon is most obvious when light reflects off surface with smooth textures – such as sand, snow, salt, or mud. I took the image below just before sunrise at Mesquite Dunes in Death Valley National Park. Notice that the sand is reflecting the rich red and orange light from the clouds. Clouds and humidity will influence the color and intensity of the reflected light.
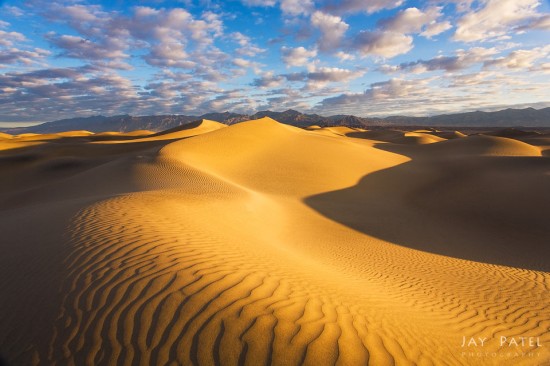
After the sun comes up, the color of the light usually becomes more golden. I took the next shot on another morning – this time, just after sunrise. On this particular day scattered clouds allowed the sunlight to come through and paint the dunes with an intense warm light.
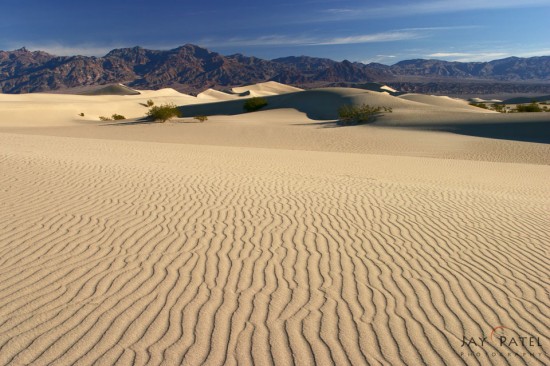
I took the photograph below at mid-day under blue skies. As you might expect, the dunes in this image are reflecting the white midday light. The scene looks very different at noon than it does during the golden hour.
In many cases, your camera’s automatic settings will try to “correct” these natural color casts. Camera algorithms are set to determine a neutral base point, and to adjust the other colors accordingly. You can get past this annoying problem by paying attention to colors when you are shooting – and setting your color balance manually. Those color casts are real and beautiful! Don’t let your camera (or automatic settings in your processing software) make decisions about color balance for you!
As you can see, the art of taking photos in vibrant colors first starts in the field. And knowing what factors impact the color in the field can help you come away with brilliantly-colored photos.
This is exactly the type of information in our Vibrant Colors landscape photography tutorials. Our Vibrant Colors eBook gives you a first-hand look at how to capture great travel and landscape photos in any conditions.







I. AM. IN. LOVE.
your work is stunning! i just discovered you today. as a wannabe with pretensions and delusions of entering the world of photography, color has become an important issue for me: i always wondered about adjusting color. why did the artist make the sky bluer, less blue, the trees greener, brighter, darker? i know i’ve seen the sky with x shade of blue, so isn’t that natural?
you explanation here is wonderful! and the results you show with the two pictures beautifully illustrates the decisions, all while allowing for artistic manipulation as well!
thank you for sharing your beautiful images, and especially thank you for sharing your time and wisdom! i am profoundly grateful!
keith
I’m glad you found the article helpful, Keith. :) You are more than welcome.
Hello,
I read this article. It answer my question on your fantastic colors in landscape pictures.
I will try it this advices
thanks
So glad it was helpful, Michel! Good luck with your photography!
Very well done Jay and Varina! That’s why I like your work so much (and personally, too – ha). You go straight to the point giving useful information and examples. You both have very good teaching skills besides the creative and technical ones.
Thanks Isabell!!
I do many art shows and this question is always asked. My answer is: “of course I make adjustments. The digital camera does not capture exactly what I experienced when I shot this photograph. I use the different software programs to bring those photographs back to the reality I experienced.” Now granted, I don’t tend to create colors that don’t exist and I don’t over-saturate so this response sits well with my viewers.
Well said, Christine. I think honesty is the key. If you are truthful, people usually respect your choice as an artist… even if they don’t understand why you need software to produce more realistic results.