Why I use Creative Post-Processing for Nature Photography
Have you been accused of cheating when posting images on social media? Has the phrase “has that been Photoshopped” been aimed at you? I know how it feels. Image editing is somehow seen by many as some sort of invalidation of the work you put into creating the photo in the first place.
But I have a question I think you should ask yourself when someone accuses you of “cheating”: Is photography a form of art or not?
The answer is always “Yes!” It’s your art, your expression of emotions, your efforts to create something uniquely yours.
What is Creative Post-Processing?
Creative post-processing in nature photography falls into two broad categories. The first category involves manipulating a nature photo to the point where it looks like a work of art. In this case, the photographer is not making any claims about the photo resembling reality. Instead, the photographer is providing their own artistic interpretation of the scene. As an example, I often use plug-ins to add a variety of artistic effects to my nature photos.
The second category is where creative post-processing is done to clearly enhance the look and feel of the nature photo. The adjustment in this case may include blending multiple photos, adding special effects like the Orton Effect, adjusting color balance, and more. Oftentimes it is hard to tell if the final results of a photo includes creative processing.
Let’s explore both of these categories in a bit more detail.
Adding Artistic Effect to Nature Photography
I started drawing and painting with acrylics about two years ago. I’ve really enjoyed the learning process and the way it made me slow down and concentrate on the details. When I posted images of my work to social media, I noticed something in particular that is different than when I’ve posted my photos in the past. I was NEVER questioned if I “replaced a sky”. No one EVER said “Were those clouds really there?” or “Are those colors accurate?” The same thing occurred with my drawings. No questions other than “How did you do that?”.
If photography is an art form, then the artist should have the flexibility to do whatever he/she thinks is necessary to bring their vision to life.
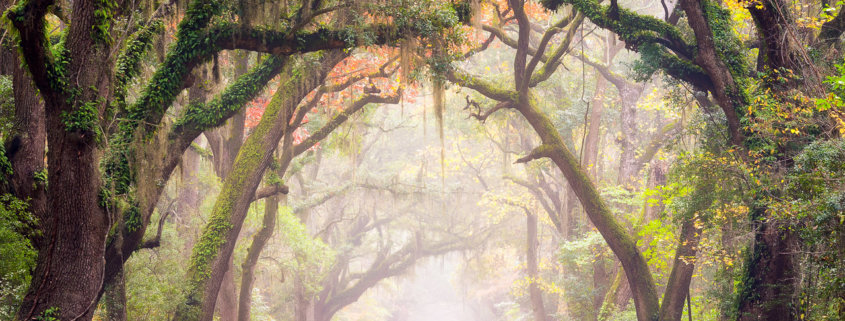
The image above is not one of these paintings. It’s a photograph. I used the Topaz Impression plug-in to create a painterly look. This is what I felt the image deserved and I love the result. Why should it matter what tools I used to create it?
Creative Post-Processing to Enhance Nature Photography
The following is an example of manipulation in post-processing in order to make the image even more true to what I saw in the field. Confused? Let me explain.
This image with the lighthouse is a combination of THREE different photographs taken about 30 minutes apart. The first is the foreground, waves, and tree… basically most of the image. The second is the clouds. And the third is the lighthouse. They were all there but here’s how it went down.
I was taking image after image of approaching waves, waiting for the perfect combination of swirl in the foreground with a wave breaking in the middle. While time passed, so did the clouds. They left the scene by the time this particular wave happened. The two situations did not occur simultaneously but they did occur. I made the creative decision to put them together in the same image.
And I have a question for you. What happens when you’re shooting with a very wide angle lens and there’s a vertical object in the distance like this lighthouse? It tilts at an exaggerated angle and gets very small in the view. Is that reality? Is a tiny, tilted lighthouse what I saw when I was there? No! I zoomed to about 50mm which is approximately what the human eye sees. Then I took a separate photo because I knew this was going to be a problem. I wanted the lighthouse to look like it did when I was there, not a tiny speck in the background looking like it was falling off the earth.
Here are a few other photos on Visual Wilderness that used creative post-processing to achieve their natural look:
The Folaldafoss waterfall from Iceland was captured by using an aperture bracketing technique. After using several different apertures to capture different tonal ranges, Jay combined them using Photoshop Layers and Mask to create a natural looking image. Using aperture bracketing allowed him to maintain a natural flow of water by using a single shutter speed for all bracketing photos.
The second image of boiling mud from Myvatn, Iceland is a composite image Jay captured using two different focus points. Jay focused his telephoto lens where the large mud bubbles were exploding and captured the explosion using a very high shutter speed. He then manually adjusted the focus point to the left where the small mud bubbles were exploding and captured a small explosion.
Again, these images were combined using creative post-processing to create the final nature photography abstract that you see here.
Is that cheating? When you think about it, it’s less like cheating than what my wide angle lens was trying to do to my subject. My lens choice, my longer shutter speed, and my perspective were changing reality. Nobody seems to fuss about that.
What about ethical considerations when using creative post-processing to enhance your nature photos? Because I look at my nature photography as works of art, I am at ease in making a full disclosure about the creative post-processing I use. This helps me avoid making any unethical claims about using creative post-processing to enhance my nature photos.
Creative Post-Processing is a Personal Preference
When it comes to image editing, I ask myself only one question when I’m finished. Do I like it?
That’s all that should matter. The only time I worry about the amount of editing or “pushing” of an image is if I am submitting it to some sort of contest where there are specific rules about the types of changes you are permitted to do. Other than that, the only person I need to make happy about my work is me. Some will like it, some will not. It’s personal taste. I like Monet… but I’m not fond of Picasso… personal taste.
In the following image from Zion National Park, I blended multiple exposures because I felt that it made for a better image overall.
I added a Skylight Filter in Color Efex Pro 2 to this image on the Blue Ridge Parkway because I liked the magenta affect that I did not see in real life. Guess what? I did it because it’s my art, my creation, and I like it that way. Another photographer may take this same image and change it dramatically. Everyone sees the world differently. You should make your art your own.
Never stop learning and experimenting with photography!


