Mastering the Telephoto Lens for Landscape Photography
When most photographers think of landscape photography, the first lens that comes to mind is a wide-angle. After all, wide-angle lenses allow us to capture sweeping vistas and dramatic foregrounds that pull viewers into the scene. But if you stop there, you’re missing out on one of the most powerful creative tools in your kit — the telephoto lens.
A telephoto lens (typically 70mm and beyond) allows you to isolate distant details, compress space, and uncover subtle patterns in nature that wide-angle lenses simply can’t reveal. While these lenses are more commonly associated with wildlife and sports photography, using a telephoto lens for nature photography can open up a world of creative possibilities — from intimate landscapes to abstract compositions.
However, mastering the telephoto lens isn’t easy. These lenses demand precision, patience, and a different way of seeing the world. The longer focal length magnifies not just your subject — but also your mistakes. So let’s start with the basics.
What is a Telephoto Lens?
Before diving into techniques, it helps to understand exactly what a telephoto lens is — and what makes it different from other lenses.
In simple terms, a telephoto lens is any lens with a long focal length that brings distant subjects closer. In photography, this typically means any lens with a focal length greater than 70mm. Common telephoto ranges include:
- Short telephoto lenses (70–135mm) — great for portraits, intimate landscapes, and isolating mid-distance subjects.
- Medium telephoto lenses (135–300mm) — excellent for compressing space and capturing distant details like mountain layers or wildlife in context.
- Super telephoto lenses (300mm and beyond) — ideal for wildlife, birds, and distant subjects where you can’t physically get closer.
A common misconception is that telephoto means zoom. In fact, “telephoto” refers to focal length, not whether the lens can zoom. You can have telephoto prime lenses (fixed focal length, such as 135mm or 200mm) or telephoto zoom lenses (variable focal length, such as 70–200mm or 100–400mm).
What makes telephoto lenses unique is how they compress perspective. Objects at different distances appear closer together, creating a layered, almost painterly look that you can’t achieve with wide angles. This compression is particularly useful in landscape photography, where you can isolate a glowing ridge, a stand of trees, or a distant peak bathed in soft light.
However, these creative advantages come with technical challenges. Longer lenses magnify every tiny movement, reduce depth of field, and make precise composition more difficult. Let’s explore how to overcome those obstacles and master the telephoto lens for nature photography.
The following are a few of the challenged that you may face when using telephoto lenses and some tips on how to overcome them:
Understanding the Challenges of Telephoto Lenses
Before diving into specific tips, it’s important to understand what makes landscape photography with a telephoto lens challenging.
- The long focal length magnifies every tiny vibration, making camera shake a serious issue.
- Depth of field becomes much shallower, complicating focus and composition.
- Subject motion, especially in windy conditions or moving wildlife, can ruin sharpness.
- Small shifts in lens position drastically alter your framing — a blessing and a curse for composition.
These factors mean you can’t just treat your telephoto lens like a long version of your wide-angle. You need a thoughtful workflow tailored to the lens’s strengths and limitations.
Getting Sharp Focus with a Telephoto Lens
One of the most common frustrations for beginners is soft images. With telephoto lenses, getting sharp focus is an art form.
The combination of long focal length and shallow depth of field means that even the slightest focus error becomes noticeable. Start by setting your focus mode deliberately:
- For static landscapes, use single-point autofocus or manual focus for precise control.
- For moving subjects, such as wildlife or waves, switch to continuous focus (AI Servo/AF-C) and track your subject using a single focus point.
Choosing the right aperture also matters. Many photographers mistakenly stop down too far, thinking f/22 guarantees sharpness throughout. In reality, diffraction softens your image at small apertures. Instead, use mid-range values like f/8 to f/11 and rely on focus stacking for depth.
Finally, make it a habit to zoom in on your camera’s LCD after each shot. Check critical details — branches, rocks, or animal eyes — to ensure tack-sharp focus before moving on.
Overcoming Camera Shake
Blurry photos are often caused by camera shake, especially at long focal lengths. The longer your lens, the more exaggerated even a tiny movement becomes.
If you’re handholding your camera, apply this general rule: use a shutter speed equal to or faster than the inverse of your focal length. For example, if you’re shooting with a 200mm lens, use a shutter speed of at least 1/200 second (and ideally faster).
That said, serious landscape photographers typically rely on a sturdy tripod when using telephoto lenses. Choose a tripod head strong enough to support your lens and camera combo — flimsy ball heads can cause composition drift over time, especially with heavier glass.
To further minimize vibrations:
- Use a remote shutter release or two-second timer.
- Turn off image stabilization when mounted on a tripod (unless your lens manual advises otherwise).
- Shield your setup from wind using your body or a hanging weight.
When done right, these small adjustments drastically improve image clarity.
Managing Subject Motion
Even if your camera is steady, your subject might not be. Telephoto lenses magnify subject motion, making it essential to adjust your settings based on the scene.
If you’re photographing wildlife, swaying grass, or ocean waves, you’ll need a fast shutter speed to freeze movement. For example:
- 1/1000 sec or faster for birds or waves.
- 1/500 sec for running animals or tree branches in the wind.
- 1/250 sec for static but slightly shifting scenes.
In Australia, I once used a 200mm lens and a 1/4000 sec shutter to freeze the motion of ocean spray, creating a crisp, abstract image that highlighted texture and energy.
Alternatively, you can embrace subject motion creatively. Slower shutter speeds (like 1/10 sec) can convey movement and flow, transforming a chaotic scene into a painterly blur — but this technique takes experimentation and steady hands.
Controlling Depth of Field
With telephoto lenses, depth of field (DOF) becomes razor-thin — even at moderate apertures. This can be frustrating if you want everything sharp from foreground to background, but it’s also an incredible creative advantage.
For intimate landscapes, embrace the shallow DOF to isolate your subject and simplify your background. For example, in Iceland, Jay used a telephopto lens with a wide aperture to capture a fishing puffin against a soft, minimalist background.
For grand landscapes, where sharpness from near to far matters, use techniques like:
- Hyperfocal focusing to maximize perceived depth.
- Focus stacking multiple images blended in post-processing.
- Checking focus at 100% zoom on your LCD to verify clarity across the frame.
There’s no single “correct” depth of field for telephoto work — it depends on your vision for the scene.
Perfecting Composition with a Telephoto Lens
Composition with telephoto lenses can be tricky — but it’s also one of their greatest strengths. While wide-angle lenses emphasize vast spaces, telephotos let you simplify and isolate your scene.
Small camera movements can cause big compositional changes. A slight tilt or shift might remove distractions or align key elements perfectly. That’s why it’s crucial to move slowly and compose intentionally.
Avoid “composition creep” — a gradual sagging of your framing due to tripod instability. This often happens with cheap ball heads that can’t support heavy lenses. Invest in sturdy gear and always double-check your framing after locking your setup.
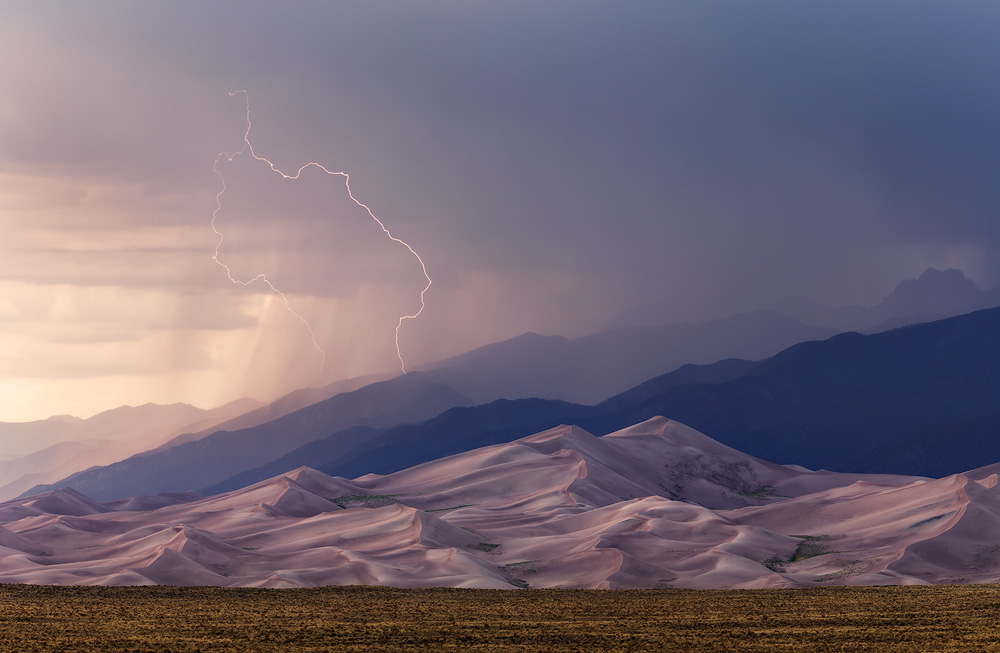
Telephoto lenses are perfect for layered landscapes, where you can compress distant hills, fog, or light beams into rich, graphical compositions. Try scanning distant ridges or valleys for repeating shapes and subtle tonal gradients.
Finally, you must think about which focusing options and camera settings work best for the landscape photo you are trying to capture. This requires a logical and creative landscape photography workflow as seen from the following example.
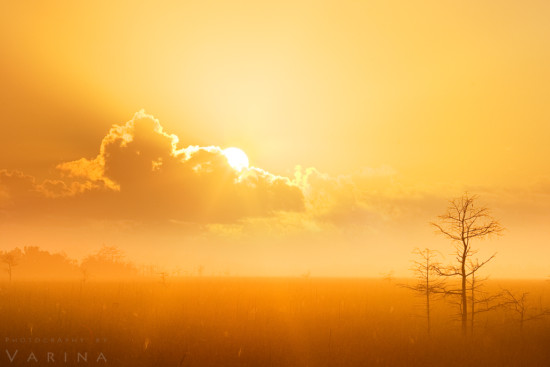
Sunrise in the Florida Everglades
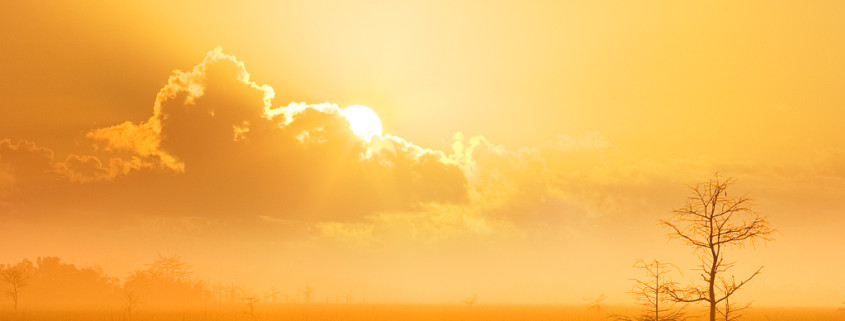
During one sunrise shoot in the Everglades National Park, I was captivated by the brilliant golden glow surrounding the rising sun. A wide-angle lens captured too much of the blue sky, diluting the color harmony I wanted. So, I switched to my 135mm telephoto prime.
The longer focal length allowed me to fill the frame with gold, isolating the sun and a small stand of dwarf cypress trees as secondary points of interest. The result was a simple, powerful composition that conveyed warmth and serenity.
The exposure was 1/640 sec — fast enough to handhold, but I used a tripod out of habit. Post-processing was minimal: subtle contrast adjustments and careful color balance to preserve the glowing light without oversaturation.
Capturing Action with a Telephoto Lens: Hawaii Waves
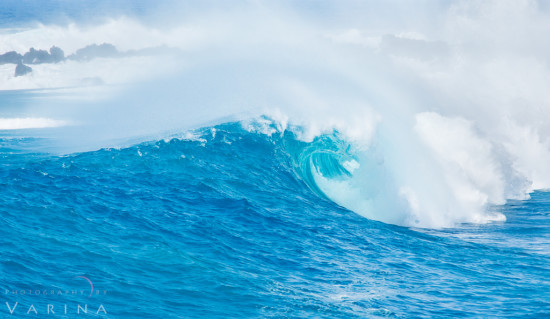
After one of our Hawaii workshops, we headed to the rugged coastlines of the Big Island. Huge turquoise waves crashed against the rocks — the perfect opportunity for telephoto action photography.
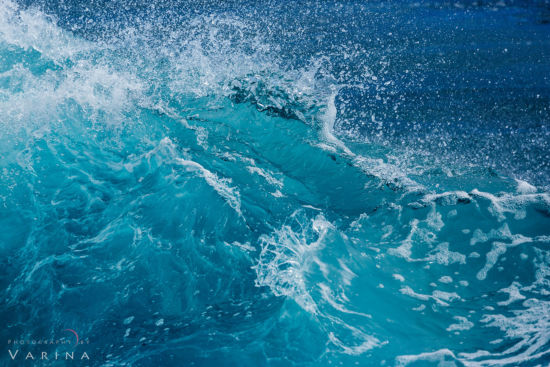
Abstract nature photography using focus tracking mode & fast shutter speed with a telephoto lens in Hawaii
Photographing fast moving waves with a telephoto lens requires a completely different workflow than shooting static landscape photos. Camera exposure and getting the waves in sharp focus requires a well thought-out strategy. You also must be fairly quick to compose your photo to capture the action when it is happening.
- Shoot at midday under clear skies:
While soft light is ideal for most nature photography, wave photography is an exception. Bright midday sunlight penetrates deep into the ocean, revealing vivid tropical colors and textures. Since light stays consistent for hours, you can lock in your exposure and focus on timing the perfect shot. Overcast skies can work too, but expect more muted colors in your telephoto wave photos. - Mind the direction of light:
Harsh sunlight creates glare and blown highlights on the water’s surface. To reduce reflections, change your shooting angle. Face the ocean, look left and right, and shoot in the direction where glare disappears. This simple adjustment helps you capture natural color and detail without a polarizer — a useful tip for telephoto lens ocean photography.
- Choose the right location:
If you want those dramatic “inside-the-barrel” perspectives, positioning is everything. Find cliffs or elevated spots where you can shoot along the length of the wave. On Hawaii’s Big Island, photographing from the cliffs of Miloli‘i allowed me to frame the curling waves as they rolled past, creating powerful compositions with a long lens.
- Use fast shutter speeds:
Waves move fast, and so should your shutter. A setting around 1/1000 sec or faster freezes the motion of crashing waves and flying spray. Midday light makes this easy, but you can open your aperture or raise ISO if needed. - Refine your focus settings:
Telephoto lenses have shallow depth of field, making accurate focus essential. Use continuous autofocus (AF-C or AI Servo) with a single focus point to track the crest of the wave as it approaches. This technique ensures your moving wave photos stay sharp and detailed.
By the way, if you’re going to shoot waves, you’d better bring along a few extra memory cards. The shifting seascape makes it difficult to pack up and leave, since the next wave is surely the one! ;)
Key Takeaways about using Telephoto Lens
- Stability is everything. Use a solid tripod and remote release to avoid camera shake.
- Mind your shutter speed. Go faster than your focal length when handholding.
- Check your focus often. Use single-point or tracking autofocus depending on your subject.
- Control your depth of field. Adjust aperture and focus distance deliberately.
- Compose with intention. Small movements make big differences at long focal lengths.
Final Thoughts
Mastering a telephoto lens for nature photography takes time, patience, and practice — but once you do, it opens up a new dimension of creativity. You’ll start seeing the landscape not as a single grand vista, but as a series of intimate stories waiting to be told.
The telephoto lens teaches you to simplify, isolate, and look closer — to find beauty in the overlooked details of distant mountains, subtle light on the water, or the rhythm of waves crashing ashore.
So, the next time you head into the field, don’t leave your telephoto lens behind. Challenge yourself to see differently — and you just might capture your most striking image yet.

