7 Essential Fall Photography Tips to Capture Breathtaking Photos
Autumn is coming soon to a region near you! I loved the appearance of the first fall foliage – and the inevitable explosion of red and gold as the maples shift their hue. And for nature photographers this is an exciting time of the year. The rich, golden hues of fall foliage, the crisp air, and the softer sunlight provide a perfect canvas for capturing nature’s beauty before the long colorless winter sets it. Successful fall photography requires the right timing, proper skills, and keen observation of the elements around you.
Whether you’re an experienced photographer or just starting, this guide will help you make the most of autumn’s vibrant palette with seven essential tips for fall photography.
#1: Find the Right Light for Fall Photography
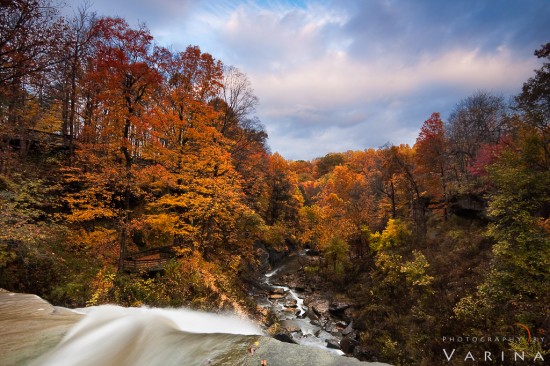
Lighting is key in any photography, and during autumn, it’s even more critical. The soft, golden light of early morning or late afternoon, also known as the golden hour, brings out the rich colors of the season. During this time, the low-angle sunlight casts longer shadows, creating a more dynamic range of tones that can elevate your images. Another trick that pros often use when photographing fall colors is to wait until everything you are photographing is in shade. This is how I captured the fall scene in Image #1 from Cuyahoga Valley National Park in Ohio.
Cloudy days are also ideal for fall photography, as the diffused light softens the landscape, emphasizing the natural warmth of the leaves without overexposing your shots. But controlling the camera exposure can be difficult even under overcast skies. Depending on your nature photography composition, you may have to use exposure bracketing to capture the entire dynamic range. Varina used exposure bracketing in Image #2 from the same location to capture this gorgeous fall scene. Avoid harsh midday light, which can wash out colors and create unflattering shadows.
#2: Look for Macro Photography Opportunities
Autumn is the perfect time to get up close and personal with nature. Don’t limit yourself to the broad landscapes; instead, explore the small wonders that often go unnoticed. Macro photography allows you to capture the intricate details of fall—dewdrops on a leaf, the textures of tree bark, or the veins of a leaf that’s changing color. Use a macro lens to bring out the fine details in your subject, and focus on elements like mushrooms, acorns, and even insects that make their appearance during the fall.
Look for interesting patterns and textures and pay close attention to your background. Use the negative space to create a sense of place and create a mood.
Varina captured this beautiful aspen leaf in Marble, Colorado with a macro photography lens using a diffuser to modify the light on a small subject.
#3: Use a Circular Polarizer Filter
To make the vibrant colors of fall pop, consider using a circular polarizer filter. This tool helps to reduce glare from reflective surfaces like wet leaves, streams, or lakes, which can otherwise distract from your subject. A polarizer also enhances contrast, saturating the reds, oranges, and yellows in the foliage, giving your images a deeper, more vivid look. Additionally, this filter bring out rich colors in the sky and create dramatic complementary colors between warm fall foliage and blue skies.
In this fall photo from Snowmass Wilderness, I used a circular polarizer to cut glare on the tree trunks and bring out the rich blue colors of the sky.
#4: Use Reflections for Fall Photography
Fall offers ample opportunities to play with reflections. Lakes, rivers, and puddles can serve as natural mirrors, doubling the effect of vibrant fall colors. Position yourself to capture the reflection of trees or skies in the water for a more immersive and symmetrical image. If the water is still, you’ll create a mirror-like reflection, adding depth and interest to your composition. This technique works exceptionally well during calm, early morning shoots, when the wind is minimal, and the water surface is smooth.
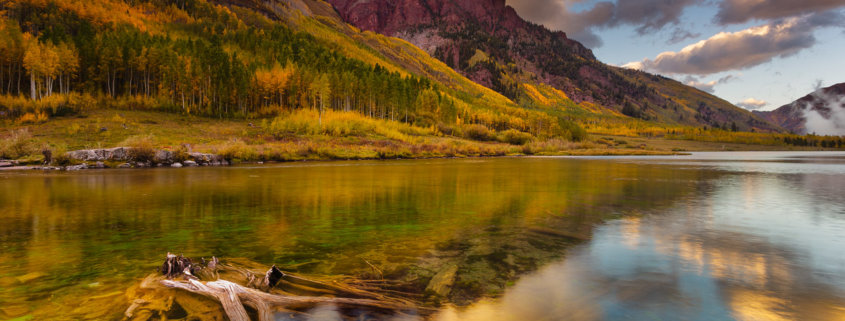
In this photograph, Jay used the calm waters of Maroon Lake in Colorado to capture the reflection of the fall colors on the mountains. Jay chose not to use his circular polarizer filter because it would have minimized the reflections of the mountains and clouds.
#5: Set Your Camera Exposure Correctly
When photographing fall scenes, it’s easy to overexpose or underexpose different parts of you your images. Be mindful of your exposure settings to ensure you capture the full range of tones. Use your histogram to check for blown-out highlights, particularly when shooting sunlit leaves or bright skies. If the highlights are overexposed, consider bracketing your shots—taking multiple exposures at different settings—to blend later in post-processing or to choose the best exposure. You can also use exposure compensation to slightly underexpose, preserving the details in the bright areas.
I took this fall photo in the Grand Staircase of Escalante. We arrived just before sunset and Varina used a wide angle lens to capture the color in the sky before it faded. I had to use exposure bracketing for this autumn photo in order to capture the entire dynamic range and then I used Photoshop layers and masks to manually blend different exposures.
#6: Create In-Camera Effects with Motion and Blur
To add a creative twist to your autumn photos, experiment with motion and blur effects. One method is intentional camera movement (ICM), where you move the camera during a long exposure to create abstract, painterly streaks of color. Another technique is subject motion blur, where you keep the camera still but let the subject (like falling leaves or moving water) blur through the frame. These effects can give your images a dynamic feel, evoking the sense of movement in nature and adding artistic flair to your work.
Intentional Camera Movement
This technique involves moving the camera while the shutter remains open. Rather then creating a tac sharp image, the resulting image will be a blurry fine art abstract similar to the photo Varina captured in Marble Colorado.
If you are shooting during the day, you may need a neutral density filter (ND filter) to slow down the shutter speed during the in-camera motion. You may find that in-camera motion requires experimentation (such as varying the direction and speed) to get the desired results.
Subject Motion Blur
In this creative fall photography technique, you can use wind or water to create motion blur in the fall foliage you are trying to capture. You may need an ND filter to create the long exposures that are necessary to capture the motion blur with the moving subject.
In the image above from New Mexico, Varina used a long exposure to capture blurry fall photos on a windy day. She wanted to capture the beauty of the landscape as high winds and heavy clouds announced a coming storm in New Mexico. She was drawn by the rich orange colors and the complimentary deep blue/grey of the sky.
#7: Pay Attention to Your Post Processing
Even after you’ve captured stunning fall photos, your work isn’t done! Post-processing is a crucial step in bringing out the best in your images. Adjust the saturation and contrast to emphasize the warm autumn tones, but be careful not to overdo it—subtlety is key to keeping the image looking natural. Consider tweaking highlights and shadows to balance exposure, white balance, color saturation to enhance depth & vibrancy. If your photo has distracting elements, cropping or cloning out small imperfections can make a big difference. Programs like Lightroom or Photoshop can help fine-tune the final touches to create a polished, professional look.
In the photo above from New Mexico, Varina used exposure bracketing guided by her histogram readings to manage the dynamic range challenges common in fall photography. In addition to this, white balance proved to be tricky. Since Varina used a wide-angle lens, the lighting varied significantly across different areas of the scene. The foreground required one white balance setting, while the sky needed a completely different adjustment to achieve a balanced look.
In Image #2 above, the foreground colors are perfect, but the sky appears unnaturally white. This happens because the light’s white balance in the sky differs from that on the ground. When Varina adjusted the white balance for the fall foliage, the sky looked off. In Image #3, she adjusted the white balance in the RAW converter until the sky looked correct, even though this distorted the colors of the foliage. She then blended the two versions using Photoshop layers and masks, combining the best of both to achieve the final balanced result.
Do Your Research
In many regions, the fall photography season is brief, making it crucial to be in the right place at the right time. A quick Google search can help you find numerous websites that track fall foliage in real-time for your destination. Be sure to do your research ahead of time to maximize your chances of capturing the vibrant autumn colors at their peak.
Fall photography is all about capturing the fleeting beauty of the season. From understanding the light to experimenting with motion and blur, these seven tips can help you make the most of autumn’s unique opportunities. So grab your camera, head outside, and start exploring the magic that unfolds with every falling leaf! Happy shooting!


