Fall Photography – 6 Tips for Capturing Color This Season
Fall photography is my favorite time of year. First, being out in nature during the fall just feels good. The grasses are turning from green to golden. Small shrubs, willows, and even a few aspen trees are showing hints of yellow.
The pungent scent of decaying leaves that marks the transition from summer to fall. For fall photography, all of these changes offer a magical but short window of time to capture nature’s most brilliant colors. In this post, I will share six tips to help make the most of your time in the field during this special time of year.

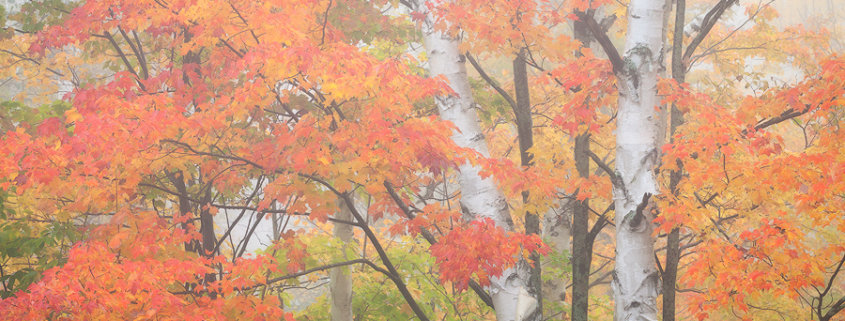
In this photo, some of the trees are still green which adds some color contrast and interest to this fall scene. You do not need “peak fall color” to create an interesting photograph.
#1: Don’t Limit Yourself to “Peak” Fall Color
If you ask ten photographers to define what peak fall color looks like in a particular area, you are likely to get a wide variety of answers. A few years ago, for example, we were photographing fall colors in Vermont and overheard a local say that we missed peak color, since the trees looked so much better the previous week. This comment seemed strange to us since quite a few trees were still green and for the trees that had changed color. Most still had their leaves. To us, it seemed like we were a bit early, which was perfect because the trees offered a vibrant mix of greens, yellows, reds, and even some purples.
Limiting your fall photography to the few days of “peak” color means that you could be missing all kinds of opportunities to create photographs on the edges of the season. Successful fall photography images can be made as the leaves start to transition, when most trees have changed and still have their leaves, and after trees have shed their leaves. So, if you get to a place when other define the colors as too early or too late, don’t be disappointed. Opportunities can still abound if you approach your subjects with an open mind.

I took this photo on a clear day. A cloud-filled sky could have overwhelmed the scene with too much color whereas the blue sky helps simplify the fall photography scene.
#2: Think Beyond Sunrise and Sunset
In preparing this post, I looked through all of the my fall color photographs and very few of them include a colorful sky. For my photography, I sometimes think that orange and pink clouds can be too colorful when paired with an already colorful autumn scene. Thus, I always try to seek out a variety of weather and cloud conditions when photographing fall colors. This means that in addition to photographing at sunrise and sunset, I also like to photograph at twilight, during stormy weather (my favorite!), or even under clear blue skies. Thinking beyond sunrise and sunset provides the opportunity to add diversity to a fall colors portfolio.
#3: Experiment with Different Kinds of Light
Fall photography offers a lot of opportunities for experimenting with differing kinds of lighting. The landscape photos in this post show the range of opportunities a photographer can encounter in the fall: even lighting over a scene (minimizing highlights and shadows), bright diffused light (foggy conditions under bright sunlight), backlighting (when photographing towards the sun), and creating my own even light over small scenes. Autumn leaves will look different under each of these scenarios. For example, with a backlit scene, the leaves will look bright, vibrant, and somewhat translucent. With more even lighting, leaves will take on a more muted appearance. Thus, you can experiment with different lighting scenarios to infuse your photographs with a range of moods and possibly tell a more well-rounded story of the places you visit.

Fall Photography Tip: A long telephoto lens helped me isolate this beautiful section of trees on a far-away hillside.
#4: Look for Opportunities to Use Your Full Range of Lenses
With fall photography, you will have the opportunity to use every lens in your kit. By using a wide range of focal lengths, you will be able to photograph a more diverse range of scenes and tell a more complete story of the places you visit.
For the nature photos in this post, I have used focal lengths ranging from 16mm to almost 300mm (and no matter how long of a lens I have with me, I always want more reach). A wide-angle lens will help you take in an expansive scene. A macro lens will help you get close to the delicate leaves on small plants (and a lot of other interesting subjects!) and a telephoto lens will help you isolate details or photograph a far-away scene. On a typical day of photographing fall colors, I will use every lens in my backpack (my kit currently includes a full frame camera, a 16-35mm wide angle lens, a 24-105mm mid-range lens, a 100mm macro for photographing tiny autumn scenes, and a telephoto lens with a reach of up to 300mm).

These leaves were slightly damp when I photographed them. A circular polarizer helped remove the glare and deepen the colors.
#5: Bring Along Helpful Photography Equipment
In addition to your normal kit (camera, lenses, and a sturdy tripod), a few small pieces of gear can make a big difference in fall photography. I always make sure to have these items with me for a fall colors trip:
- Circular polarizer: A circular polarizer filter can help remove glare and enhance colors when photographing foliage. I always have this photography filter with me and use it a lot in the fall. You can rotate the filter to see how much of the effect works for your scene.
- Remote release: Wind can be a constant companion in some fall colors locations. A remote release can help you time your camera exposure for lulls in the wind. Thus increasing your chances of getting a sharp photograph. Compared to your camera’s self timer, a remote release gives you more precise control over timing and keeps you from having to touch the shutter release on your camera.
- Lens hood and something to shade your lens: If you are photographing a back-lit scene and are facing into the sun, using a lens hood (and sometimes, something to provide more shade for your lens) can reduce the chance of flare. In addition to my lens hoods, I stuff a foam cushion in my pack which doubles as a knee pad and a lens shade.
- 5-in-1 reflector/diffuser (a collapsible round disc that includes a white diffuser plus reflectors of different colors): This handy piece of gear helps create shade over a small area, which can be helpful for photographing tiny scenes. Although I didn’t need it for the scene above since I took the photo on a cloudy day, this item can create instant shade and even light.
- A way to keep my camera dry. Fall can sometimes bring rain and snow and both weather conditions can create interesting opportunities for fall photography (like showing the change of seasons with snow on colorful trees, example above). Thus, I always bring a clear shower cap to cover my camera along with a microfiber towel that I can use to cover my camera and lens in light rain or snow. (Note: never photograph in wet conditions unless you have a weather-sealed camera and a solid insurance policy that covers water damage.)

I always try to look down when hiking because scenes at your feet can often make interesting images for fall photography. Here, aspen leaves surround fallen pine cones in Califonia’s Eastern Sierra.
#6: Embrace Experimentation and Creativity
Photographing fall colors provides all kinds of opportunities for experimentation and expanding your creativity. If you are at an iconic location this fall, like Maroon Bells in Colorado or Oxbow Bend in Grand Teton National Park, take the photo you came for but also consider all of the other opportunities that surround you – alternative views of grand landscapes, abstract renditions of natural subjects, and creative portraits of plants and trees. Consider experimenting with abstractions like photographing moving leaves or reflections. Slow down, wander around, and explore the small scenes at your feet. Experiment with shallow depth of field or intentional camera movement to expand your portfolio of fall photos.


This is a really helpful article and I love your inspirational pictures. Thanks so much!