How to use Range Masks in Lightroom
One of the biggest challenges that you as a landscape photographer will face is you inability to control light in nature. This is particularly true if you are shooting with a wide angle lens in difficult terrain with an uneven horizon. In situation like these we use exposure bracketing to capture the entire dynamic range of light and then use post processing tools to produce final results. In the past pro landscape photographers relied on Photoshop Layers & Mask to create a stunning natural looking high dynamic range photos. However you can use range masks in Lightroom to produce similar results.
What are Range Masks in Lightroom?
Lightroom always gave landscape photographers and ability to create local adjustments using Brushes, Graduated and Radial Filters. However this ability lacked the precision found in Photoshop. With graduated and radial filters your adjustment are limited to geometric shape defined by filters. With brushes your adjustments are very imprecise because you have limited ability to control where the brush adjustment are applied. Range masks in Lightroom solved both these problems by limited the local adjustment using either by either luminance or colors. You can apply range masks to the Graduated Filter, Radial Filter, and Adjustment Brush tools of the Develop Module is that Lightroom. This is almost as powerful as using layers and masks in Photoshop, with the ability to create something akin to luminosity masks, all without leaving Lightroom.
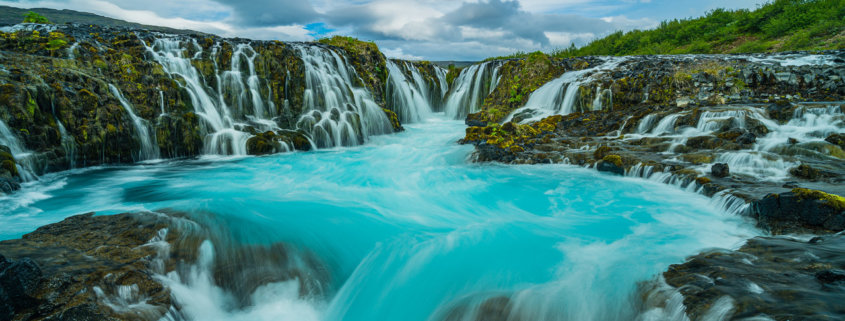
The new range mask control is perfectly suited for landscape photos where you want to selectively edit the sky without affecting objects protruding from the horizon. It also makes it easy to make precise adjustments to complex areas, like the foliage of trees or uneven shaped mountains. Here are few landscape photos on Visual Wilderness created using range Masks in Lightroom.
In short range masks in Lightroom as potential to take your landscape photography to an entire different level. Here just some of the reasons why you should be using range masks in Lightroom in your own workflow:
Why use Range Masks for Landscape Photography?
Balancing Light
One of the biggest challenges with landscape photography with a wide angle lens is to be able to deal with extreme dynamic range. If you are photographing at golden hours your foreground is often underexposed and the sky may be over exposed. This is where the Lightroom range masks tool comes in super handy. For instance, you may want to brighten up the shadows in one specific area of your foreground, but keep the shadow levels unchanged across the remainder of your image. With the luminance or color range mask, depending on the scene, you can make a highly-refined local adjustment to target just one part of the foreground in your landscape photos while leaving the remainder of your image untouched. Similarly you can selectively adjust highlights in the sky to recreate the stunning light you captured.
Color Correction
Color correction or color grading is an ongoing challenge for landscape photographers who are working with a wide angle lens. White balance in an area that is in deep shade may be different from the areas that are lit by full sun. You can use range mask to select the areas that need color correction with high degree of precision. This will allow you fine tune the white balance of your landscape photos to match the scene you were trying to capture.
You can also use range masks in Lightroom to selectively adjust color saturation to different parts of your image. In other words range masks in Lightroom gives you the ultimate control of adjusting colors in your landscape photos.
Bringing out the Details
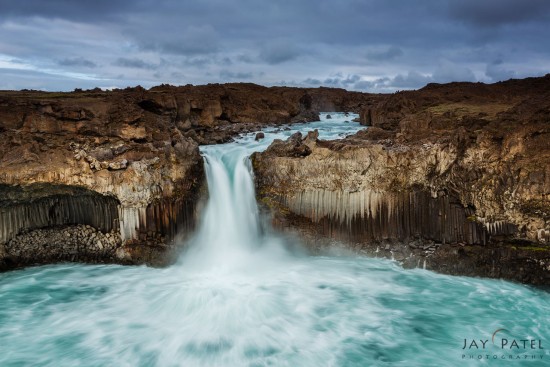
Variation in light in landscape photography can also lead to loss of details. I am not talking about the loss of details that occur due to blown out highlights or clipped shadows. I am referring to loss of textures in a landscape photo. One of the most common situations a photographer faces is when loss of details in flowing when photographing waterfalls. Range masks in Lightroom can be used to make specific adjustments to the highlights in the waterfall.
Range masks in Lightroom were used to bring out the incredible details that you see in the Aldeyjarfoss in Iceland. You can also use range Masks to selectively enhance textures and sharpen small details in your landscape photo.
Now that I’ve seen how powerful it is, I am going to use it much more often and, to make life easier for you, I’ve created a little video tutorial on how to exploit this tool.
How to use Range Masks in Lightroom
Range masks workflow in Lightroom starts with using filters or brushes. Once you have selected a region where you want to make adjustments with a filter or a brush you can then fine tune this area using luminance or color range masks. This will allow your target your adjustment precisely in your landscape photo. Here a short video using a real life case studies from Italian Dolomites used in our Range Masks in Lightroom for Landscape Photography Tutorial.
As you can see from the above video range Masks in Lightroom can bring out the details, contrast and colors in every part of the image. They work in conjunction with the filters and brushes in the Lightroom and allow you to make precise adjustments exactly where they are needed.
So now that you have seen the power of range Masks in Lightroom the only question is Have you used range Masks in Lightroom for landscape photography? If not you are missing out on one of the most powerful tools to take your landscape photography to the next level.


