Black and White Long Exposure Landscape Photography for Beginners
Black and white long exposure landscape photography is one of the most rewarding ways to slow down, observe the landscape more carefully, and create images that feel timeless and intentional. By removing color and extending time through long exposures, photographers are encouraged to focus on the true building blocks of a compelling image: light, shadow, shape, texture, and emotion.
For beginners, this genre can feel intimidating at first. Long exposures require patience, careful technique, and a deeper understanding of composition. However, when approached with the right mindset and tools, black and white long exposure photography becomes less about technical complexity and more about learning how to see the landscape differently.
This guide brings together essential principles of black and white vision, ND filter use, and long exposure fieldwork into a single, cohesive introduction designed specifically for photographers just starting out.
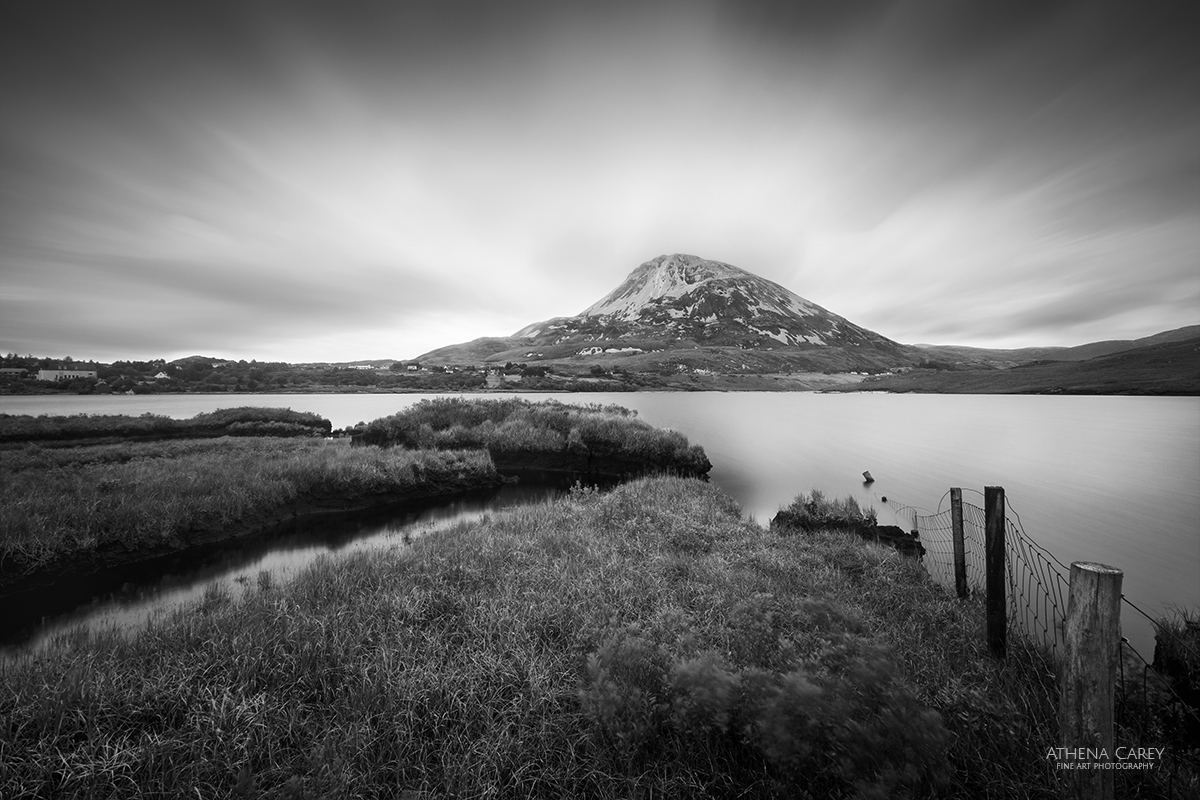
Donegal, Ireland – F11, 80 seconds, ISO 80
Why Black and White Works So Well for Long Exposure Landscapes
Black and white landscape photography is not simply about removing color—it is about revealing structure and mood. Color often carries emotional weight on its own, but it can also distract from the essential elements of a scene. When color is removed, the photographer must rely entirely on tonal relationships and composition.
Long exposure amplifies this effect. Moving water, clouds, fog, or grasses become simplified shapes rather than literal representations. Static elements like rocks, trees, and cliffs anchor the image, creating a visual contrast between stillness and motion.
Black and white photography trains photographers to:
- Recognize directional light
- Identify tonal separation
- Simplify scenes
- Create stronger compositions rooted in shape and form
Long exposure naturally complements this way of seeing by reducing visual clutter and allowing time to become part of the composition.

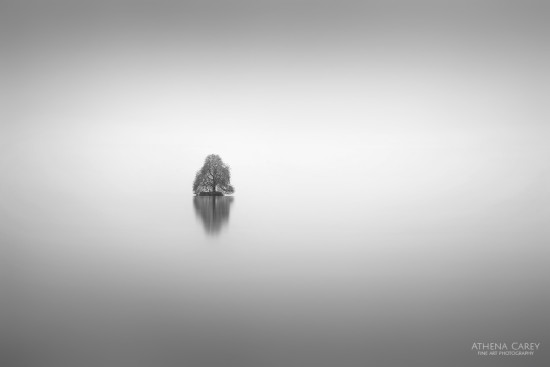
Black and White Photography at Lake Geneva by Athena Carey
Learning to See in Black and White
Before pressing the shutter, it’s important to think in monochrome. Strong black and white images are made before the camera is ever set on a tripod.
When evaluating a scene, ask:
- Where are the brightest highlights?
- Where are the deepest shadows?
- Are there clear midtones connecting the two?
- Do shapes stand out clearly without color?
Scenes with flat, overcast light can be excellent for black and white long exposure photography, especially when texture is present. Diffuse light reduces harsh contrast while still allowing subtle tonal variations to emerge.
Mist, fog, moving water, and clouds are particularly effective elements because they simplify the scene while adding atmosphere.
Essential Equipment for Black and White Long Exposure Photography
A Solid Tripod
A sturdy tripod is non-negotiable. Long exposures magnify even the smallest vibrations, and stability is critical. This is especially important in windy conditions, near water, or on uneven terrain.
Camera and Lens
Any DSLR or mirrorless camera that allows full manual control is suitable. Wide-angle lenses are commonly used, but focal length should always support composition rather than habit. In many cases, isolating a smaller section of the landscape produces a stronger black and white image.

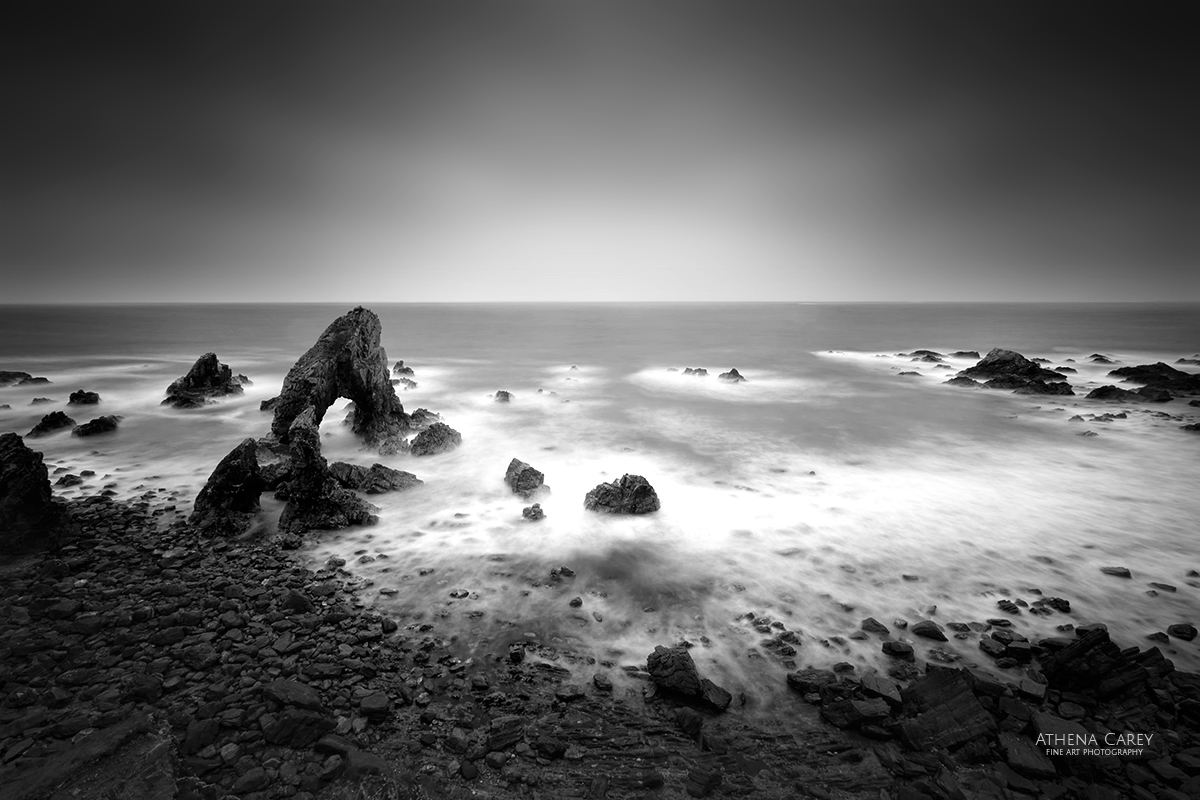
Long exposure Black & White landscape photography with an ND filter – Lough Neagh, County Antrim, Northern Ireland
Neutral Density (ND) Filters
ND filters are central to long exposure photography. They reduce the amount of light entering the lens, allowing slower shutter speeds even in bright conditions.
Common ND filter strengths include:
- 3-stop ND for subtle motion blur
- 6-stop ND for longer exposures in moderate light
- 10-stop ND for dramatic long exposures during daylight
- Extreme ND filters for multi-minute exposures
Rather than relying on a single filter, carrying multiple strengths provides creative flexibility and control.
Graduated ND Filters
Graduated ND filters help balance exposure between bright skies and darker foregrounds. They are most effective when the transition between light and dark areas is relatively clean and predictable.
Polarizing Filters
A polarizer reduces glare and enhances tonal separation. In black and white photography, this often results in darker skies, increased contrast, and more defined textures.

Canon 5Dmk3 | EF 17-40L | F22, 8 seconds, ISO100
Camera Settings for Long Exposure Black and White Landscapes
While exact settings vary by scene, a thoughtful approach remains consistent:
- ISO: Use the lowest native ISO to maintain tonal quality and minimize noise
- Aperture: Choose an aperture that balances sharpness and depth of field, often between f/8 and f/11
- Shutter Speed: Adjust based on the desired amount of motion blur and available light
Long exposure photography benefits from patience. Test exposures, histogram checks, and small adjustments are all part of the process.
Composition Principles for Black and White Long Exposure Photography
Simplification Is Key
Long exposures naturally simplify scenes by blurring motion, but composition must also be simplified intentionally. Removing unnecessary elements strengthens visual clarity and impact.
Balance Motion and Stillness
Effective long exposure images often rely on contrast between moving and static elements. Rocks against flowing water, cliffs against drifting clouds, or trees against mist create visual anchors.
Use Foreground with Purpose
Foreground elements should guide the viewer into the image rather than dominate it. Texture, shape, and tonal contrast are more important than color contrast.
Pay Attention to Tonal Flow
In monochrome images, the viewer’s eye naturally moves toward areas of contrast. Composition should guide this movement intentionally through the frame.
Donegal, Ireland – F11, 121 seconds, ISO 100
Field Workflow: A Practical Approach
- Slow Down and Observe
Walk through the scene before setting up. Watch how light and motion interact over time. - Compose First
Establish composition before adding filters. Filters should support the image, not dictate it. - Focus Carefully
Set focus, then switch to manual focus to prevent changes once filters are attached. - Add Filters Thoughtfully
Choose ND strength based on creative intent rather than maximum blur. - Test and Refine
Review histograms and refine exposure times incrementally. - Wait for the Right Moment
Subtle changes in clouds, waves, or light can significantly affect the final image.
Common Beginner Mistakes
Overusing Long Exposure
Excessive motion blur can remove important details. Sometimes shorter exposures preserve texture and structure more effectively.
Ignoring Tonal Separation
Without color, elements with similar tones can merge visually. Look for natural contrast or adjust composition to create separation.
Relying Too Heavily on Post-Processing
Strong black and white images are created in the field. Editing enhances what already exists rather than fixing fundamental weaknesses.
Canon 5Dmk3 | EF 17-40L | F22, 8 seconds, ISO100
Editing Black and White Long Exposure Landscapes
Post-processing should reinforce the original vision of the image. Key considerations include:
- Establishing a balanced tonal range
- Preserving highlight and shadow detail
- Enhancing texture selectively
- Using dodging and burning to guide the viewer’s eye
Subtle adjustments are often more effective than heavy-handed edits.
Conclusion: A Slower, More Intentional Way to Photograph Landscapes
Black and white long exposure landscape photography encourages a more thoughtful and deliberate approach to image-making. By removing color and extending time, photographers gain a deeper understanding of light, form, and emotion within the landscape.
For beginners, this genre provides an excellent foundation for developing strong composition skills and creative awareness. With practice, patience, and careful observation, black and white long exposure photography becomes not just a technique, but a powerful way to express how a landscape feels, not just how it looks.
Without doubt, anyone who knows my work knows that I love an escape from reality, especially in the form of long-exposure black and whites created using ND Filters. But what you may not know (yet), is that I carry a lots of filters with me whenever I am out shooting landscapes. The reason is mainly that I like control. Ok… I love control – creative control.
Donegal, Ireland – F11, 80 seconds, ISO 80
Here is what I carry…
- ND filters: 1-, 2-, 3-, 4-, 5-, 6-, 10-, and 13-stop filters to manipulate shutter time.
- ND grads: 2- and 3-stop filters to darken skies and balance exposures.
- A large polarizer that I can use in front of my 100mm filters to reduce reflections and darken skies.
That is eleven filters in total. It’s a lot (!) and it contributes to the expense of my gear and the weight of my bag. In all honesty, I have tried to force myself to bring fewer filters, but I simply cannot comfortably do it because I know there are will be circumstances when I want each and every one of the filters in my filter case.
When most of us start out with long exposure photography, we likely do so with a 10-stop filter or perhaps a 6-stop filter and little else. It’s a good place to start to see if you like the genre and have the patience required for the work. But it’s also hugely limiting. You essentially are bound to the exposure times that those filters give you within the existing conditions, regardless of what it is you are capturing. Yes, you can adjust aperture or ISO to gain some control over your shutter speeds, but both of those adjustments come at the expense of either image quality or creative control.
Donegal, Ireland – F11, 121 seconds, ISO 100
After working with LE for awhile, you start to get a feeling for the speed of those elements that you want to blur in your long exposures. You begin to understand how long a shutter speed you need in order to blur clouds moving at this or that speed or how long it takes to get the wave lines you want across a sandy beach. You generally know ahead of time what you want your shutter speed to be. If you’re like me, you also know ahead of time what you want your aperture to be. And ISO needs to be low for image quality. So these become fixed in your creative recipe for this image and the only other variable you can control is… Yep. The ND filter(s) you choose.
Antrim, Northern Ireland – F11, 136 seconds, ISO 100
If I want to shoot at F11, ISO 100, and have a four minute shutter speed in order to completely blur the movement in the ocean and transform the clouds into streaks across the sky, the ambient light dictates how many stops of ND filter I need. Since I cannot control the movement of the water, the speed of the clouds, nor the ambient light, I must have ND filter options in order achieve all my creative desires for that shot. And so I do.
To be clear though, I am not suggesting you go out today and purchase 11 filters in order to create beautiful long exposures. I started out with one 10-stop round, screw-on filter. And I worked with that for quite a while before the filter addiction took me over. Even then I didn’t buy them all at once, but rather added them slowly across time, starting by adding a 3-stop filter and then a 1-stop filter.
So there you have it… the what and the why of the filters I carry in my camera bag. As for the brand, because I know you’ll ask… at the moment they are a combination of Lee filters and Formatt-Hitech Firecrest filters. My favorites are the Firecrest filters because they are extremely neutral (almost no color cast) and beautifully made.
About Author Athena
Athena Carey is a multi award winning fine art travel photographer specializing in long exposure and black and white photography. She is widely recognized for her ability to capture the emotional essence of place and time within her images. Aside from travel, another of Athena's great joys is teaching others the technical aspects of photography, how to find their own artistic vision; and then to harness the two together to express themselves through their photography. To this end, she teaches photo courses online and locally, and offers workshops globally.
Athena's work is published in various books, magazines and websites and has been printed and hung around the world in private homes and businesses. Traveling extensively in search of new experiences, she has lived on four continents, and currently resides in Switzerland. Her keen appreciation for the natural beauty of our planet drives her excitement about each new destination.


Comments are closed.