Learning to See for Black and White Photography
Years ago, I began my journey in photography solely in the black and white medium. Like many others, I studied the works of the great Ansel Adams, Edward Weston, Minor White, and other icons. There was something about the black and white photography, devoid of color, that I was certainly attracted to. There was also the magical captivation of watching your image slowly emerge in the developer. Like many others, I moved to color landscape photography, as this medium had become increasingly popular with a growing choice of color film palettes and printing techniques. Then the advent of digital imaging seemed to only increase the popularity and demand for color landscape photography.
However, I feel there is a growing resurgence of black and white popularity, particularly among those pursuing a fine art photography. That is not to say color landscape photos cannot qualify as fine art. One only need to consider Eliot Porter as an example. Nonetheless, there is something about a fine art black and white print, without the distraction of color, that has a timelessness about it. I’ve recently turned my attention back to this medium, where I feel more at home. To help those feeling a desire to explore this medium, I’m offering few tips to help this process along.
Learning to See in Black and White
Without a doubt, one challenge for those initially exploring black and white photography is seeing, or visualizing, what a scene would look like in black and white. In my view you must have an entirely different mindset when you shoot with black and white landscape photography in mind.
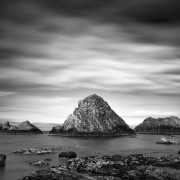
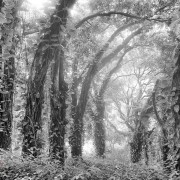
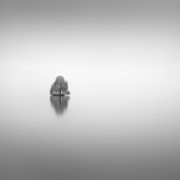
Some landscape photographers can shoot for both black and white and color at same time. I for one need to be focused to enable me to think and see in shades of gray. It’s a whole mindset to me. We see color images as somewhat a depiction of reality. In fact, in some color landscape photography, the color itself carries the image and is an important and even defining element. Black and white eliminates color and its distractions and allows one to focus more on graphic form, light, shadow, and texture.
With a little practice, learning to see in black and white becomes much easier. When composing your image, focus on small parts of the image and how lines, shadows, and texture interact. Focus on graphic forms. Forget color. In other words, learn to translate elements into geometric forms rather than their literal form, such as a mountain might be viewed as a triangular element. Examine how these elements interact in terms of light and shadow, tone and pattern.
Useful Photography Filters for Black & White
Color Filters
During my days shooting black and white film, I always had a photography filter pack which included red, yellow, green, and orange filters. Without getting too deep down the rabbit hole, just understand that a particular colored photography filter allows in more light its associated color and less light of its complimentary color. For example, I attach a yellow filter (the most common type) to darken a blue sky and help make clouds stand out. A red filter could also accomplish this but also add additional contrast, depending on other colors in the scene. A green filter lightens foliage. You soon learn what filters you want to apply based on colors in the scene and how you want to bring out contrast between elements. How is all of this relevant for black and white landscape photography in today’s digital world?
Well, the good news is that we no longer have to use these color photography filters because we can accomplish the same in the Lightroom or Photoshop. In fact, we can do so with greater nuance during the color conversion process. Suffice it to say that understanding how these color photography filters worked in the film days will help you when trying to visualize what you might expect during post processing.
Circular Polarizers Filter
For landscape photography in general (color or black and white) circular polarizering filters are an essential tool in your camera bag. When properly used they can increase the contrast between a blue sky and clouds.
When I say “properly used”, I mean being mindful of not dialing too much polarization when using wide angle lenses. With a wide angle lens you end up with an unnatural and uneven polarization effect. The wider the focal length, the greater the potential of this problem. Another great value of the a circular polarizer, which applies to both color and black and white, is its ability to remove some or all of reflections from water and foliage.
Neutral Density Filters
Neutral density (ND) filters reduce the intensity of all light. I use two types: graduated and solid. These come in various strengths and can have a number of uses. For example, when the sky is too bright in relation to the foreground, a graduated Neutral Density filter could help tone down the sky values. This would help create a more balanced camera exposure. On the other hand, a solid ND filter is often applied to cut down on the light to allow desired long exposure effects using a slow shutter speed. An example might be a smoother waterfall effect in sunny conditions.
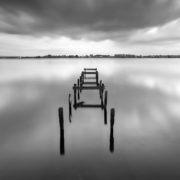
Special effect long exposure photography has also become popular. Solid ND filters are very useful here allowing for some rather creative results.
Viewing Filter for Black and White Photography
This filter can aid you in recognizing tonal relationships in your composition. It is basically a Wratten #90 filter that, when held to the eye, it temporarily removes the color bias and allows a better view for how tones of compositional elements compare. You can only hold one of these to your eye for about five seconds or so before your brain begins to compensate which diminishes the filter’s effectiveness. Still, it is a very useful tool and can help you develop you ability to see and think in black and white. I still have one from my 4×5 view camera days. Today, you can order one made by Tiffen for around $40.
Camera Settings
JPEG vs RAW
There are a couple of important considerations here. If you shoot solely in JPEG, you are likely very limited in your ability to explore creative post-processing options in Photoshop or Lightroom. This is because the camera already does the processing when creating the JPEG file, compressing and removing some information. Thus, all the lost data is not available for further processing. Shooting RAW allows for all the data to be available for post processing. Another option is to shoot RAW + JPEG, which may have some benefit as I point out in the following section.
Live View
If you turn you DSLR to monochrome mode (most cameras have this option), your live view display and images show as black and white. This helps you see the tonal relationships and facilitates your development of seeing and thinking about black and white photography. When you import the images into Lightroom, Photoshop or other software, they import as color as long as you shot in RAW. You then go through you conversion process. An advantage to shooting RAW + JPEG is that you can import the images to show the black and white JPEG image next to its corresponding color RAW file. This too can help you develop your ability to predict tonal value comparisons and select better subject matter for your black and white photography.
Along with camera settings and learning to see in black and white, you will have to rely on photography composition skills to create visual impact with your black and white landscape photos. Black and white landscape photography will dramatically increase your opportunity to come away with an awesome photo from locations you are photographing.


