Creative Photography to overcome Midday Blues – Part 1
Perfect light with the perfect subject is a desire of all photographers. But what about all of the times of the day when the light is not ideal… such as the times when you go on an outing with friends and they are not interested in getting up early for sunrise and need to be back home in time for dinner? Or how about the family vacations where photography is not the focus of anyone except you? There are also times when you plan a photography adventure, buy your plane tickets and set your travel plans, and get there only to find Mother Nature not cooperating. So, what are you to do with all the times when conditions are not ideal? Heaven forbid you leave your camera behind!
In this segment, I focus on midday light and how creative photography can help you to capture stunning images.
By watching the light from sunrise to sunset, you’ll notice that during sunrise and sunset, colors tend to be warm and calmly subdued. It’s beautiful light and, with the right amount of clouds, you can have an award-winning image. As the sun nears midday, the light gets cooler (more bluish) and more contrasted. Highlights and shadows can compete with your subject creating a busy and unappealing scene; it’s important to know how best to work within these conditions.
So… don’t put the camera away, just look for compositions and subject matter that are ideal during midday.
Create Shade
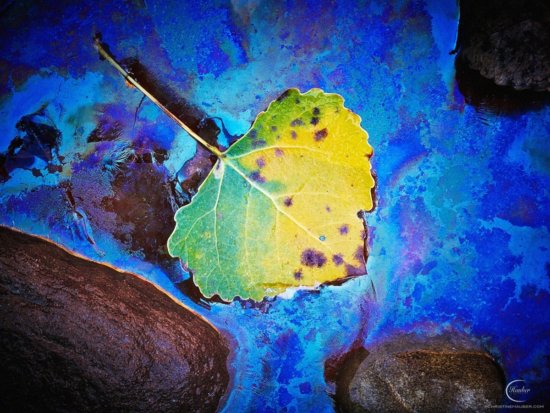
In this image I blocked the light from hitting the composition. The result is vibrant colors.
If the light is too bright, create shade over your subject. This works with objects in nature that you can get close to or can zoom into; it doesn’t work with large landscapes. (For large landscapes, just wait for a cloud to cover the sun; this diffuses the light.) By creating shade, the colors of the scene become more saturated and the contrast is diminished; this allows the eye to focus on the details of the subject. If you decide you like the look of these images, consider carrying a collapsible light scrim/reflector. I prefer the interchangeable panels so that I can either block light, reflect light, or diffuse light. When I don’t have my scrim, I use the shadow of my body to block the light.
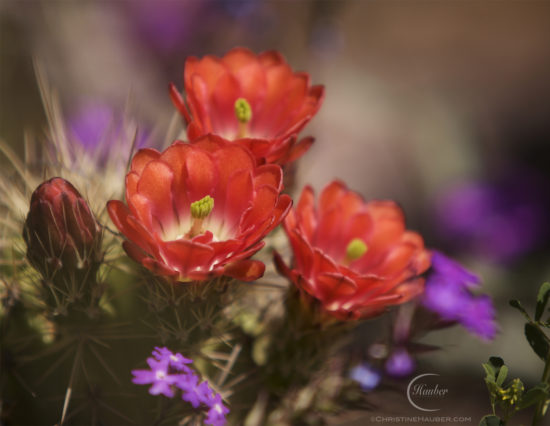
Not only did I diffuse the light hitting the red flowers, but I also opened-up the aperture so that the short depth of field blurred the contrasted light.
Exercise: Look for a closeup object and photograph it in direct sun. Photograph the same object in shade. Compare the two images.
Add a Sunburst
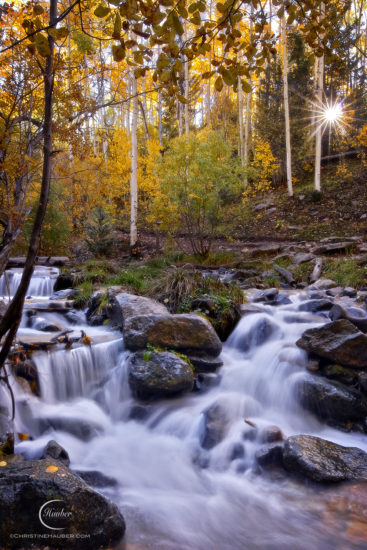
This scene would succeed regardless of a sunburst or not, but the sunburst really makes this image pop.
Adding a sunburst to your composition can add an amazing effect to your image. The best time to shoot is on a bright, sunny day with the sun in a location in the sky that adds to your composition. By positioning the sun so that it is partially obscured behind another object, such as tree or a thick cloud, serves to amplify the effect of the smaller aperture. This also cuts down on the intensity of the sun so that your foreground is not too dark. When you shoot, expose for the sky. Shoot in RAW with an aperture of at least f11 (but preferably f16) and a relatively wide angle lens. Often times older lenses create a better star effect because of the aperture blades in the older lenses have straight edges; the new lenses have curved edges. These older lenses create patterns with sharper corners. Also, make sure your lens is clean. Dust spots create additional flares in your image. If you are having difficulty getting a good starburst, switch lenses and try again.
Exercise: Photograph an object using the technique above to create a sunburst.
Continued at Creative Photography to overcome Midday Blues – Part 2


 Grant Collier

Christine, thanks for the great tips. It’s good to learn how to shoot in all types of lighting conditions, something I need to do more of. I recently purchased a collapsible light scrim/reflector, as you mention. I’m looking forward to getting out there and experimenting with it. Up to now I’ve mostly used what light was available without any attempt at modifying it. It’s time to add a new tool to my kit.
Todd:
Thanks! Using available light can be very nice but having additional options give you more control over your creative style. Have fun!