Why Use Black and White Photography for Sand Dunes?
Do you primarily pursue color photography or primarily black and white photography? If the former, you are going to love sand dunes, but you will likely find yourself wanting to print black and white landscape photos more than ever. If your favorite interpretations are black and white, you may want to invest many days searching out wonderful monochrome compositions, but you will also have occasions where color is the preferred choice for your images.
So, how do you know which one work the best for photographing the sand dunes?
Benefits of Black and White Photography
You can often find landscape photography compositions consisting of graphical shape, lines, and repetitive patterns while shooting sand dunes. Black and white photography (or monochrome) is usually the best choice when we are working with graphical shapes, simple lines, and graduated tones. The power in the photo comes from those sensuous shapes, the composition, and the play of light.
We achieve these shapes when we shoot with brightly lit areas contrasted against shadowed areas, particularly during sunlight hours. By isolating with a telephoto lens, we are more likely to reduce confusion and keep those shapes the focus of our image. Adding a foreground to the image, as we usually do with a wide angle lens, brings the textures and tones of sand and smaller wind ripples into play. These tones and contrasts are also fascinating to our eye. Adding color to them may not be their strongest presentation.

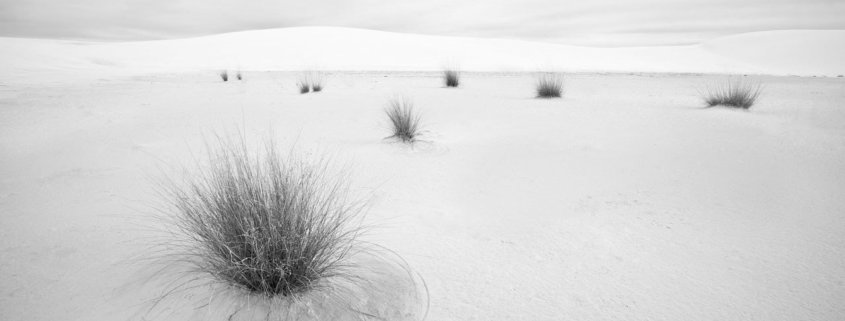
Tone and Textures in Black and White Photography – White Sands National Monument, New Mexico (NM), USA
Black and white photos are most effective when your composition is design-oriented. This may include distant dune shapes compressed by a telephoto lens, a single curve and shadow, or combinations of other shapes seen in overlapping dunes and their shadows. In the field, be alert for attractive curves, triangles or points and ovals. The intimate landscape photo with the beetle track is all about the track and shapes. Color would detract from the image.
One great thing about shooting for black and white photography is that we are not dependent on clouds to make our images pop. In fact, clouds are a hindrance since the shadows won’t be there. I would suggest that you avoid the center part of the day while pursuing black and white photography, but in the southwest you can generally shoot the shadows for two or three hours either side of sunrise or sunset during the winter.
A long lens can prove invaluable to isolate shapes, but be aware that changing lenses on a windy day is not advisable when shooting sand dunes. Sand can cause irreparable damage to the camera sensor.
In post-processing, you will often want to bump up the contrast for black and white photos of sand dunes. While I prefer the multiple tonal ranges of an Ansel Adams landscape photos, there are times when the design may call for more as in this photo at Eureka sand dunes.
Black and white photos can look great when printed in smaller sizes. This can help hold your costs down if you are trying to build inventory to sell your work. Once you have collected three or four good images, present them in a triptych or square set to increase your sales revenue.
Tips for Black and White Photography
Here are few more tips to help you capture some stunning black and white landscape photos:
- Take a larger image of the scene using a wider angle of view, then use the playback feature to review the image. Magnify the image and scroll around to locate the best shapes for you image. Then zoom or move closer to frame that area of your image. The landscape photo below was at 150 mm before zooming in to the strongest abstract feature.
- Because the shadows are constantly on the move and you will have two or three hours to photograph sand dunes (if it’s not too hot), you will also need to be on the move. Plan your movements so you don’t disturb the area in front of you. Always check the scene behind you.
- The closer you are to sunrise or sunset, the more you can concentrate on smaller ripples dune ridges and their shadows. On those morning shoots, practice guessing what shapes will occur when the sun first hits the peak of a dune. Then, be ready, as the shadows change quickly.
- Process your sand dune photos, or at least similar images, in the same manner so that they look like they belong together, as in the triptych shown above. This means the tones or contrast ranges will be similar, as well as any vignettes or other preset styling you apply. This will become part of your style.
- On your dark images, avoid having bright areas go off the side of the image. On your bright or high key images, avoid having black areas touch the side of the image. Even subtle modifications with content aware fill, the cloning brush, or healing brush in post-processing can make a big difference.
- Shooting directly towards the sun can yield some dramatic images, especially if the wind is blowing. Use sun highlights to create drama in those images.
- If color is unimportant to your image or distracting to your subject, consider eliminating it. In the color image below, the dark blue sky dominates and the brown on the lower right serves only as a frame to the shape of the dunes. The shape and the clouds become more of the focus of the image when it is rendered in B&W.
- Look for subjects that are amplified by utilizing negative space around them such as the soap yuccas below. I would actually prefer this image in color since it is more about life on the dunes than the shapes, but it works for illustrating this and the next tip.
- Sticks and stones and footprints can break your subject. If they are distracting, remove them, preferably before you take the shot if your footprints aren’t a bigger distraction and challenge. Try to avoid as much clutter as in this high key image and use the small intruders for depth only.
While our cameras are capable of capturing amazing colors, don’t confine yourself to color. Sand dunes, with their sensuous forms and ever-changing designs can result in very appealing black and white images. Moreover, the techniques you practice with monochrome images on sand dunes can be carried over to your other photographic interests.


