HDR Photography: 2 Mistakes to Avoid
Some of the best light for landscape photography is during sunrise and sunset hours. The highlights and shadows are soft and the colors that kiss the skies and ground are warm and golden. It’s truly a beautiful time to be standing at an overlook with your camera on your tripod. However, there are also some challenges with photographing at these times. Sometimes the light in the sky can jump the timing a bit and light up. Thus, you’re forced into a difficult dynamic range situation where the sky is perfectly exposed and the foreground is too dark. Or the foreground is perfectly exposed and the sky is too bright. A great technique for these situations is exposure bracketing. Afterwards, you merge the images using HDR photography software such as Lightrooom.
The technique of exposure bracketing allows landscape photographers to take multiple exposures, usually between three and five shots, to accurately capture all of the light and detail in a scene. As you start the exposure bracketing sequence, expose a photo(s) for the foreground first as your shadows, then take another exposure(s) for mid tones, and finally a photo(s) for the highlights in the sky. Then, using HDR photography software like Lightroom, you can easily merge all of your bracketed shots into a single HDR photo that reveals the correctly-exposed sections of the sequence.
Now, before you hit the trails and shoot everything in bracketed sequences, you need to know some of the situations to avoid when merging bracketed photo sequences into a single HDR photo. Let’s explore a couple case studies of what may not work for HDR photography
Photographing Light Beams
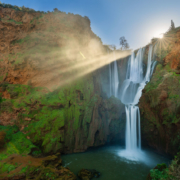
A beautiful phenomenon that can occur when you’re shooting with clouds that occlude the sun are light beams. Light beams are amazing to photograph because they pierce through the sky to highlight sections of the earth below. It’s truly inspiring to witness.
However, light beams can cause some headaches when you’re merging exposures. Because different exposures take time to shoot and clouds move during that elapsed time, you may discover that the direction of light in the light beams shifts & changes from frame to frame. This can have a big impact on the various highlights and shadows in your skies in an HDR photo merge.
For example, if you’re merging your photos in Lightroom, the software looks for exposures to pull from each of your photos. If your light beams change, you can actually end up with awkward light beams that overlap each other and create a sky that doesn’t look realistic. While you can edit the unwanted light beam edges out of the final photo merge, that process can be tedious and sometimes difficult to achieve.
Wave & Cloud Movement
Wave and cloud movements are similar to issues with light beams. However, they have a more obvious effect on the final photo. Waves and clouds move much like light beams shift over time. But waves and clouds have much harder edges and are way more noticeable in the final HDR merge.
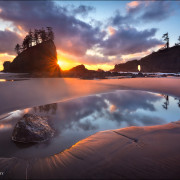
Let’s take waves, for example. As you shoot your exposures, the waves continue to move into shore and eventually crash on rocks and sand. Because of this, the final image merge can reveal duplicate waves that don’t look natural and blurred wave movement on the shoreline that looks out of place. When this occurs, it’s very obvious to an audience that knows what natural wave movement looks like. Our goal is to create a natural HDR photo, not to create one that is noticeably unrealistic.
The challenges you may face in HDR photography should not deter you from trying this technique. However, be aware of them when you’re planning a photograph or watching a scene unfold. Just like the use of a circular polarizer is reserved for water photography, the HDR technique should also be used in appropriate situations. Sometimes the restraint of using a technique is just as good as using one. I hope these case studies help you use your bracketed photos correctly so that you can create incredible photos of nature that you can be proud of.


