Landscape Photography Tips for capturing Dramatic Sunbeams
Sunbeams captured with landscape photography makes for dramatic photos. I’m guessing that we’ve all had those moments when we’ve been awe-struck by sunbeams shining just perfectly through trees, clouds, or other diffracting objects onto a desire photography composition. But… successfully capturing these sunbeams in our landscape photos is not an easy task. The phenomenon is rare, and the conditions must be just right in order to effectively pull in the beams in such a way that enhances our stunning landscape photos.
Maybe it’ll help to first understand how these sunbeams are created. They appear when sunlight passes through – and is scattered by – particles in the air. These particles can materialize from moisture, dust, sand, or even smoke. In addition, for a stunning effect, they are concentrated and backlit (front lit particles do not produce sunbeams). For example, a passing storm can be a perfect background for visible sunbeams due to its dark clouds. And, of course, storms are typically accompanied by moisture. A thick fog in forest is another ideal possibility for photogenic sunbeams.
To guide you with the challenge of capturing dramatic sunbeams and create awe-inspiring, sunbeam-laced photos, here are some landscape photography tips:
- Learn to use exposure bracketing for landscape photography
- Look for dark back drops to illuminate sun beams
- Look for sunbeams in intimate landscape photography scene
- Use reflections in landscape photography to enhance sunbeams
- Always practice safety first when photographing sunbeams in nature
Lets take a look at each of these landscape photography tip in more detail:
Learn to Use Exposure Bracketing
Because sunbeams occur when light passes through particles, almost all sunbeam images are backlit. Because of this, the scene you are trying to capture tends to have extreme dynamic range. In other words, very bright highlights and very dark shadows.
To capture the details in all parts of your subject’s dynamic extremes, you need to use multiple photos with different camera exposures. To accomplish this, we typically use our histogram to determine how much exposure bracketing is required. We then use the camera’s high speed bracketing mode to successfully capture the sunbeams.
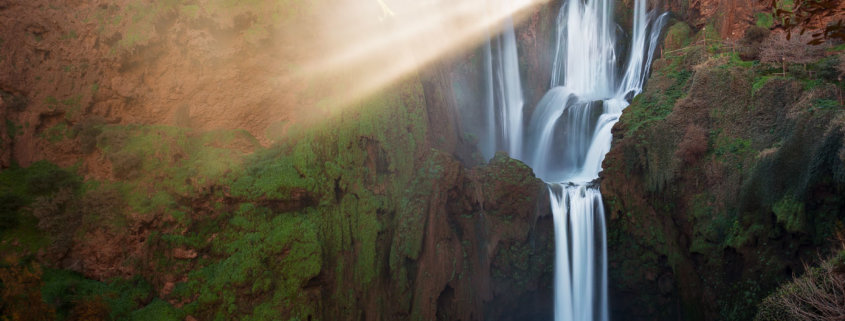
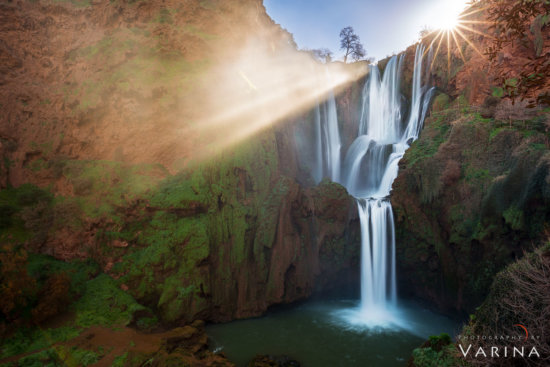
To capture the photo above, I set up my tripod overlooking Ouzoud Falls in Morocco. I then waited for the sun to creep over the horizon. The falls produced a fine, vaporous spray that scattered the morning sunlight, and the shadowed walls of the canyon provided a subtle backdrop. I used a narrow aperture (f/22) to produce a sun star for a little extra drama. I also used the camera’s high-speed bracketing mode and to capture multiple camera exposure 1.67 fstops apart.
Finally, I then combined these bracketed photos using Photoshop Layers & Masks to produce the dramatic photo of Ouzoud Falls that you see above.
Use a Dark Backdrop to Illuminate Sunbeams
Keep an eye out for bright beams that stand out against a darker background. Dark rocks, storm clouds, or mountains make perfect backdrops for these beautiful rays of sunlight.
In the landscape photo above from Glacier National Park, the sunlight scattered as it passed through smoke from nearby fires and the humidity that had settled in the valley. This heavy, humid air created a perfect medium for sunbeams. Also, because it was late in the day, the light took on a gorgeous golden tone.
I used a wide-angle lens to capture the entire scene. To capture the broad range of light in the scene, I also needed to high speed exposure bracketing. I used a tripod to keep my camera in place between my camera exposures and a remote release to avoid shifting my camera or introducing camera shake.
Look for Sunbeams in Intimate Landscape Photography Scenes
Intimate landscape photography scenes are ideal when confined to small, enclosed natural environments. Some likely (and intimate) spots to capture sunbeams include both slot canyons and caves where you can often find dust particles floating in the air. If there’s no dust, feel free to toss up some sand or dirt instead to create your own floating particles.
Antelope Canyon in Arizona is famous for landscape photography with its spectacular sunbeams. Unfortunately, these beams of light only show up when conditions are just right. The sun must be high in the sky to allow it to stream down through the overhanging canyon walls. This only occurs during the summer months and only in the middle of the day. So… no “golden hour” landscape photography here if you want to capture these beams!
Keep in mind, the air is very dry in the desert. It’s highly unlikely that you’ll have any available water vapor when trying to capture sunbeams. However, the floor of the canyon is covered with fine sand. For the photo above, I tossed handfuls of the sand into the air, and photographed the resulting sunbeams against the brilliant orange walls of the slot canyon. I angled my camera upward for a more abstract composition. This is certainly a great place to play with intimate landscape photography abstracts.
For landscape photos in this type of environment, exposure bracketing may not be necessary because it’s an enclosed area with an even tonal range. I suggest that you always check the histogram on back of your camera to ensure there are no blow highlights or clipped shadows.
Use Reflections in Landscape Photography to Enhance Sunbeams
I don’t know anyone who doesn’t appreciate a dramatic reflection to enhance landscape images. Smooth water and the reflections we can capture with it are certainly sought-after landscape photography elements. On a trip to Beauty Creek in Canada several years ago, we were treated to some perfect conditions for these sought-after elements.
Throughout the day, storm clouds rolled through. With these conditions – the humidity and the heavy storm clouds – we hoped to get some vibrant sunbeams at sunset. Ideally, the scattered clouds allowed the sun to peek through just before it set.
We set up our tripods low to the ground at the edge of a little pond and waited. Sure enough, we got the sunbeams we were hoping for. On this particular day, there was no wind which resulted in perfectly still water. Not only were we able to capture landscape photos with the sunbeams, but the reflection on the still water greatly enhanced the overall appeal of this landscape photo.
Practice Safety First
When we’re out shooting, we try to remain fully aware of our surroundings at all times. We are always paying attention to the angle of the sun, the humidity in the air, and storm clouds that might produce interesting skies.
Remember that storms can roll in quickly, putting you and your equipment at risk. Make sure to follow all safety protocols when trying to capture sunbeams in stormy weather. No photo, no matter how spectacular, is worth risking your life.
Also keep in mind that rainbows sometimes appear in conditions that produce sunbeams. So, if you see a rainbow, be sure to turn around and look for sunbeams – along with other dramatic colors that many appear in the sky!
It is not easy to find sunbeams in nature. And when you do, it’s also not easy to successfully capture them. That’s what makes landscape photography with dramatic sunbeams so compelling – and so challenging!
To catch the sunbeams, look for passing storms, mist created by waterfalls, or foggy areas in the forest. Once you find yourself staring at a breathtaking scene with sunbeams, be sure to capture the entire dynamic range using exposure bracketing. And… keep an eye on the weather at all times.
A little awareness of what’s happening with the weather can help you put yourself in the right place at the right time to capture something inspiring. Good luck and have fun!

