Why I Use Photoshop Instead of Lightroom for Nature Photography
Back in the “old days”, we used to shoot photos with our film cameras and then take the film to the local lab to have them developed. Back then Photoshop was associated with computer geeks and designers. We never quite knew what sort of photos would come back to us. I’m willing to admit, the anticipation was fun! But times have certainly changed.
With the advent of DSLR and mirrorless cameras, every landscape photographer wants to master the art of post-processing. This step is now, after all, an integral part of a typical digital nature photography workflow.
Two of the current and most popular software programs for post processing are Adobe Lightroom and Adobe Photoshop. Although the two programs do share some overlapping capabilities, there is an ongoing debate about which one is the best software program for nature photography. So, how do you choose between the two?
Lightroom vs. Photoshop
The answer to this question depends upon what you are trying to accomplish with your nature photography. Before I try to answer this question, let’s look at what each program does best and when to use each one.
Adobe Lightroom is a tool with two very powerful functions combined into one. Not only is it a highly sophisticated photo management tool, but you can also use it as an RAW converter. Some of the most powerful editing features are built into its RAW converter. With these, the software is geared towards photographers who want to bring out the most incredible details and vibrant colors produced by their DSLR and mirrorless cameras.
Over the years, Lightroom has also added some local adjustment capabilities using brushes, gradient filters, and range masks. However, these local adjustment features are quite simple and basic when compared to what is found in Photoshop. They are well-suited for photographers who are looking to balance light, manage contrast, and correct some basic coloring on a single image.
Which brings us to two of the biggest advantages of working with Adobe Photoshop. With Photoshop, you can work on multiple images using Photoshop Layers feature. Also, local adjustments in Photoshop can be extremely precise even down to a single pixel (Lightroom doesn’t have this ability).
To achieve these local adjustments, Photoshop provides two very powerful features: Selections and Layer Masks. Both these features work together as well as with all of the other adjustment tools in Photoshop. These features provide nature photographers with ultimate control over local adjustments. But Photoshop does not stop there with its features! It also enables you to work on individual color channels which brings a variety of creative post-processing options for photographers. Advance healing and correction tools can be combined with Photoshop Selections and Layer Masks can be used to provide an incredible amount of precision during post processing.
Now that we’ve looked at a few basic similarities and differences between these two post-processing software programs, I want to discuss further what we can do with Photoshop that we cannot do with Lightroom.
Manual Exposure Blending for Landscape Photography
Lightroom has excellent HDR (high dynamic range) capabilities that landscape photographers love. However, this is a turnkey solution with very few controls available to control how the exposure blending occurs. This means that Lightroom cannot blend specific parts of an image that pro landscape photographers frequently need to create natural looking high dynamic range photos.
In the image above, I only wanted to replace the overexposed highlights in the landscape photo. A traditional HDR blends every part of the photos. I can use the Photoshop Layers and Masks tool to restrict my blending to just the highlights. This allows photographers to have incredible control over exposure blending. The final result is a stunning natural looking HDR photo.
Combine Polarized and Un-Polarized Images
As noted earlier, the RAW Converter in Lightroom can work on only a single image at a time. If you ever find yourself trying to combine two different images, one with a full polarization effect and one without, you are basically out of luck with Lightroom. To achieve this, you need Photoshop’s Layer capabilities.
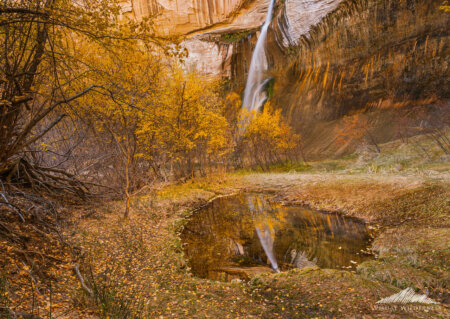
Photoshop Layers used to combine a polarized and unpolarized image for post processing – Calf Creek Falls, Utah
The image above was produced by merging two images together. One with a circular polarizer rotated to remove the glare from the rocks and two with a circular polarizer rotated to bring out the details and contrast in the reflections. The resulting image is free of glare with life-like reflections in the pool of water.
Focus Stacking to your landscape photos in Sharp Focus
In landscape photography, you will likely run into situations where the depth of field you can achieve with your camera aperture is not enough to get everything sharply in focus. When this happens, you can resort to focus stacking to produce landscape photos in sharp focus with incredible details.
This technique requires the combination of multiple images captured at different focal points to produce a final image with a sharp focus. Take a look at the photo above as an example. You cannot use Lightroom for this technique. You need Photoshop Layer capabilities to implement focus stacking.
Creative Landscape Photography using Temporal Exposure
Temporal exposure is a brilliant creative landscape photography technique that allows you to create awe-inspiring photos. This technique requires you to take multiple exposures using different camera settings over an extended period of time (several minutes or hours). You then combine them to produce the final result.
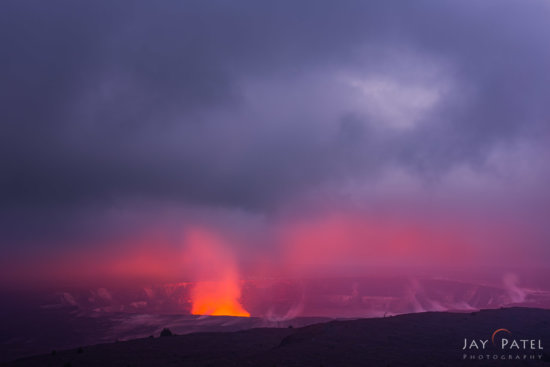
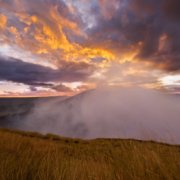
Temporal exposure blending created using Photoshop Layers & Masks – Volcanoes National Park, Big Island, Hawaii
I used this technique to produce the photo above from Volcanoes National Park. I took several camera exposures over the course of several minutes and merged them together. To do this, I used Photoshop’s selections, brushes, levels, and masks tools. I was able to capture both the light and the textures in the incredible colors created by the lava. The resulting natural looking image of Kilauea Volcano contained incredible colors and details throughout the photo.
Star Trails created in Photoshop
Just like temporal camera exposure blending, photographing star trails can also require multiple exposures over the course of several minutes. This is exactly how Varina created these star trails over the balance rock in Arches National Park, Utah.
This star trail photo consists of over 100 thirty-second shots that were then exposure blended together in Photoshop. If done manually, this blending is tedious and time consuming. To avoid that, Varina created a Photoshop action that processed the RAW images and blended them together to create this stunning star trail photograph.
Advanced Photoshop Techniques for Nature Photography
You can also use Photoshop Layers to create special effects for landscape photography. For example, it’s quite easy to add textures to your photos, apply the Orton Effect (adding a soft glow), and many more tricks using Photoshop Layers. You can also combine several of these effects in a single photo and completely control how the effects are applied using Photoshop Selections and Masks.
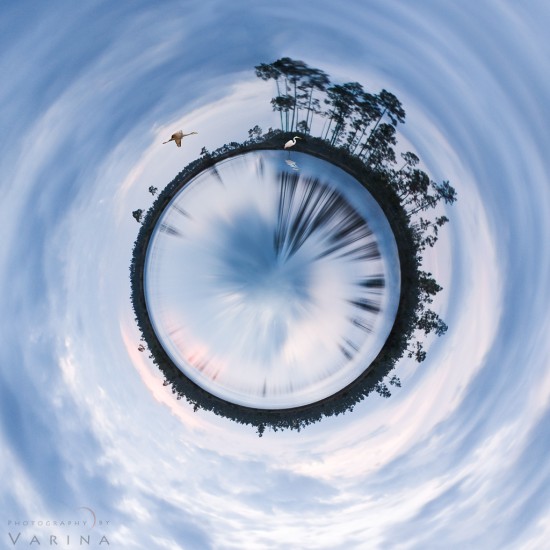
Varina used Photoshop Layers and Mask to convert one of her landscape photos into a tiny planet.
Integrated Non-Destructive with using Plugins
While it is true that you can use most plugins with Lightroom, you can go much further in Photoshop. Once you use a plugin to modify a file in Lightroom, you cannot change the adjustments. With Photoshop, you can create a new layer and allow the plugins to make the changes only on that newly-created layer. This provides you with a non-destructive workflow when using plugins to make adjustments. You can also control exactly when and how to merge the plugin results with the original image using Select and Mask in Photoshop.
Ok, so after reading this, are you ready to abandon Lightroom and only use Photoshop? Not so fast!
Photoshop’s power comes with a significant draw back. It has a steep learning curve. The best way to overcome this is with step-by-step learning on just one small set of skills at a time. Once you overcome this learning curve, you have the ultimate power of post processing at your finger tips. Photoshop opens up an infinite number of creative options for your nature photography.
So… mastering Photoshop does not mean abandoning Lightroom. Even after you master Photoshop, remember that there are times when all you need is Lightroom. And if this is the case, it doesn’t make sense to import your photos to Photoshop. Go ahead and finish processing in Lightroom. Just be smart about what program to use at what time to produce the spectacular results that you envision.


