
Tips for Stunning Wildflower Photos
As someone who considers the mountains to be a second home, I frequently find myself photographing these majestic areas during the summer months when the wildflowers are at peak bloom. Wildflower scenes are a personal favorite of mine; I try to make it a point, both in the field and during post-processing, to create images that are visually stunning and that have a strong impact and effect on the viewer. Here are a few tips to achieve this sort of result.
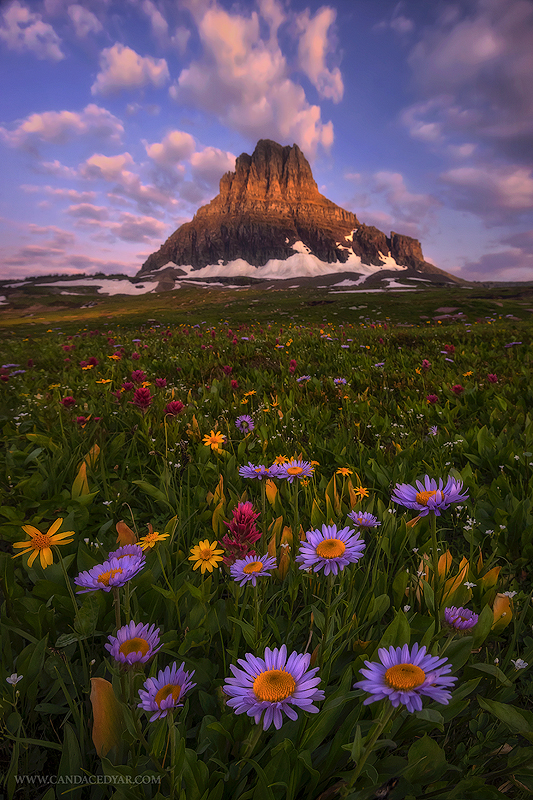
Get low to fill the foreground with flowers – I shot the image above of Clements Mountain by getting very low to the ground, nearly eye-level with the flowers and by shooting with a wide angle lens. The wildflowers are only a couple of inches overall in size, yet appear to be much larger and fill the frame in the foreground. This can be achieved by spreading the legs on your tripod almost completely flat to the ground. Another option is to invert the center column (if you have one) of your tripod and position your camera up close (within inches) of the flowers. I managed to capture the scene below of Cracker Lake by using the inversed column and shooting low to the ground, eye-level with the Indian Paintbrush in the scene.
Composing this sort of shot can be a bit tricky at first and it’s a good idea to give yourself adequate time to make sure that you are including all of the desired elements in your scene. Try your best to fill your foreground with flowers, while also balancing the background with an interesting subject, such as a mountain peak, tree, etc. Hopefully you also have a mid-ground element to tie the two together. If the mountain is included but your sky is cut off, try either moving a bit farther away from your subject or using a super wide angle lens (preferably 14-16mm or wider) in order to include everything you want within your scene, so that it compositionally makes sense and flows together.
While I don’t always choose to get up close and personal when shooting wildflower scenes, and it is really up to the photographer’s own discretion and depends on the circumstances, it can definitely achieve a more dramatic and strikingly impressive effect.

Focus stack for overall sharpness – For more advanced photographers, I highly recommend focus stacking so that your foreground, mid-ground, and background all appear sharp throughout the scene. This is a technique applied while shooting out in the field and requires taking several images at different focus points throughout your scene in order to ensure that certain areas are not blurry. A good general rule is to start shooting your foreground in focus and slowly rotate your lens to adjust focus throughout the scene towards the mid-ground and background, taking an image every small rotation until you have taken the image of your background in focus. Once you have captured all areas of your scene with various focus points, you are then able to apply this in the processing stage in Photoshop and stack your images so that all areas appear tack sharp from foreground to background. If you haven’t tried this technique yet, I highly recommend watching some of the various Skype tutorials and Youtube videos that are available; they carry a wealth of information and will guide you through this process. Having your scene appear sharp throughout is generally very pleasing to look at, creates a greater sense of depth of field, and (unless you are trying to achieve an artistic sort of effect) produces an overall higher quality image.
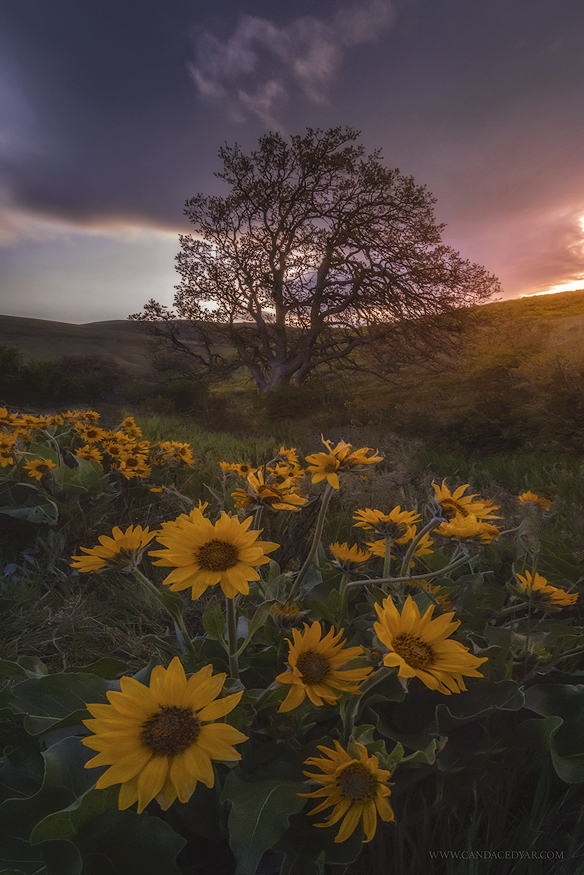
Use high ISO blends – Everyone at some point experiences windy conditions while attempting to shoot wildflower scenes. A little breeze now and then is no big deal and you can snap away in between. However, gusty conditions or a nearly constant wind can become quite aggravating. As with any action shot, using a higher ISO and a shorter shutter speed will greatly reduce or eliminate any motion or movement from your subject. The downside is that the high ISO creates more noise in your image. So, how do you manage to keep everything sharp in your foreground while not creating an excessive amount of noise in your sky and background? As with focus stacking described above, the solution is to take several images while out in the field in order to blend them later on while processing in Photoshop. In this case, shoot your foreground flowers at a higher ISO to prevent blurriness. You can then shoot at ISO 100 or a much lower ISO for your background and sky portion of the image. The image below was taken during an especially windy morning where it was almost constantly blowing around the Balsamroot in the foreground and branches on the tree. I managed to get a sharp shot at ISO 1250 for the flowers and tree, and shot ISO 100 for the sky portion. I then blended them in Photoshop during processing to achieve the desired effect. If you are not familiar with processing using ISO blending, there are various Skype tutorials and videos available which demonstrate this process more clearly.
Hopefully these tips are helpful when attempting to create stunning wildflower foregrounds with your photography. Please feel free to leave any comments or feedback below.
About Author Candace Dyar
Candace Dyar is a landscape and nature photographer based in Washington State. Her background in art history significantly contributes to her overall artistic vision and she is known for portraying a painterly type of style within her work. In addition to landscapes, Candace’s portfolio also includes intimate images of flora and fauna, and she is passionate about exploring and photographing the diversity of wilderness areas in their entirety. Her goal as a photographer is to reach viewers on an emotional level, while also spreading awareness of the necessity and vitality of the natural world.


These are really beautiful! The part that attracts me is the splash of light on the flowers. How is that accomplished? Thanks for sharing your talent.
Many hanks for sharing your knowledge and experience.
Thank you very much Candace for sharing theses techniques. These photos are really striking and now I understand much better how you produce them. Especially the “huge” flowers in the foreground are really eye catching and make the photos very dreamy and out of this world. I didn’t expect the use of “high iso blend”, but it makes perfect sense.
In case you’re reading this, did you manage to get the shots in the article with “normal” shots, I mean without panorama or perspective blend?
Great article Candace. Thank you for sharing.
Just wondering if you could supply links to You Tube vids and Skype tutorials on Focus Stacking and high ISO blending?
Thanks.
Hi Brian – Sorry for the delayed reply! Here is a link to a YouTube video on focus stacking from Dave Morrow: https://www.youtube.com/watch?v=6hNhCo15Ay4
There are others available on YouTube if you search for “Focus stack landscape” on there as well.
For High ISO blending, it is just basic layer masking of two separate exposures. For this, I either highly recommend a Skype tutorial from Ryan Dyar or there are other highly regarded photographers offering them as well (I do not currently offer Skype sessions, but can provide this sort of information during a private workshop). Ryan also has a video titled “Putting Together The Pieces” that goes over both focus blending and contains other really helpful information: http://www.ryandyarphotography.com/606227/putting-together-the-pieces/
Great job Candance! Thanks for taking the time to share this information.
Thanks for taking the time to look, Michael! I apologize for the delayed reply.