Creative Texture Blending in Photoshop for Beginners
Let’s face it everyone wants to be at an exotic location with fantastic colors at the golden hour. And more nature photography “chase light” just to get that one perfect shot. So it is not surprising that the competition is fierce out there for stunning landscape photos with awesome sunrises or sunsets. A perfect photo at the golden hour at an ideal location is a rare occurrence. More often than not I am at a beautiful place, but the sky and weather just doesn’t cooperate. Regardless, I still photograph the beautiful subjects with the less than compelling skies knowing I can use the power of creative texture blending in Photoshop to turn my images into fine art prints.
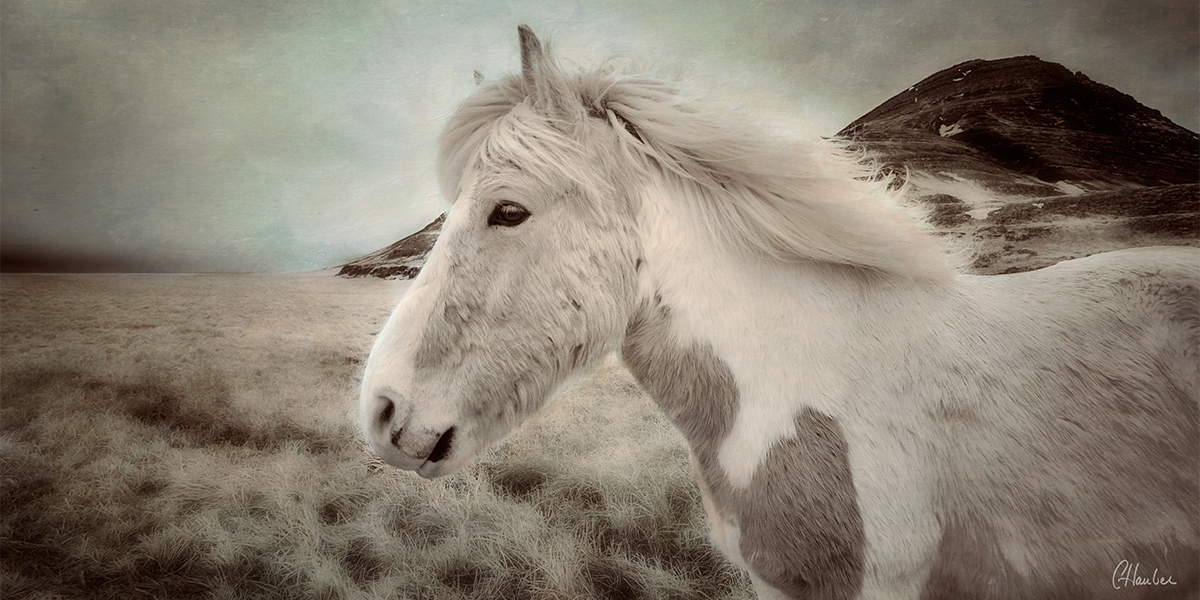
As a fine art nature photographer, I am always looking for ways to display my work in a unique and creative way. Texture blending in Photoshop is a creative way to add an artistic component to your nature photos. You can take an ordinary landscape photo and make it more emotive photos that create a visual impact.
Here are few tips to add textures in Photoshop to your nature photos:
Choose the right Photos for Texture Blending
Some nature photos seem to lend themselves much more to texture blending than others. I tend to look for images that look great compositionally and are exposed correctly but may lack an interesting sky. Often times, I will use the images that may have been taken during midday when the light is not great because sometimes we are lucky enough to be in the right nature photography locations but not during the right time.
When choosing a photo for texture blending in Photoshop, I look for images that have a large area with uniform color or I look for photos where I have photographed in a way that results in a large area of plain open space. This will make texture blending more effective. Usually when the light or sky isn’t ideal, I shoot specifically keeping texture blending in mind.
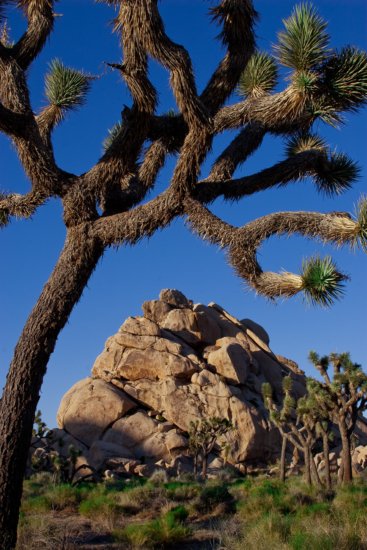
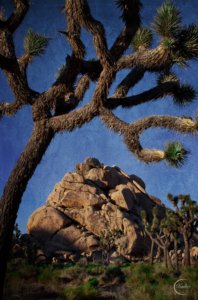
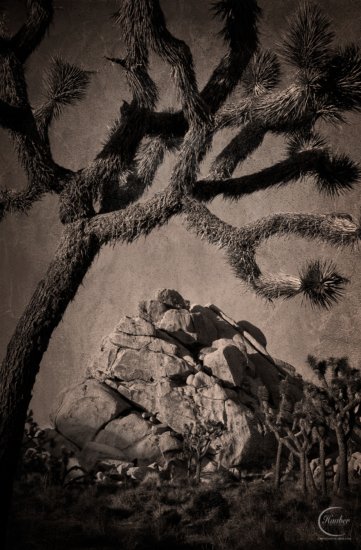
This image in Joshua Tree National Park was photographed before sunset for the purpose of being used for texture blending.
Usually when the light or sky isn’t ideal, I shoot specifically keeping texture blending in mind. The above photo from Joshua Tree National Park was photographed before sunset for the purpose of being used for texture blending.
Choose the Right Textures
Selecting a texture can be a difficult step. Knowing what you want as an end results can help ease the process. Are you hoping to have a final image that is artistic in nature? Do you hope to create a grunge or gritty image? Or you looking to enhance the sky but in a somewhat realistic way?
These questions are not necessary but will help you to simplify the process of choosing the correct textures. Choosing the right texture for your photos is a personal choice and often requires you to experiment. Don’t be afraid to change the direction if you are not getting visual impact with the texture you are working with. Often, I find myself with one idea only to completely change directions when I start working on an image.
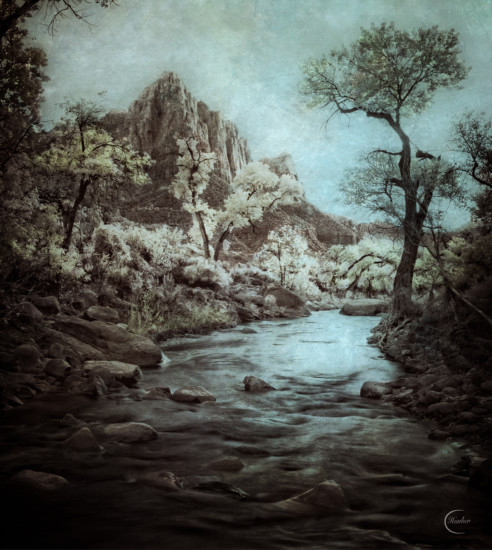
The Watchman in Zion National Park started out as an infrared black and white image. With multiple texture layers, I painted in the colors and textures I wanted.
The Watchman in Zion National Park started out as an infrared black and white image. With multiple texture layers, I painted in the colors and textures I wanted.
Finding Textures for Creative Blending
Textures are everywhere in nature. So it is easy for you to create your own textures to be used for blending in Photoshop. For years, I have been photographing abstract subjects that can be used for texture blending. I find these such textures everywhere from the adobe walls in Santa Fe to the rust of old cars. I also spend a good amount of time creating abstract paintings that work well.
But an even easier way to find textures is online. There are many websites offering free textures for you to use. But my favorites happen to be available for purchase through Flypaper Textures.
An Easy Texture Blending in Photoshop Tutorial
I prefer to use Photoshop for texture blending because it gives you precise control over your blending using Layers and Layer Masks. However you can also use Lightroom, iPhone Apps, On1 Photo, Topaz, and Capture One to create your texture blend photography. Most programs utilize layer stacking in a similar way with blending mode options that are the same across platforms. Find a software program that works best for you and learn to make the most of it.
Here is a quick Photoshop workflow for texture blending:
- Open your base image
- Open your texture image
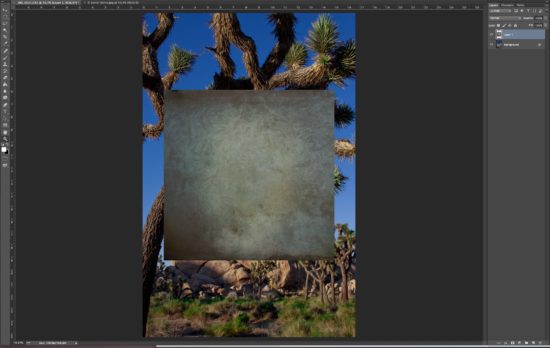
- With your texture image open, select all by pressing Ctrl + A and copy by pressing Ctrl + C. Go back to your base image and paste by pressing Ctrl + V. I have pasted my texture onto my base Joshua Tree photos (Image #1). It will now need to be transformed to fill the size of the base image.
- Resize the texture by using the transform tool so that it covers all the base image
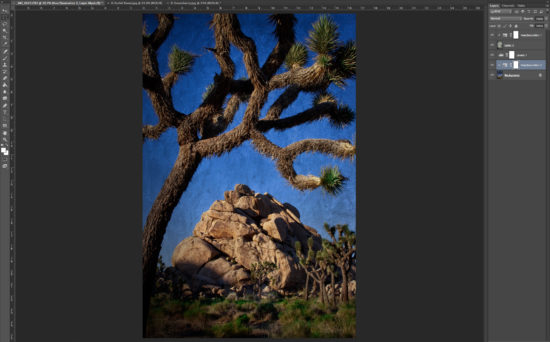
- In the Layer Stack for the texture, change the blending mode. I usually look at each one to see its effect but my favorites tend to be Multiply, Overlay, Soft Light, Screen and Hard Mix
- Adjust the opacity until you get the desired look you are happy with. To preserve the original color of the base image, de-saturate the texture layer.
I like to experiment with different textures and different blending styles in Photoshop. Here is a different look created using texture blending in Photoshop:
Photoshop gives you limitless possibilities to play with texture blending. For more advanced techniques try some or all of the following techniques:
- Transform the texture: Often times, just transforming the texture to match the size of the base image works fine but try transforming it in different ways, from flipping the texture to stretching or warping the texture.
- Look at each blending mode: Although I have favorite blending modes, these don’t always work in all situations. So I tend to click on each option to see what the result will be.
- Modify or Stylize the texture layer: Any layer can be modified, including your texture layer. I tend to look at a texture layer for the type of texture it has, rather than its color. You can always adjust the color, saturation or tone of the layer to better fit your vision.
- Masking: Textures do not need to be universally applied to your photo. Utilize masking tools to add it to the areas you want without affecting the areas you do not.
- Use multiple textures: Apply multiple layers each with different blending modes or opacities to produce creative results.
Texture blending in Photoshop gives you powerful creative post processing options. So don’t be afraid to use it for your nature photography. And make sure to have fun being creative.

