How to pursue Nature Photography without Photoshop Wizardry
As a nature photographer and a workshop leader, I often ask my students this question – “What is wrong with this image, and how can I correct it?” Inevitably, the answer gravitates towards a technical solution involving Photoshop or post processing. They suggest processing the shot differently, or using HDR software, or choosing a different contrast setting.
These days, if you spend time on social media, you’ll discover loads of information about post-processing and its importance. If you’re new to nature photography, this can be an intimidating experience especially if you’re still developing your skills. It’s easy to believe that, unless you’re already a wizard at post-processing, you may never get a great shot.
Photoshop is Necessary, But Not Essential
Here’s something I’d like you to take away from this article… although it may be necessary to some degree, Photoshop prowess for great nature photography is not essential.
Many, if not most, nature photographers today rely on some level of post-processing for their quality images. And it’s a common opinion that, without post-processing in HDR software, you cannot capture a great photo. I say this is far from the truth. Post-processing may be an essential tool but having limited Photoshop skills does not necessarily keep you from creating a stunning image. I actually know many nature photographers who only work in Lightroom and never open Photoshop for their photographic creations.
How is this done? What is needed to succeed? Bottom line… it’s a balanced approach. Analyze your scene. Get the photo right in-camera. And use post-processing to simply enhance the details. Let me walk you through some ways we accomplish this with some fairly typical scenes found in nature.
Dealing with Harsh Light in Nature Photography
Recently, I posted the following image on social media and asked the question: What’s wrong and how can I fix it?
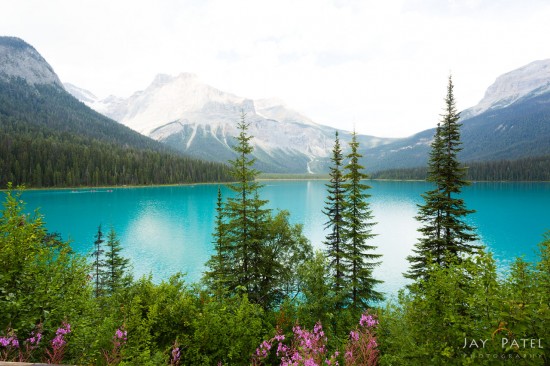
Landscape photography in harsh light from Emerald Lake, Yoho National Park, British Columbia, Canada
I received over 50 responses with the vast majority stating that the sky was overexposed. And, they’re absolutely correct. The sky is washed out with zero details showing. So, despite a gorgeous scene (and bottom half of the image), the top half of this photo is fairly uninspiring.
As far as a solution goes, I heard the same answer again and again and again… bracketing and blending the exposures later with Layers and Masks in Photoshop. Some also suggested that I use an automated HDR program to create a blended image. These are completely valid solutions. But, each of these approaches require a considerable level of post-processing skills. It’s possible these aren’t realistic options for many nature photographers who don’t yet have that skillset.
So, what can the casual or novice photographer do? Is there a way to capture the beauty of the scene without any extra equipment or post-processing skills? The answer to this is analyze the scene. This gorgeous setting during this time of the day is tasked with harsh light, deep shade, and bright highlights. As part of our analysis, we look at what is important for capturing the shot we desire: the colors in the water as well as the details in the mid- and foreground.
The main problem in this case is that the scene is not evenly lit. A photographer has to choose between exposing for the sky or for the foreground (can’t do both in one shot). Although they’ve improved a great deal, cameras simply cannot handle both bright sunlight and deep shade all at once.
Despite the challenges, it is possible to get the desired image in-camera. For this to be possible, the available light must be relatively even. Some options to achieve that include waiting until the foreground and mid-ground are directly lit by the sun. Focusing on the details and amazing colors. Waiting for the shade to move to the background. Minimizing the use of a wide-angle lens. Using your camera’s histogram to assess exposure.

Landscape photography in harsh but balanced light Emerald Lake, Yoho National Park, British Columbia, Canada
I captured the following image in a single shot. It required minimal post-processing and NO fancy HDR software. I was able to create this gorgeous image in Lightroom. So, again, the key here is to analyze the scene you are trying to photograph and come up with practical solutions to capture those stunning photos.
Here are some additional creative ways for dealing with extreme dynamic range without having to resort to post-processing wizardry.
Photographing Silhouettes
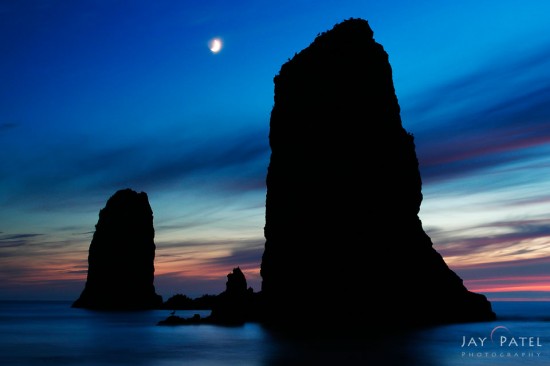
The following is a shot from Cannon Beach using my old Canon 10D camera. At the time of this shot, my Photoshop skills were quite limited. Added to the complication, I was photographing at the blue hour with extreme dynamic range. [Side note in case you don’t know what the blue hour is… it’s that blueish period of time right before sunrise and just after sunset.]
When you have an interesting foreground, sometimes it’s just not necessary to show detail in every part of the image. Strong shapes like these “needles” at Cannon Beach in Oregon make for a very nice silhouette.
There are a variety of different ways to create good silhouettes whether it be with human figures, trees, barns or other structures, artistic rock formations, and anything else in nature you may find interesting.
Using Macro Photography to Combat Harsh Light
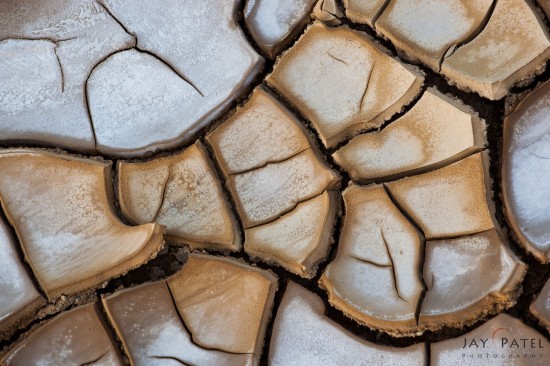
Macro photography – shooting your smaller subjects at extremely close range – is another potential solution for minimizing the need for complex post-processing. When you’re stuck with harsh lighting, try focusing on the very small details. Flowers (from all angles), patterns in the mud or ice, splashes of water… small subject such as these can be the foundation for beautiful photos.
If the area is small enough, you can use your body to create a little bit of shade – or you can use a hand-held diffuser to filter direct sunlight. Here’s a shot from our nature photography workshop in Death Valley that I took using my body to shade the area.
So, just another reminder… having limited post-processing skills does not necessarily keep you from creating a stunning photo. It’s important to be aware that a minimal amount of post-processing can produce great shots.
Simplifying your Nature Photography Composition
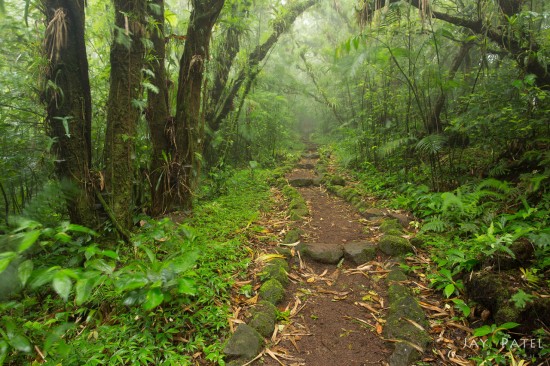
While we were leading a workshop in Nicaragua, I experimented with this idea of using composition to remove distracting elements from my photos. My class included some first-time students. While exploring the beautiful Mombacho Rainforest, I instructed them on camera settings and nature photography composition in an attempt to capture the scene with minimal post-processing.
One of the tricks we use is to set the camera’s white balance to match the environment. With this method the students then know how to set the white balance in post-processing. We were obviously in a forest region… and it was an overcast day with the typical thin layer of clouds that always hangs around Mombacho. I instructed my students to set their white balance to Cloudy or somewhere between Cloudy and Daylight. With just that one simple setting, the colors matched up pretty closely between the camera’s Live View and the actual scene surrounding us.
Next, I instructed them to adjust the exposure based on the histogram (again using Live View). Their goal was to match up the histogram with the scene they saw in front of them. As they worked with the histogram, their images progressed until they looked very similar to real life.
The biggest obstacle in capturing the scene was those pesky spots of light that were peeking through the trees. These bright spots create over-exposed areas in the trees. I suggested that my students use simple composition to minimize the amount of bright light. By using the longer focal length of a telephoto lens, the narrow field of view avoided the bright spots. This, in turn, made the exposure far easier to set properly.
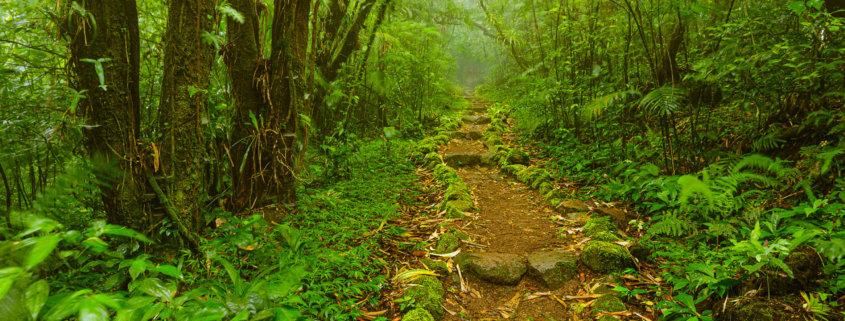
Image 1 (below) is my post-processed shot. Image 2 (also below) is the image that came straight from the camera. As you can see, the exposure and colors captured in-camera are pretty close to my finished image. So much of the post-processing was limited to bringing out the contrast, details, sharpness, and cloning in the finished image.
I used Lightroom to process the entire image. And I used basic adjustment in Lightroom for most of the modifications. I also used some tone curve adjustment and a few localized adjustments in to bring out the contrast and details in every part of the image. I then cloned out some leaves and created the finished image that you see here.
In Summary
Generally speaking, we all embrace technology in a variety of ways and for a variety of reasons. When it comes to nature photography though, it’s not the only path to stunning photos. Please don’t misinterpret me. I’m certainly not suggesting that Photoshop skills are unnecessary. I certainly believe in using whatever tools you have available to create beautiful photographs.
My closing point is… it’s not always necessary (or ideal) to rely on technology as a “quick fix”. Sometimes, creativity is a far better solution, especially if your Photoshop skills are more limited. Pushing our own creativity can broaden and enhance our nature photography outcomes… leading to the gorgeous, eye-popping images we strive to create.

