Visual Wilderness
  • Get Started
  • Shop
    • SPECIAL OFFERS
    • STREAMING SERVICE
    • Browse by Topic
    • Learn To Shoot
    • Post Processing
    • Online Classes
    • eBooks
    • Landscape Photography Guide
  • Blog
    • Blog
    • Guest Photographers
  • About
  • My Account
    • My Account
  • Search
  • Menu Menu
  • 1Shopping Cart
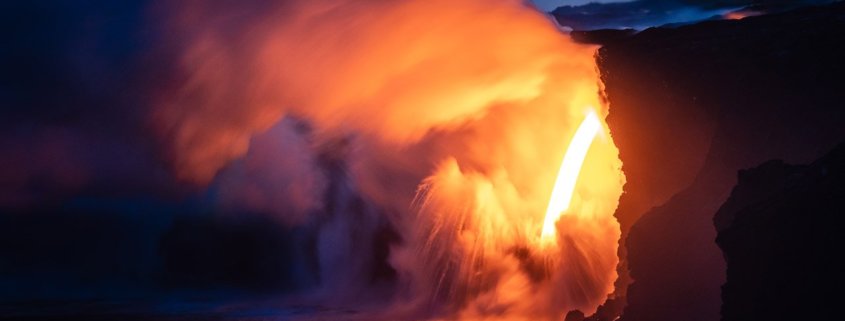
Cover Image on Tips to Sharpen Your Photos in Lightroom Blog Post

Tips to Sharpen Your Landscape Photos in Lightroom

August 21, 2019/in Blog, Post Processing/by Mark Denney

How should I sharpen my photos in Lightroom?

We get this question all the time from students.  So it is no wonder that one of the more sought after qualities amongst outdoor and nature photographers is overall image sharpness. This is an important element, as having crisp details and textures within your image can either make or break your photo.

Understanding how to properly sharpen your nature photos during post processing has become a rather complex and highly detailed procedure over the years due to the advancements in editing software. The interesting thing about sharpening though, is that the entire process is merely an illusion as there isn’t any way to actually “sharpen” a photograph.

Nature Photo Sharpened with Post-Processing from Yosemite National Park, California by Mark Denney

Nature Photo sharpened in Lightroom from Yosemite National Park, California by Mark Denney

The wizardry known as sharpening in Lightroom (or any other software) is the result of selectively applying small amounts of contrast to the edges of your image. This modest amount of edge contrast is what creates the illusion that an image is actually sharper than it was straight out of camera. Sounds easy enough, but the tricky part is understanding the best way to sharpen multiple types of detail and textures within your image. Not all details are the same and they shouldn’t be enhanced as if they are.

Sharpening Workflow

When it comes to sharpening in Lightroom for nature photography, there is no one-size-fits-all approach. Within a single nature photo you can have various types of detail and textures that require enhancing. These include small to fine-sized detail, medium and large-sized detail, or maybe all three. Each level of detail should be enhanced or sharpened independently using specific tools and methods of application.

Nature photography example that can benefit from different sharpening tools in Lightroom by Mark Denney

Nature photography example that can benefit from different sharpening tools in Lightroom

For example, in the image above, only the rock required a a strong edge sharpening. Not applying edge sharpening in rest of the image minimizes the noise. Similarly the ocean surrounding the rocks and the sky can benefit from texture enhancement.

There’s multiple tools available within Lightroom to enhance details and textures. Each method creates a similar yet different result depending on the level of detail you’re looking to enhance. Below are a few of my favorite tools that I use to sharpen my landscape photos. 

Detail Panel

This tool is perhaps the most popular technique when it comes to sharpening in Lightroom. This approach is comprised of four sliders: Amount, Radius, Detail, and Masking. It is a fantastic option to sharpen the small to fine-sized details contained within your image.

Lightroom Detail Panel to sharpen small details & edges by Mark Denney

Lightroom Detail Panel to sharpen small details & edges.

Here is an example from my upcoming Sharpening in Lightroom Tutorial that shows you just how effective the Details panel in Lightroom can be.

  • Abstract Nature photo before sharpening

    Image #1 – Before sharpening in Lightroom

  • Nature Photo sharpened in Lightroom using Details Panel by Mark Denney

    Image #2: After sharpening in Lightroom

The first image above (Image #1) is an abstract nature photo before I applied sharpening. I sharpened Image #2 using the details panels and other tools in Lightroom.

Texture Slider

This slider is perfect for sharpening and enhancing small to medium-sized details. I’ve found the best way to see the impact of this tool is to zoom in quite a bit and scrub the slider from -100 to +100. This is an easy way to visualize the level of detail that’s being impacted.

Dehaze Slider

This is an interesting one and something you might not think of as a means to sharpen an image. Not only does this slider resolve a flat, low contrast image, but it also applies a great deal of contrast to your scene. This results in the illusion of additional sharpening. Keep a careful watch on your global saturation as this can quickly get out of hand.

Selective Sharpening

One of my favorite aspects of Lightroom is the ability to selectively enhance specific areas of an image as opposed to applying a global affect. You can add sharpening to select regions of your image by using application methods such as the Radial Filter, Gradient Filter, and even the Adjustment Brush. This enables you to be highly selective with the areas of detail and textures you choose to enhance. When you look at a photograph, the most detailed areas of the image naturally draws the eye first. Only applying sharpening to certain regions is a great way to direct the viewers attention to specific portions of your scene. 

High ISO Nature photography exampled sharpened using selective sharpening techniques in Lightroom

High ISO nature photography example sharpened using selective sharpening techniques in Lightroom

There are multiple other ways to enhance detail and textures in Lightroom while also improving contrast in your nature photos, but these are a few of my favorite methods.

It is rather easy to get carried away with sharpening in Lightroom and create an image which looks rather unnatural or is full of halos. It is also important to understand how and where to apply sharpening to your nature photography. Properly sharpening your nature photos may seem like a highly technical and overwhelming process, but once you begin sharpening each size of detail independently, I’m sure you’ll quickly become impressed with the results.

Feel free to share your own sharpening techniques in Lightroom in the comments below:

About Author Mark Denney

Hi there! Mark Denney here - I’m a North Carolina based outdoor and landscape photographer. My affection for travel, photography and the great outdoors is something thats matured over the past six years. I’ve always been fascinated with camera technology, but the art of photography was something that escaped me until 2012. This is when I discovered the calming zen like meditation that is landscape photography. I’m a naturally anxious person and photography provided me with a channel to encourage patience and a means to slow down. I’ll never forget the tranquil feeling I experienced during my initial attempt at landscape photography. I remember arriving early to my location, setting up my composition and waiting for the setting sun - this was the moment I began to realize what my passion was. The transition time between setting up my shot and waiting for the “good light” to arrive is still meaningful to me as it creates a captive audience within myself and provides ample time to reflect and appreciate the beauty that surrounds us all. Outside of the technical and creative aspect of photography, I enjoy teaching the storytelling ability of photographs and encouraging others to not focus solely on the the end result, but to appreciate the overall photographic experience.

Website | Facebook | Instagram | Youtube

Tags: Lightroom
You might also like
Lightroom – Must Know Keyboard Shortcuts
Cover Image for Lightroom Catalog Management for Travel Blog PostLightroom Catalog Management for Travel Photography
10 Lightroom Shortcuts That Every Photographer Should Know
Cover for blog article about Lightroom for Landscape Photography by David JohnstonEasy Lightroom Workflow for Landscape Photography
Landscape photography from Geysir, Iceland by Jay PatelCommon Lightroom Mistakes that Beginners should Avoid
Cover photo for Landscape Photography blog post about Range Masks in LightroomHow to use Range Masks in Lightroom

NATURE PHOTOGRAPHY NEWSLETTER

Join 45,000+ Nature Photographers and get the free eBooks, free creativity course & discount codes right in your inbox.

loader

Note: We never share your email address with anyone. More Info.

Blog | Shop | About

 Email Policy  |  Privacy Policy  |  Terms

INFOCUS NEWSLETTER

Join 45,000+ other photographers and get the Free eBooks, Free Creativity Course & Discount Codes right in your inbox.


loader

Note: We never share your email address with anyone. More Info.

All Rights Reserved, © Copyright Visual Wilderness

Why use Dodging and Burning for Landscape Photography?Sample photo for Dodging and Burning for Landscape Photography Tutorial by Josh SnowLandscape Photography blog post about Photoshop Curves adjustment tool by Jane Palmer.Photoshop Curves Adjustment for Nature Photography
Scroll to top

This site uses cookies. By continuing to browse the site, you are agreeing to our use of cookies.

OK

Cookie and Privacy Settings


How we use cookies

We may request cookies to be set on your device. We use cookies to let us know when you visit our websites, how you interact with us, to enrich your user experience, and to customize your relationship with our website.

Click on the different category headings to find out more. You can also change some of your preferences. Note that blocking some types of cookies may impact your experience on our websites and the services we are able to offer.

Essential Website Cookies

These cookies are strictly necessary to provide you with services available through our website and to use some of its features.

Because these cookies are strictly necessary to deliver the website, refusing them will have impact how our site functions. You always can block or delete cookies by changing your browser settings and force blocking all cookies on this website. But this will always prompt you to accept/refuse cookies when revisiting our site.

We fully respect if you want to refuse cookies but to avoid asking you again and again kindly allow us to store a cookie for that. You are free to opt out any time or opt in for other cookies to get a better experience. If you refuse cookies we will remove all set cookies in our domain.

We provide you with a list of stored cookies on your computer in our domain so you can check what we stored. Due to security reasons we are not able to show or modify cookies from other domains. You can check these in your browser security settings.

Other external services

We also use different external services like Google Webfonts, Google Maps, and external Video providers. Since these providers may collect personal data like your IP address we allow you to block them here. Please be aware that this might heavily reduce the functionality and appearance of our site. Changes will take effect once you reload the page.

Google Webfont Settings:

Google Map Settings:

Google reCaptcha Settings:

Vimeo and Youtube video embeds:

Privacy Policy

You can read about our cookies and privacy settings in detail on our Privacy Policy Page.

Privacy Policy
Learn More
NATURE PHOTOGRAPHY NEWSLETTERJoin 45,000+ Nature Photographers

Unlock Your Photography Potential! Get Free Webinars, Tips, eBooks, and More Delivered Straight to Your Inbox! 📸✨

We never share your email address with anyone. More Info.

Enter your email address