5 Reasons to use Photoshop Layers & Masks instead of Lightroom
Have you noticed that, in the last few years, Lightroom is becoming more and more “Photoshop-like” by adding HDR and panoramic blending? There’s a reason for that. Lightroom is a great tool for image management and RAW processing, however some post processing workflow requires Photoshop Layers and Mask because it simply cannot be done in Lightroom, or at least done very well.
While Lightroom does have a non-destructive workflow build into it, it does not have ability to layer images. My non-destructive landscape photography workflow will often invoke blending different images together to accomplish my vision. Additionally I often time requires precise control over their local adjustments to guide how these images are blended together. I can easily accomplish this in Photoshop with masks which have both a sharp edge as well smooth tonal gradation. While Lightroom has ability to create masks using local adjustment tools these masks lack pixel level contorol that is build into Photoshop.
Here are just a few examples that require the use of Photoshop Layers & Masks:
The most natural-looking HDR
I’ve tried a number of different HDR programs over the years; Lightroom’s Merge to HDR, Nik’s HDR Efex Pro, Aurora HDR, and Photomatix among them. Despite all this amazing technology, and it is amazing what can be done with these programs, I still rely on the old faithful more than anything else. That happens to be manual blending in Photoshop.
If I take a properly-exposed foreground and a properly-exposed sky and put them together in Photoshop, I end up with a a very natural, authentic looking blend that doesn’t scream “HDR”. For me, that’s my favorite look. The dedicated HDR software actually makes it more difficult and time consuming to make the image look truly natural.
Blending textures with my photos
I know that there are some textures in Lightroom, but they’re limited in their abilities. You also cannot change blending modes with them. I add textures, sometimes two or three at a time, within Photoshop Layers in order to create the exact effect I want.
With the ability of layers to mask portions in and out, change opacity and blending modes, and make changes in the future, it seems to be a no-brainer. Photoshop offers the most versatility and creativity for your texture work.
Using plugins for Landscape Photography
I just LOVE plug-ins. After processing in Lightroom and/or Photoshop, I use Nik’s Color Efex Pro for nearly all of my color images and Silver Efex Pro for my black and white conversions. But, while these are available as plug-ins for Lightroom, once you exit the plug-in and return to Lightroom, you’re stuck with the results. You can not re-open Color Efex or Topaz or any other plug-in and make changes. You must start all over again.
If I take the one, small step of loading the image into Photoshop first and THEN using the plug-in, I can save the adjustments to a layer and make changes in the future. Even better, if I create a smart layer prior to opening the plug-in, Color Efex Pro for example, I can go back a few years later, reopen the image in Color Efex, and all my sliders and adjustments are exactly where I left them.
Focus Blending with Photoshop Layers & Masks
This is a technique that simply cannot be done without the use of layers. You take several photos at different focus points to get the amount of depth of field that you want in the final image. It allows you to use more “sweet spot” apertures like f/8 or f/11 on landscapes while still getting everything in focus from near to far.
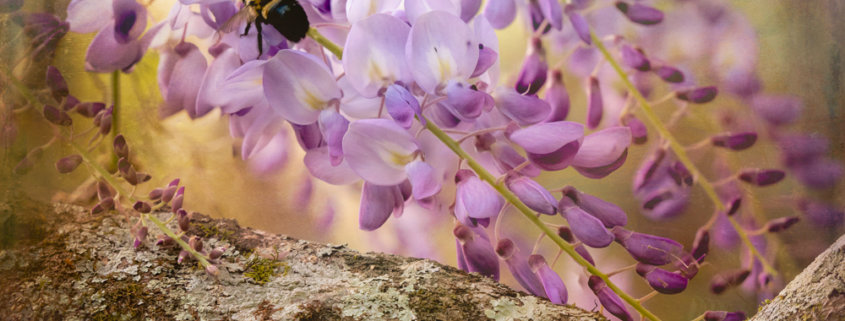
Focus stacking/blending is also a macro photographer’s best friend. Stopping down to f/22 or more is not always ideal when you want your entire flower or other small subject in focus while maintaining a soft background. In the image below, I took two images at f/8. One was focused on the foreground bud and one was focused on the background bud – without too much in focus in the background to distract from my subject. I got the best of both worlds. What can I say? I’m greedy that way!
Creating Composite Landscape Photo using Multiple Exposures
This is definitely not something I do on a regular basis. But from time to time, I just want to combine elements from different images. In the image below, I used a 16mm wide angle lens on the waves and branch in the foreground. But what happens to objects along the horizon when you use a wide angle lens? They tilt at a weird angle and get very small.
That’s what happened to the lighthouse. With my naked eye, it didn’t look tilted and tiny. So I took another image of the lighthouse at 50mm (which is close to what our eye sees) and blended it with the wide-angle shot. It’s not even my best blend as I did it ages ago, but it’s still one of my best selling images on Fine Art America. The public doesn’t seem bothered with the fact that I blended multiple images together to make this one. And nor should they. I created something unique and yet natural looking.
And most notably, I couldn’t have done this in Lightroom.
So as you can see that the there are quite a few things that landscape photographer can accomplish using Photoshop Layers and Masks that cannot be done in Lightroom. So why do most photographer prefer to work within Lightroom? Because Photoshop is not the most intuitive program and there is a steep learning curve to master Photoshop Layers and Masks.
It is best that a beginner landscape photographer who is just getting started in Photoshop focus on just the essentials of Layers & Masks. To get you started we have introduced brand new video tutorial Photoshop Layers and Mask for Beginners. In just two hours beginners will be easily able to navigate Photoshop Layers and Mask and accomplish all the task you see in this article.
I hope that this encourages you to give Photoshop a try if you have not done so already. The possibilities are endless!


