Creating Panoramas of Night Photos
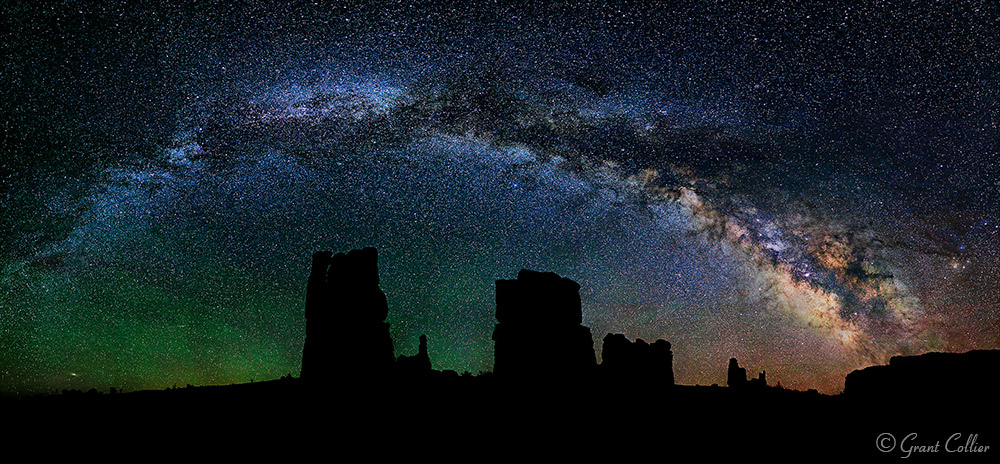
Even if you have some of the best camera equipment for night photography, you’ll still find that there is a fair amount of noise in the images. This noise may not be very apparent when an image is seen at small sizes. However, if you want to make a large print of the image, the noise can become more problematic. One of the best solutions I’ve found for this is to create large stitched images.
A stitched image is one where you take multiple shots, each comprising a small part of the scene you want to photograph. You later use computer software to “stitch” each of these images together to produce an image of the whole scene. The resulting file will be much larger and of much higher quality than one from a single shot.
EQUIPMENT
There is some specialized equipment you can use to stitch images, such as a panoramic tripod head, a leveling base, and even a robotic camera mount. However, the majority of the time you won’t need any special equipment. Anyone with a tripod and a DSLR can shoot stitched images at night.
Ideally, you’ll want to use a 35mm or 50mm lens with a wide aperture (such as f1.4). It is also helpful to have a tripod with a bubble level on top of its legs and a tripod head that has a rotating base.
CAMERA SETTINGS
When capturing stitched images, I recommend using the rule of 500 to calculate exposure time. Simply take 500 divided by the focal length of your lens to get the number of seconds to expose the shot. For example, if you’re using a 50mm lens, take 500 / 50 = 10 seconds per exposure.
You’ll typically want to use the widest aperture on your lens when shooting stitched images. You’ll also want to use the highest native ISO that doesn’t cause any highlights to be blown out.
TAKING THE PHOTOS
When you first start taking stitched images at night, I recommend avoiding shots that include a close foreground. This will make it much easier to get everything in the scene in focus with the wide apertures you’ll be using.
You will need to make sure that your camera is level using a bubble level or your camera’s built-in leveling feature. Ideally, you’ll also want to make sure your tripod head is mounted on a level surface by using a bubble level on top of your tripod legs or a leveling head. This will ensure that your camera remains level as you turn it.
Before beginning the stitched image, I recommend taking a test shot. Point your camera towards the brightest part of the scene you will be photographing and take an image using the camera settings you have decided on. Check the histogram to make sure you are not overexposing the image. If you are, lower the ISO until you are not clipping the highlights. You’ll also want to zoom in on your shot and make sure everything is in sharp focus.
If everything looks okay, you can start taking your stitched image. Position your camera to take an image of the far bottom left corner of the scene. After you take the first shot, you’ll need to quickly rotate your camera to the right before taking the second shot. Make sure and leave plenty of overlap between the images to make it easier for the software to stitch the images.
Now, continue taking shots and rotating the camera to the right until you’ve captured the entire horizontal field of view that you want to capture. If you are taking a multi-row panorama, you will need to rotate the camera up and then shoot a second row of images. Keep doing this until you’ve captured the entire vertical field of view you want to capture.
STITCHING WITH LIGHTROOM
You can stitch images within Lightroom CC. Simply select all of the images you want to stitch, right-click on them and select Photomerge > Panorama. Occasionally, Lightroom will be unable to stitch the images together. If this happens, I recommend trying a free program called Image Composite Editor.


