6 Landscape photography myths that beginners should ignore
There is certainly no shortage of advice that an beginner landscape photographer can find online. Landscape Photography forums on the Internet are populated by self-appointed experts who ask nothing more than to give unsolicited suggestions and to warn against the evils of not following some arbitrary set of rules or what is perceived as common wisdom. Unfortunately, many half-truths or outright lies, if repeated enough times, sometimes assume the status of truths-that-should-never-be-questioned. These become like myths, but one can only grow in their craft when myths are examined ruthlessly and if necessary, abandoned.
Let’s look at some of those myths in detail.
#1: You must have great light to take landscape photos
Great light can really make a picture if you know how to use it and how to combine it with an interesting subject and compelling composition. However, that doesn’t mean you should leave the camera at home or in the trunk of the car if the light is not great.
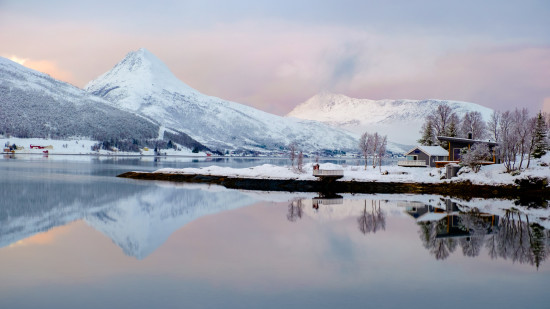
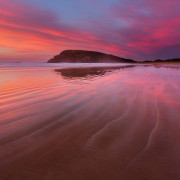
Here is a landscape photo taken one morning in Norway under overcast skies. It took some work in post-processing to bring out those pinks. They were there, but a straight conversion from RAW did nothing to them.
A good photographer finds ways to exploit almost any kind of light. Overcast skies are perfect for shooting waterfalls and even harsh, high noon light can create interesting shadows and graphical subjects.
Moreover, digital cameras nowadays are very good at capturing colors and details that our eyes cannot see very well unaided. Careful and expert post-processing can bring out those colors and details and infuse life into an otherwise flat and boring scene.
#2: Always use Manual exposure for Landscape Photography
Here’s my dirty secret: I use aperture priority mode about 90% of the time. I sometimes use manual exposure mode and very rarely shutter priority mode. If I feel a landscape photo might be over- or under-exposed, I use camera exposure compensation (I love the fact that my Fuji cameras have a dedicated camera exposure compensation dial).
Modern cameras are exceptionally good at nailing the camera exposure in almost every circumstance. Do you think you can do better? I’m not so sure.
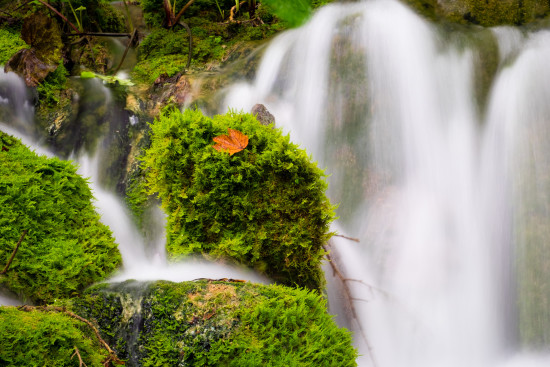
Landscape photo shot in aperture priority mode. Notice: There is no overexposure on the water, Plitvice Lakes NP, Croatia
I have nothing against photographers who only use manual mode. Sometimes we learn to use our cameras in a certain way and we stick with what has always worked for us. If manual works for you, be my guest.
What I can’t stand are photographers who look down on “beginners” who use aperture priority or, god forbid, the dreaded P mode. Give me a break!
That said, there are times when I use manual mode, but that has nothing to do with getting the right exposure and everything to do with getting a consistent exposure. For instance, I use manual mode when I want to get the same exposure for the main subject even when my framing changes because I moved or zoomed. I also use it when I’m taking a series of shots to stitch into a panorama or to combine for focus stacking.
#3: You need a full frame camera
Here’s another confession: I’ve never owned a full-frame camera and I don’t feel the need to own one. If you are looking down on me because you use a full frame camera and I use one that only has an APS-C sized sensor, let me introduce you to my friends who only shoot with medium format cameras.
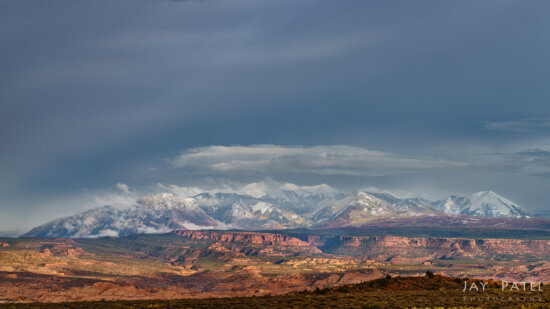
Here are is an example on Visual Wilderness taken with an APS-C sized sensors:
#4: You must always use a Tripod
If I can use a tripod, I will, but I won’t refrain from increasing my ISO, if necessary.
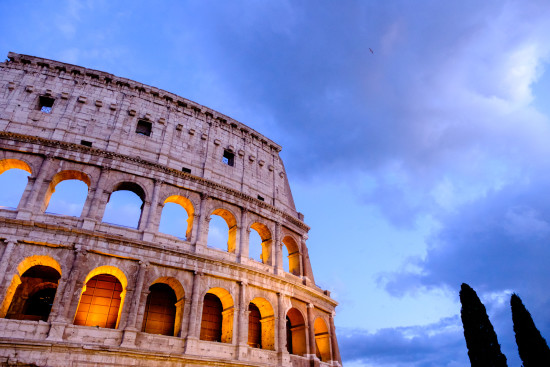
I didn’t have a tripod when I took the image above. I had been walking around Rome all day with some minimal gear; my legs and my back were tired enough and, if I had had to carry a tripod too, I would have probably already gone to bed and missed the best light of the day.
As the light at the edge of the day was getting marginal, I set the camera to auto-ISO with a minimum shutter speed of 1/60s to ensure I could get a sharp picture even when hand-holding. The camera chose an ISO of 2500 which adds some noise in the sky that is only visible when zooming in at 100%. If you print it, it goes away.
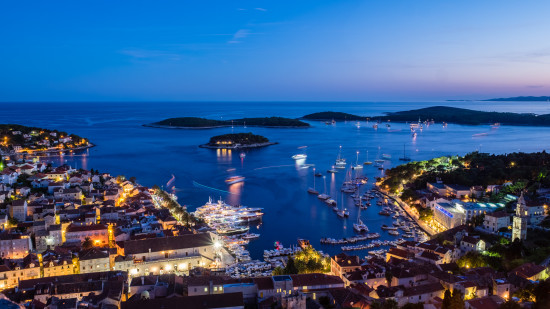
There are time when shooting handheld is the only way to capture a landscape photo for example if you are shooting from an air plane or a drone. Here are landscape photography hand held landscape photography example on Visual Wilderness:
#5: Special ball head is needed to capture panoramic landscapes
Nature does not alway conform to 3×2 format. There are times when a panorama is best suited to capture the stunning beauty of the scene. And you dont need any special equipment to do that. Photoshop and Lightroom have become insanely good at stitching together panoramas, if you take some precautions when shooting them. Special panoramic equipment such as panoramic heads are bulky, heavy, expensive, and not necessary 99% of the time.
I like to turn the camera to portrait orientation when I am taking panoramas because it gives me more vertical resolution. For this reason, I use an L-bracket so I can mount the camera on the tripod without turning the ball-head 90°; this gives it more height and more stability.
Here are few panoramic landscape photos on Visual Wilderness that were taken with a regular ball head.
#6: Avoid HDR for landscape photos
HDR, or High Dynamic Range imaging, has gained a bad rep from people abusing it to produce garish, overcooked clown vomit. The best HDR, in my opinion, is the one that doesn’t look like it’s HDR; and I firmly believe it can be done.
I often bracket shots just in case I might want to do a HDR version of the scene later. On the computer, I have my own workflow for creating natural-looking HDR images and it has served me well on a number of occasions.
In this article, I listed six prevalent myths in landscape photography. This is not an exhaustive list and I am sure someone will disagree with me….if you do, please leave your comment below. So please don’t take this list as anything definitive; I wouldn’t want to establish a contrarian mythology.
Above all, use your own judgment and never stop experimenting and breaking the rules.
Additional Resources
The field of landscape photography can be difficult to master because it involves both creativity and technical skills. In addition, a photographer’s development is often non-linear. Some may easily grasp the technical side of photography, while others pick up post-processing more quickly. Some are extremely creative, but have a difficult time with a more technical thought-process. This page provides you with tools to help you improve your photography development in each of these areas.








Great points. As a fan of your photography, it’s great to find out some little “secrets”.
Dear Ugo,
I liked your “six myths”, but I did feel a little like you were knocking down straw men. After all, these so-called rules are only guidelines, not laws of physics. For example, to illustrate the point on FF sensors, you have used a time-exposure taken with an ND filter and a tripod at base ISO. Evidently this doesn’t need FF. However, in low light without a tripod an APS-C will be noise-limited to ISO 1600 whilst a FF will likely be useable up to 6400. And at equivalent magnification, a scene on a FF sensor will be 1.6 times larger than on an APS-C, and so the APS-C will be 1.6 times more sensitive to camera shake. These are not show-stoppers but simply give the FF photographer more leeway.
I use an APS-C because FF cameras, seemingly being for professionals, never have a built-in flash which I find very useful for fill-in (few people having hiked up to the Annapurna basecamp at 13’000 feet actually carried a flashgun). In addition for those amateurs with children or grandchildren, having a flash available makes the difference between an acceptable shot or no shot.
Common myths are really nicely explained. Though I always like to use tripods for my photography, I started exploring more handheld shots with higher ISOs when tripod use is not convenient at times.
Thank you Vishwanath.
Great list Ugo. You have provided some very thoughtful tips. I always find discussion about full frame interesting. You used a full frame APS-C. What most people call full frame is quite small compared to medium format film/sensors, and if we compare it to a 4 x 5 or 8 x 10 view camera.
Spot on, Keith!
Hi Ugo
I am very impressed with your Natural, honest teaching!
Your work proves it and you make it easy for those who are beginners,
Inspiration, is a valuable tool to capture nature’s raw beauty!
Thanks for sharing!
June from Australia
Thanks for your kind words, June.
Hi Ugo, love the list & couldn’t agree more about the camera settings , it makes no difference how you get to the end result, it only matters that you achieve your target. As far as the HDR image is concerned, I still prefer to stack & edit my own images to bring out the image as close to what my eye could see at the time & I think having multiple exposures does help to get to that end result. As for thr light , there are so many way these days to get a wonderful image at almost any light , ND Filters , polarisers , etc , etc. that I never leave home without my camera & my next end result is not to far away…. Enjoy your work ,,, thanks… Loz
Thank you very much Laurie.
Great list Ugo! My opinion that anything that has a “must” or “always” in it is misleading advice – whether it be in regards to landscape photography or any other art.. While they might be useful general purpose advice, rules are always meant to be broken.
Exactly, but you “must always” provide your insightful commentary. That rule is not meant to be broken, Elizabeth ;)