Visual Wilderness
  • Get Started
  • Shop
    • SPECIAL OFFERS
    • STREAMING SERVICE
    • Browse by Topic
    • Learn To Shoot
    • Post Processing
    • Online Classes
    • eBooks
    • Landscape Photography Guide
  • Blog
    • Blog
    • Guest Photographers
  • About
  • My Account
    • My Account
  • Search
  • Menu Menu
  • 1Shopping Cart
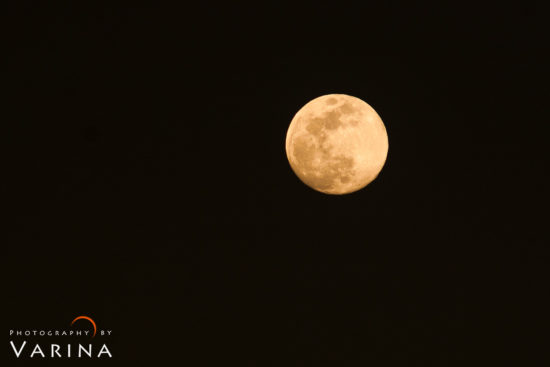
Cover for Night Photography article by Varina Patel about photographing moon.

Night Photography Advice for Capturing the Moon

May 31, 2019/in Fieldwork, Post Processing/by Varina Patel

Full moon on a clear night can create some beautiful and subtle details in the landscape. The moon is a gorgeous subject, but night photography that includes exquisite details in the moon as well as in the foreground can be tough. Have you ever photographed the moon, only to discover that it is so bright in your photograph that it appears as a small, bright spot? Or that foreground is completely black?

  • Night Photography with Moon & Foreground at Grand Tetons National Park, Wyoming by Jay Patel

    Grand Tetons National Park, Wyoming (WY), USA

  • Landscape Photo with Moon & Foreground at Zabriskie Point, Death Valley National Park, Califorina by Jay Patel

    Moon & Foreground at Zabriskie Point, Death Valley National Park, California

Night photography like the one that you see above is possible and can be hauntingly beautiful. But I created these landscape photos using two different techniques. The image from Glacier National Park is a composite image where the moon and the foreground were photography using two separate exposure and lenses. The second image from Death Valley National Park was captured using a single camera exposure using a telephoto lens. Lets take a close look at both of these techniques.

#1: Composite Night Photography Technique

I took the shot below at The Devil’s Golf Course in Death Valley National Park. A brilliant, harvest moon hung over the mountains… but my unedited photograph doesn’t show it. To capture the image I wanted, I used a “double-exposure” or blending technique. With my camera on my tripod, I took one exposure for the foreground, mountains, and sky. The scene was evenly exposed, except for the moon – so with the help of my tripod for a 30-second exposure, it was an easy shot. I used a 24mm focal length to capture the scene in the image below.

Night photo exposed for foreground captured with Wide angle lens by Varina Patel

Exposed for Foreground with a Wide Angle Lens – The Devil’s Golf Course, Death Valley National Park

When I had the landscape shot I wanted, I prepared my setup to capture a photo of the moon. I changed lenses – choosing a 300mm focal length so I could zoom in and capture the details in the moon. The moon is properly exposed in the shot below.  However, the sky is completely black, rather than the reality of it being a deep blue.

Night Photography with moon captured with a telephoto lens by Varina Patel

Photographing Moon with Telephoto Lens

In Photoshop, I combined the two images for a finished “composite” shot. Of course, the blended image isn’t entirely true to the reality of the scene. Although, neither was the original, unedited image. My finished composite captures the feeling of that huge, golden moon over the bizarre desert landscape.

Composite night photography with moon & foreground created in Photoshop by Varina Patel

Composite night photography with moon & foreground – The Devil’s Golf Course, Death Valley National Park – California

#2: Single Camera Exposure Technique

If composite imagery isn’t your thing – I have good news for you. It is possible to capture both the moon and foreground in a single camera exposure. The trick is to photography the moon at twilight. When the light is low, you can capture the moon and the foreground with a single exposure – without blowing out the moon or leaving the landscape pitch dark.

I took this shot at Sandy Beach on Oahu just after the sun had set, but while there was still some beautiful residual light on the scene.

Moon Photography at Sandy Beach, Oahu, Hawaii captured with a single camera exposure by Varina Patel

Moon Photography at Sandy Beach, Oahu, Hawaii captured with a single camera exposure.

Here are a few useful tips that I used to photography the moon in the above photo.

  1. First, I used a tripod to hold my camera steady. A 1/5 sec shutter speed let me blur my moving subjects in the foreground for a bit of motion without blurring the moon.
  2. Next, I took a couple of test shots to make sure I had the desired focus in the foreground and in the sky. Then, I zoomed in to check the photo on the back of my camera to be sure the details in the moon were sharp.
  3. Additionally, I stood well back from my foreground and used a long lens – 70-200mm with a 1.4x extender. This setup let me choose a 300mm focal length, which allowed me to zoom in to show the large size of the moon as it rose. A wide angle lens delivers a tiny, little moon that gets lost in the frame.
  4. Pay attention to the phases of the moon when you are planning your trips. We often plan our travels around the full moon, so we can capture it in all it’s glory if the weather cooperates.
Photographing moon with single camera exposure at Sandy Beach, Oahu, Hawai'i by Varina Patel

Photographing Moon with single camera exposure at Sandy Beach, Oahu, Hawai’i

Whether you choose to create a composite shot or a single exposure image like the one from Sand Beach in Hawaii, the moon is a beautiful subject.

Do have any more tips for shooting the moon? Please share them in the comments so that others can learn! And then, get out there and shoot the moon, everyone!

About Author Varina Patel

There is nothing more remarkable to me than the power of nature. It is both cataclysmic and subtle. Slow and continuous erosion by water and wind can create landscapes every bit as astonishing as those shaped by catastrophic events – and minuscule details can be as breathtaking as grand vistas that stretch from one horizon to the other. Nature is incredibly diverse. Burning desert sands and mossy riverbanks… Brilliant sunbeams and fading alpenglow… Silent snowfall and raging summer storms… Each offers a unique opportunity. I am irresistibly drawn to the challenge of finding my next photograph, and mastering the skills required to capture it effectively.

Website | Google+ | Facebook | Twitter | YouTube

Tags: Night Photography
You might also like
Night photography of Northern Lights by Clint BurkinshawNight Photography Guide for capturing Northern Lights
Cover for Night Photography Blog post by Grant CollierA Beginners guide for Night Photography
Cover for Milky Way Photography Blog for Beginner by Jay PatelAn In-depth guide for Milky Way Photography for Beginners
Night photography at Arches National Park, Utah by Jay PatelTop 3 Misconceptions about Night Photography to Ignore
Example of photo stacking & blending for Night Photography by Austin JacksonNight Photography Tips for creating Stunning Images
Landscape photography with Belt of Venus, Turret Arch and the La Sal Mountains in Moab, Utah by Grant CollierMagical Landscape Photography at Twilight Hour
12 replies
  1. Bob
    Bob says:
    July 23, 2019 at 4:53 pm

    Minor detail: Wouldn’t a 70-200 mm with a 1.4 extender have a max focal length of 280mm?

  2. Derek Tempongko
    Derek Tempongko says:
    July 23, 2019 at 2:07 pm

    Thank you for the valuable tips Varina and Jay! Would you be able to share any tips on shooting the moon using a Smartphone? I own a Google Pixel 3 phone and I know the camera on this phone produces fantastic shots, for what it’s worth for Smartphone photography. I wonder if you might know of any tips that I can try the next time I get to shoot the moon. Thanks a bunch!

    • Jay Patel
      Jay Patel says:
      July 25, 2019 at 8:53 am

      I have seen few photos…but never really tried that. We will see if we can put an article about Smartphone up for our audience.

  3. Lily
    Lily says:
    July 16, 2019 at 3:50 am

    All you need to take a photo of the moon:
    -Know the phases of the moon
    -Correctly choose the time of shooting
    -Fill the frame
    -Use foreground
    – Reduce vibration to sharpen
    -Determination of the correct camera settings
    – Tricks Photoshop
    voila and you have a gorgeous moon

  4. durul
    durul says:
    June 2, 2019 at 1:15 pm

    This is my Exposure Settings for the Moon shoot
    ◦ Aperture f5.6 Shutter 1/250 ISO 400
    ◦ Aperture f8 Shutter 1/125 ISO 200

  5. Nitin
    Nitin says:
    June 1, 2019 at 6:02 am

    The evening before the full moon day is best for this type of photography

    • Jay Patel
      Jay Patel says:
      June 1, 2019 at 7:46 am

      Thanks for the most valuable tip.

    • Ashutosh Kaushik
      Ashutosh Kaushik says:
      July 24, 2019 at 2:38 am

      I agree a full moon shows rather flat surface. I would always recommend couple of days before or after full moon to capture the details of craters. I also suggest at least a 600 mm lense. Any thing less needs too much cropping and you will loose the details. Stay with simple settings – f9 or f10, ISO 100, 1/100. Take few shots by playing around with the f-stop some will certainly come out good. An evening sky which is deep blue makes a great background.

      • Jay Patel
        Jay Patel says:
        July 25, 2019 at 8:52 am

        Thanks for a great tip!!

  6. Powerstroke98
    Powerstroke98 says:
    August 11, 2017 at 1:54 pm

    Thanks for sharing Varina! I follow yourself and Jay, and I’m appreciative of the information you share with those of us trying to sharpen our skills. Of course with Photography being a hobby rather than our career, we don’t often get the time as you do to find that ‘constant’ use of our camera’s which heightens our experience overall, yet the excitement of getting out when we can, and use the tips and tricks we find through folks such as yourself are helpful and important.

  7. Carl Lum
    Carl Lum says:
    August 3, 2017 at 12:59 pm

    The great thing about the composite method is, once you take one really good image of the moon, you can save it and then paste it into just about any shot! My images have improved dramatically since I learned more about layers and compositing.

  8. Rick Ramsey
    Rick Ramsey says:
    August 1, 2017 at 7:36 pm

    Just a heads-up that the email that brought me here described your photo from Zabriskie Point as a moon rising at sunset, when from the direction you were facing it is clear it is a photo of the moon setting near sunrise.

Comments are closed.

NATURE PHOTOGRAPHY NEWSLETTER

Join 45,000+ Nature Photographers and get the free eBooks, free creativity course & discount codes right in your inbox.

loader

Note: We never share your email address with anyone. More Info.

Blog | Shop | About

 Email Policy  |  Privacy Policy  |  Terms

INFOCUS NEWSLETTER

Join 45,000+ other photographers and get the Free eBooks, Free Creativity Course & Discount Codes right in your inbox.


loader

Note: We never share your email address with anyone. More Info.

All Rights Reserved, © Copyright Visual Wilderness

How to use Histograms in PhotographyCover photos for landscape photography article about histograms in photography by Jay PatelCreative Flower Photography with Lensbaby Sol Series
Scroll to top

This site uses cookies. By continuing to browse the site, you are agreeing to our use of cookies.

OK

Cookie and Privacy Settings


How we use cookies

We may request cookies to be set on your device. We use cookies to let us know when you visit our websites, how you interact with us, to enrich your user experience, and to customize your relationship with our website.

Click on the different category headings to find out more. You can also change some of your preferences. Note that blocking some types of cookies may impact your experience on our websites and the services we are able to offer.

Essential Website Cookies

These cookies are strictly necessary to provide you with services available through our website and to use some of its features.

Because these cookies are strictly necessary to deliver the website, refusing them will have impact how our site functions. You always can block or delete cookies by changing your browser settings and force blocking all cookies on this website. But this will always prompt you to accept/refuse cookies when revisiting our site.

We fully respect if you want to refuse cookies but to avoid asking you again and again kindly allow us to store a cookie for that. You are free to opt out any time or opt in for other cookies to get a better experience. If you refuse cookies we will remove all set cookies in our domain.

We provide you with a list of stored cookies on your computer in our domain so you can check what we stored. Due to security reasons we are not able to show or modify cookies from other domains. You can check these in your browser security settings.

Other external services

We also use different external services like Google Webfonts, Google Maps, and external Video providers. Since these providers may collect personal data like your IP address we allow you to block them here. Please be aware that this might heavily reduce the functionality and appearance of our site. Changes will take effect once you reload the page.

Google Webfont Settings:

Google Map Settings:

Google reCaptcha Settings:

Vimeo and Youtube video embeds:

Privacy Policy

You can read about our cookies and privacy settings in detail on our Privacy Policy Page.

Privacy Policy
Learn More
NATURE PHOTOGRAPHY NEWSLETTERJoin 45,000+ Nature Photographers

Unlock Your Photography Potential! Get Free Webinars, Tips, eBooks, and More Delivered Straight to Your Inbox! 📸✨

We never share your email address with anyone. More Info.

Enter your email address