Understanding Focus Modes for Nature Photography
When I first began doing nature photography, I ignored using autofocus mode on my DSLR and mirrorless camera and would always use manual focus mode. Being that I was transitioning from a wildlife photographer to shooting mostly landscapes, I had assumed that the autofocus setting on my camera lens had seen its last days. After a few more years and after second guessing my focus mode choice as I have upgraded over time, I realized what a mistake to just ignore autofocus mode altogether. I now use both autofocus mode and manual mode as needed for my nature photos based on the subject matter that I am photographing.
If you are just starting out in nature photography you will need to know what autofocus and manual focus modes on your camera work. Here is a quick look at how focus modes on your digital and mirrorless camera work:
Focus Modes on DSLR or Mirrorless Cameras
Autofocus Modes
Digital and mirrorless cameras have multiple ways of engaging the autofocusing systems. The first is to depress the shutter halfway and when the focus locks on to your subject complete the full shutter depression. This seems to be the default option on DSLR and mirrorless cameras. The second option is to use back button focus. This can be achieved by going into your camera’s respective menu systems and assigning the auto focus setting to one of the buttons on the back of your camera. This is my preferred method for wildlife photography.
Autofocus modes on most DSLR and mirrorless cameras have two settings – Single-shot autofocus setting and a continuous autofocus setting. Single shot autofocus setting will lock and engage the focus when depressing the shutter halfway, or when using the back button. This method works great for a static subject and wide angle landscape photos. However if your subject is in motion, you will have to constantly refocus using your shutter release. This is where continuous autofocus setting comes in handy. With continuous autofocus on your DSLR and mirrorless camera, your autofocus constantly adjusts focus as long as your shutter is depressed halfway, or pressing back button is held down. Continuous autofocus setting is invaluable to capture sharp photos for fast moving wildlife.
Autofocus Assist
Autofocus assist is a way to achieve autofocus in low light situations. This usually comes in the form of a faint light illumination from the camera (usually near the top of the lens mount) or by the use of an external flash depending on your camera model. Some cameras may also achieve this via liveview and automatically brighten up the scene for more precise focusing.
Manual Focus Modes
To use manual focus mode on your DSLR and Mirrorless camera, simply rotate the camera lens focusing ring and keep an eye in the viewfinder or LCD to make sure you are getting accurate focus. You can also zoom in and use your camera’s liveview for the more accurate focusing. Most DSLR and mirrorless cameras will allow you to use manual focus when autofocus is switched to on, however, some do not. Be sure to check your camera manual to make sure as to not damage focusing elements.
Focus Area
Most DLSR and mirrorless cameras have multiple focusing points that are scattered across the frame. Some cameras may only have a handful of focus points (usually older models), while others may have hundreds. These points are usually displayed as squares or rectangles in liveview or through the viewfinder. You can use one of more of these focus sensors at any given time. Nature photographers prefer single or small focusing areas to control where the camera focuses. However there are instances where you may want to use multiple focus points for nature photography.
Focus Setting for Wildlife Photography
Autofocus mode is immensely helpful for wildlife photography. I’ve tried using manual focus for photographing wildlife and have mostly come up empty handed. This is because when I was trying to photograph wildlife, my subject was engaged in some activity and was constantly moving around. Trying to manually focus while on a moving animal is quite a task. Utilizing the autofocus mode in this case is simply a no-brainer. Most DSLR and mirrorless cameras have decent auto focus systems these days, but there are some budget-friendly camera that may not support all autofocus modes.
If there is enough light, continuous autofocus settings will be very successful to track your wildlife subject. When the autofocus mode begins to hunt for focus and cannot lock on to your moving subject, it’s time to switch to manual focus. This usually occurs when there is not enough light to allow the autofocus system to track your wildlife properly. If you have steady hands and are using a sturdy tripod you may be able to capture the moving wildlife in sharp focus.
Autofocus Mode for Landscape Photography
With DSLR and mirrorless cameras, it is easy to use autofocus mode for landscape photography. Many of these cameras have built in features that allow touch screen autofocus when using your camera’s Liveview. Many wide angle and telephoto lenses are capable of very quick and highly accurate focus at the focus point selected by you. The combination of quick accurate focus using touch screen LCD can be used to capture multiple images with focus points for focus stacking applications.
I’ve found great success focusing about 1/3rd of the way into a wide angle landscape photos. For this to work properly you want to be sure you are not extremely close to your foreground. I simply tap anywhere within the bottom third of the frame to get my focus. If your camera does not have touch screen auto focus, don’t worry, you can still utilize liveview to focus. Once you have decided where you want to focus, just select the proper focus point using shutter release or back button to capture your landscape photo.
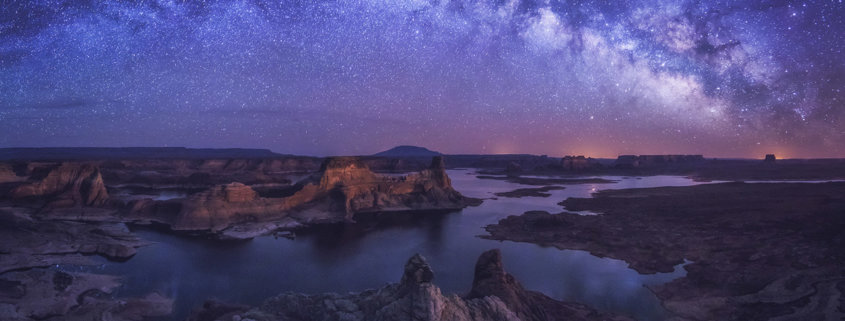
Manual Focus Mode for Night Photography
If you do any night photography, chances are you probably won’t be able to use autofocus mode. With the general atmosphere being extremely dark, it will be difficult for your camera’s autofocus mode to achieve a focus lock. In this case, I try to zoom into the area I want to focus at and then use the camera’s liveview to manually focus at that point. This only works if there is something bright enough to see on your camera’s liveview such as city lights or the moon. If you have a powerful headlamp you can use this to light up the area you want to focus at and then use the camera’s liveview to get a focus lock at that point. You can also try focusing to infinity using your camera lens (as long as you have a headlamp to see) as that will usually be the sweet spot.
So now that you have some idea of when to use manual focus modes for night photography here are some things to keep in mind:
- Use Tripod stable sturdy. Stable and durable tripod legs and a sturdy tripod head (ballhead or gimbal) will ensure sharp images during long exposures.
- Zoom in using your camera liveview to accurately set your focus in manual focus mode.
- Use an artificial light source (headlamp, flashlight or citylights) located at infinity for night photography. Once you get a focus lock don’t forget to switch your camera to manual focus to ensure that the focus remains locked at that point. It is also important not to accidentally rotate the focus ring when you are in manual focus mode.
- Use a 2-sec timer or remote release so that you don’t accidentally bump your camera while pressing the shutter release.
- You may want to take a test shot to see if the stars and foreground are sharply in focus.
Getting accurate focus for nature photography is critical to spectacular images. Guidelines provided in this article will help use the optimal focus modes for any given situation. However keep in mind that every situation is different and sometimes you will have to use your creativity and out-of-box thinking to nature photography in sharp focus.


