How to Create Clean Backgrounds in Macro Photography
Let’s talk about backgrounds, the often overlooked part of macro photography images. One of the most important and challenging variables to master in macro photography is how to create simple, clean backgrounds, free of distractions. In the field working with students new to macro photography, I often find that students are so entranced with their subject, they may not be paying attention to what is going on in the background. A messy background with distracting elements can pull the eye away from the main subject, the star of the show, and compromise an image. A goal in my personal photography and in my teaching others is to try to achieve the best possible background in camera and avoid spending needless time in post processing to remove distractions.
So how do we learn to master this challenging part of macro photography? Here are some ideas to help you.
Train Your Eye to Look at the Entire Frame
As you look through your viewfinder, don’t just look at the main subject – examine the whole frame and patrol the edges to be aware of what is happening in the background. Getting in this habit in the field will help you pay attention to your whole composition and create stronger images. Slowing down and practicing mindfulness in your photography is essential for learning to see and control all the variables needed to create great images. It is also important to take a few minutes to ask yourself:
- What drew me to this particular subject and how does it make me feel?
- What do I want to draw the viewer’s eye to in order to tell my story?
- What can I eliminate that doesn’t add to that story?
- Simplify your composition!
As you are looking at the entire frame, ask yourself what is important to the image and what needs to be eliminated.
Pay Attention to Your Macro Photography Composition
Before you compose your image or put your camera on a tripod, look through your viewfinder and move around, experimenting with different angles and compositions. Watch what happens to your background. By moving just a fraction of an inch or reorienting yourself in a different direction, you can completely change a background. Those small movements may help you eliminate a bright spot of light or other distracting elements, such as other stems or leaves. I am often surprised by how I can create a much different, stronger image just by changing my position slightly. Although one should never alter a scene in a public space like a botanic garden or national park, moving dead leaves or loose sticks out of the way or gently pulling back distracting elements and securing them with a clothespin or plamp, is acceptable as long as no damage is done to the plants. It is much easier to try to get it right in camera rather than spend time correcting distractions in backgrounds later in post processing. When photographing macro subjects in a garden, I am always looking at the bigger picture, beyond my subject. Are there other flowers or foliage in the background that might add visual interest or color if blurred? How is the light affecting both my subject and the background? Is that light causing hot spots that will pull the eye away from my subject? If my light is too strong, do I have a large enough diffuser to soften the light both on my subject and in the background elements?

Study your background carefully to determine if it adds beauty to the image or detracts from it. Lensbaby Velvet 85mm
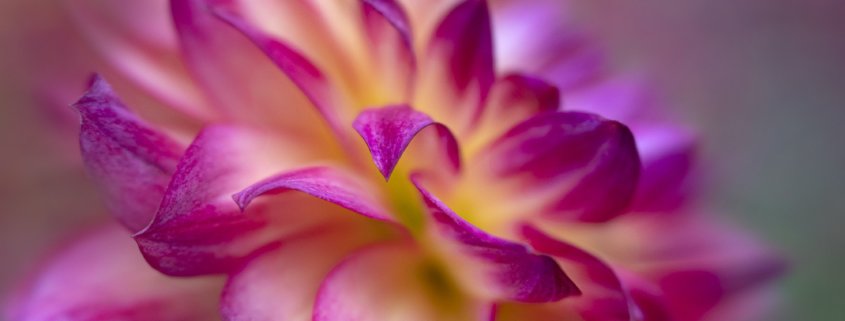
Try to choose subjects that have backgrounds set off in a distance. When you have good separation between your subject and background, the background elements will become a beautiful blur. The magnolia image below is an example of positioning myself to use the background in a distance. I took my time and positioned myself between two branches of the magnolia tree making sure I had no other flowers or branches in my frame. I raised up on the my tiptoes, angling slightly down to use a patch of green grass about 12 feet in the distance as my background. Because I was close to my subject, I needed a higher aperture to get the whole flower from front to back and the bud in focus. Although I experimented with a range of apertures, I found that f/14 was the most successful and because the grass was at a distance, it went to a beautiful blur even at that higher aperture.
If you find it impossible to eliminate distractions from the frame, you might make the choice to move in and eliminate most or all of the background. Sometimes it is the best way to deal with unruly backgrounds and it will certainly create impact and lead the eye directly to your subject.
Use Aperture to Control Your Background
It is important to understand depth of field in all genres of photography but even more so in macro photography where you are working closer to your subject. Depth of field is determined by the aperture chosen, how close you are to your subject, how far away your background is, and the focal length of your lens. Wider open apertures (f/2.8-f/4) will produce less depth of field and, thus, more blur in your background. Using a shallow depth of field (also known as selective focus) will serve to draw the eye to one part of your image while the rest falls to blur. Higher apertures (f/8 and above) will produce more depth of field and bring more of your subject and the background elements into focus. How do we know what aperture to choose for a particular image? It is a matter of choosing that right aperture that will get the important elements of your subject in focus and keep your background a beautiful blur at your chosen distance. Most important, however, choice of aperture is a way to create the vision you have of your subject. There is no one right or wrong answer; some prefer more in focus, others prefer less and like to dance on the edge of focus. In many instances, because I love to photograph using selective focus, my choice gravitates to those wider open apertures. Not always, however. When the details and texture of a flower, like the magnolia above, are part of the story I want to convey, I will choose a higher aperture and more depth of field. I recommend approaching each image with that series of important questions mentioned above – What drew me to this particular subject and how does it make me feel? What do I want to draw the viewer’s eye to in order to tell my story? What can I eliminate that doesn’t add to that story? – then experiment to bring that vision to life.
Learning about depth of field may require a bit of experimentation and knowledge of your lenses. I recommend shooting in Aperture Priority mode. Because aperture is the most important variable in my workflow, I like being able to quickly move between apertures to experiment. A great exercise to help you understand the effect of aperture is to choose a flower or any stationary macro subject and shoot it in the full range of apertures with a range of lenses. Take your time – flowers won’t leave the scene! Study the results on your computer screen. This exercise will help you learn about controlling backgrounds as you learn to balance the aperture and how much is in focus in your background. With time and experience, choosing apertures will become more intuitive and you will begin to recognize a style that pleases your eye. Even when I know the vision I am trying to achieve and the aperture that will most likely get me there, I always experiment and shoot in a short range of apertures to ensure I get the image that matches my vision. I never want to go home after shooting in one aperture and realize that I needed a bit more or less depth of field to bring my vision to life. Experiment! The true test comes in seeing that image on your computer screen, not the back of the camera. Don’t leave the scene without fully working your subject. This is where the learning happens!
Choose the Right Macro Photography Lens
A longer focal length lens will will create more blur in your background. For example, I will often reach for my 180mm macro lens instead of my 100mm macro to create more compression and blur in my background. A longer focal length zoom, such as a 70-200mm, will also have the same effect when used at the longer focal lengths.
Creating beautiful blur in my background is one of many reasons I love shooting with Lensbaby lenses. The art effects and blur built into the Velvet 56mm, Velvet 85mm, the Composer Pro System with interchangeable optics, the Sol and other Lensbaby lenses all create soft backgrounds in camera. The image below was taken with the Lensbaby Sol 45mm and part of a project I am working on to create backgrounds in camera that create impact and compliment my subject. I positioned myself to include some beautiful, colorful flowers in the background. The Sol 45mm, at a fixed aperture of f/3.5, created a stunning background straight out of camera.
Add Textures to Your Background
The use of textures to enhance or even replace a background has become very popular in recent years. Although I love the challenge of creating great backgrounds in camera and this is my preferred way to work, I do occasionally enjoy playing with textures in post processing to bring a more artistic look to my images or create a more interesting background. It is a fun way to stretch your creativity. Our photography should be playful and, most of all, fun. Because I personally prefer to keep my textures subtle and soft, I have found it fun to create my own background textures while shooting in a garden. While photographing in nature or gardens, I look for colorful scenes – beds of flowers, grasses, colorful leaves – and photograph them completely out of focus. I will then place that layer on top of the flower image in Photoshop, create a mask, and use a brush tool to paint over the parts of the flower I want to make visible beneath the texture, leaving the texture in the background. I will experiment with blending modes and opacity to get the look I am envisioning. Fellow Visual Wilderness author, Christine Hauber, has an earlier article “Beginner’s Guide to Creative Texture Blending” that gives more detailed instructions on applying a texture, and there are many videos available online for using textures. Below is an example of a dahlia I photographed that had a clean green background provided by some grass in a distance. Although the image was fine as it was, I began to play with adding a background I photographed in the garden that complimented the colors within the flower. The image became more interesting and dynamic with the added color.
With these ideas to help guide you – paying attention to the whole frame, positioning, aperture, lens choice and even the use of textures to enhance your backgrounds – you have the essentials to help create clean backgrounds in your macro photography images. Our journey, our growth as a photographer requires a lot of experimentation, time and practice. Take the time to stay with your subject and work it to the fullest – aperture, compositions and the lenses you use. Experimentation is how we learn, mistakes and all, and is at the heart of creativity. Be patient in your learning – it won’t all come overnight – but with time and lots of practice it WILL come.


Great article. Gonna have to practice this at out of Oregon next week!
Hi Steve! Thank you for your comment! Looking forward to seeing you and catching up at Out of Oregon. Here’s to a week of great photography!
What a wonderful, informative and inspirational article! On the flower example above where you used f/14 as your aperture, I was wondering where you focus on the flower to ensure that the rest of the flower is in focus.
Thank you for your comment, Claudia! I’m glad the article inspired you and your question is a great one. When deciding where to place my focus I always ask myself where I want to draw the eye, what is most critical to have in focus? In the magnolia image it is the center of the flower that is the most important, that’s where the eye goes first. With this flower, however, I liked the whole flower and the bud in focus and that’s why I needed that higher aperture to achieve that (f/14). Because I work my subject and shoot it many ways (I spent well over an hour with this particular flower), I also experimented with shooting it using selective focus in a wider open aperture, focusing on the center of the flower and letting the petals go to blur. There are so many ways to photograph a flower and there is no one right or wrong answer as to where you place your focus. It’s where ever you want to lead the eye first. It might be the center of the flower, it might be a petal edge or a dew drop resting on a petal. Just make sure that your aperture choice tells that story clearly. Aperture is such a powerful variable in bringing our stories to light and that’s why I encourage people to experiment – shoot in a variety of apertures, with a variety of compositions and angles and see what pleases your eye. That’s where the creativity happens!