5 Useful Tips for Beginner Macro Photography
Are you looking to get into macro photography? Do you want to start taking stunning macro photos fast? Don’t worry. Macro photography isn’t as hard as it might seem. There are actually a few simple tricks that beginners can use to get gorgeous macro photos every single time you shoot.
In this article, I’ll share those tricks with you. Sound good? Let’s get started.
#1: Choose a Wide Aperture for Softer Shots
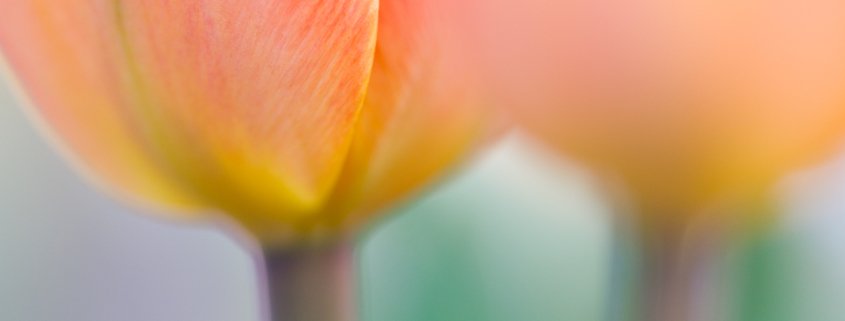
I love soft-focus macro photography. I’m referring to the type of close-up shot where barely any of the frame is sharp. There’s something very impressionistic about it. Here’s an example:
Notice how much of the photo is a lovely blur. Very little is actually sharp. But how do you achieve this effect? Simple! All you have to do is work with an ultra-wide aperture.
In general, I shoot soft-focus macros with the widest aperture my lens has available, which is generally f/2.8. This blows the background out of focus, creating a beautiful blur (also known as bokeh).
You may have heard that lenses tend to be their softest around f/2.8. This is true, but sharpness isn’t as significant in soft-focus macro photography.
It’s also important to have a significant distance between the subject and the background. If the background is too close, it’ll be in focus (or nearly in focus). And if that happens, the bokeh just won’t look good. So use the widest aperture you have and increase that subject-background distance.
#2: Shoot in Cloudy Weather for Stellar Colors
This is a simple tip but it’s extremely important. You see, macro photography is all about the light. If you don’t know how to work with light, you’re going to struggle.
But if you know how to work with light you can get some amazing photos. So what light is best for macro photography? There are a few contenders. But one of the best types of light, for me, is cloudy weather.
No, you don’t want rain. But if you go out on an overcast day, your photography looks so much better. This is because clouds diffuse the harsh sunlight, softening it. Plus, the overcast lighting helps bring out rich, deep colors.
#3: Get In Close…and Keep Getting Closer.
Macro photography is all about getting close-up shots, right? It’s true. But not enough beginner actually get close to their macro photography subjects.
When I say ‘close,’ I mean really close.
So here’s the problem:
If you shoot your subject from further back, you don’t get the same impact. You don’t create the same presence, the same oomph.
Instead, I recommend that you get as close as you can. If your lens offers true macro focusing capabilities, then use them. Experiment. Have fun! If you don’t have a dedicated macro lens, that’s okay too. This tip applies to all macro photographers.
Just get closer! You’d be surprised by the type of shots you discover. For instance, you may start to abstract macro possibilities!
#4: Find a Point of Focus for Gorgeous Compositions
When it comes to macro photography compositions, you have a number of options. That is, you can arrange the frame in a number of different ways.
But here’s one thing that never changes about macro photography: You need a clear point of focus. I’m talking about the sort of thing a viewer can latch onto. The sort of thing that can anchor your compositions.
Fortunately, points of focus are everywhere. Flower petals, veins on leaves, dragonfly wings–it can all be a clear point of focus! You just have to make sure that it’s sharp. You also must make sure that there are no distractions. After all, you don’t want something to compete with your point of focus.
Even if you’re struggling to find a good focus point, don’t give up. Instead, try moving slightly closer or farther away. Experiment with slightly different angles. Eventually, you’ll find a great point of focus and you’ll get an absolutely perfect shot.
#5: Use Sun-Shade Combinations for the Best Background
This is one of my favorite macro photography tricks. But it’s not one that most people know about.
The best macro photography shots have stellar backgrounds. That is, they have backgrounds that are simple, uniform, and clean. There are no distracting objects or splashes of color.
But the best macro shots generally go beyond this. They don’t just have a clean background, they have a gorgeous one. A background that could almost stand on its own. Let me show you what I mean:
So… how do you achieve something like this? It’s actually quite simple. All you have to do is wait until the late afternoon. Then find a nice subject–one that’s sitting in the shade. Position yourself so that the background is very sunny. Then take your shot.
You’ll create a photo with a wonderful, pastel-like background. And this will set your macro photos apart.
Beginner Macro Photography: Next Steps
Now you know some of the most important macro techniques out there. Techniques that will really help your photos.
You know how to create gorgeous colors. You know how to create amazing light. And you know how to use a wide aperture.
The next step a beginner macro photographer? Get out and shoot!


