A Beginner’s Guide to Camera Histograms in Photography
“What’s a histogram”, you ask? Histograms in photography are simply a graphical representation of the tonal values captured in your images. In simpler terms, it shows you how dark or bright your image is.
Understanding Your Histogram
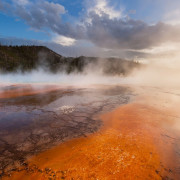
When looking at histograms in photography, the darks are represented on the left, mid-tones in the middle, and lights on the right. The number of pixels representing each tone is viewed on the vertical axis. Looking at the histogram below, I can see that most of the tones in my image were dark to mid toned. There’s a slight spike on the right side which represented a bright spot in the photo. The image that goes along with this histogram is just below it. When you see the actual photo, you can see how the blues, grays, browns, and other colors are making up all of the dark to mid tone parts of the histogram and the clouds and sun are represented in the right portion of the histogram.
Why Do You Need a Histogram?
Well, great! Wonderful information to have. “But why do you need it”, you may be asking?
I use a histogram at multiple times during my image creation. The first is in the field. There’s a rule I live by… I never trust my LCD to show me a proper exposure. LCD’s are inherently bright. They’re made that way. You’re supposed to be able to see your image on a digital screen in the great outdoors, often under bright conditions. If the LCD didn’t produce a fairly bright image, you wouldn’t be able to see it outside very well.
Knowing that, and the fact that I’m looking at a JPEG even when I’m shooting RAW, I use my histogram to tell me whether or not I’ve captured the range of light needed for a proper exposure. It also lets me know if the range of light is too much for a single image to capture. If my highlights and shadows are peaked off the vertical axis of the histogram, this is a good occasion to create a bracketed HDR image set.
As landscape photographers, we have a little time to check these things in the field. After all, the landscape usually isn’t in any hurry to go anywhere. So why not make sure you have all the tones you need before you pack it up and go home?
A Real-Life Example
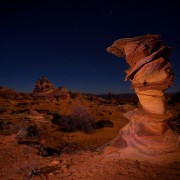
Let’s look at this very situation so you can understand visually what I’m talking about. Here are three images of Jabba the Hut taken two stops apart in Valley of Fire State Park. What? You don’t see Jabba? Maybe it’s just me.
I have an underexposed, metered exposure, and an over-exposed photo in this set. On the right of each is their corresponding histogram in Adobe Camera RAW. You’ll see the same thing in Lightroom’s RAW converter.
I turned on the highlight warning to see where I was losing highlight detail.
First, the metered image. When you look at the histogram, the highlights on the bright rocks in the background are blown out or clipped. There was no detail recorded in these highlights, or at least not enough to be recovered in the RAW converter. I did try to process this single image in Camera RAW and was unhappy with how the bright rock looked when I had to drag the highlight slider all the way to the left in order to recover blown highlights. It just didn’t work. HDR was necessary here. Jabba’s just fussy that way!
This underexposed image (image 1) preserved all the highlight detail in the background rocks. No clipping on the right side.
This second image (image 2), 2-stops over exposed, preserved all of the shadow detail. No clipping on the left side of the histogram.
Histogram in Photography & Exposure
Ok… so I’m looking for histograms in photography that are just in the middle so that I don’t lose any highlights or shadows. Is that right?
Not necessarily. First, I’d like you to memorize this because you may hear otherwise out there in the photo world. There’s no such thing as a BAD histogram. They’re not evil… they are just showing you the tonal values you captured. There is, however, a poor exposure. I use my histogram to get the best exposure I can in the field and then I use it again in post-processing to make sure I’m not pushing my image too far and introducing blown highlights while working on the computer.
While creating images, I tend to expose so that my histogram is as far to the right as possible without clipping/losing too many highlights. I do this because making a bright image darker on the computer doesn’t introduce noise, but making an underexposed image brighter does. The less noise I introduce, the better my final image quality.
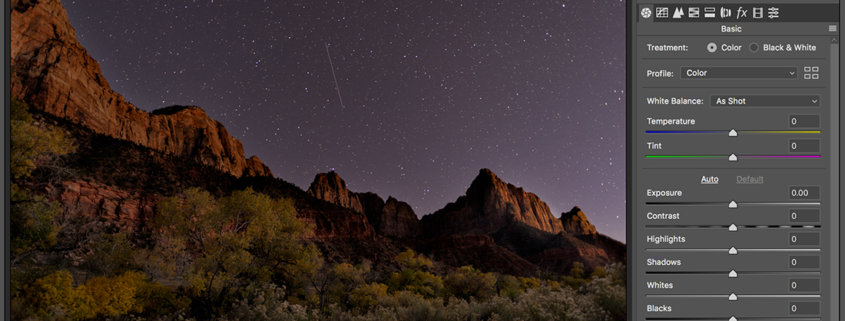
There are occasions when this doesn’t work though. Lets take a look at the image below from Zion National park. If I were to apply my “rule” to this exposure, I’d be leaving my shutter open way too long in order to get a brighter photo. It simply does not need it. It’s a dark situation. It should have a dark histogram like the one you see here.
I hope this has helped you to better understand the purpose of histograms in photography and why you should be utilizing this valuable tool. And, if you’re ever in Valley of Fire State Park, say “hi” to Jabba for me!


I have experienced over exposure and under exposure in my captures. Even after checking histogram, I have tried to work on HDR. But, most of the time, I got noisy images. Can you please tell me the reasons? And of course yes, it would be great if you share your HDR post processing method.
Thank you for the article.
Hello Vivek! Thanks for commenting. I’m not sure why you’re getting noisy images. Are you working in RAW with the lowest ISO possible? I shoot HDR sets at ISO 100 as long as movement is not a huge concern. I shoot in manual and adjust the shutter speed only…not the ISO..to get the different exposures. If I use the bracketing feature on my camera, this is done automatically.
I process my HDR images in multiple ways and will even try different methods if one method does not produce the results I like. I first try the Merge to HDR ability of Lightroom. Sometimes this produces a really nice result right away. More often than not, I manually blend my sky with my foreground. I have a Youtube video on this process. It’s a little old but still relevant. I like the manual method the best because it produces the most realistic results as I’m not relying on algorithms in the computer program to make decisions for me. I blend the exact amount I want to make the image as real as possible…as I saw it in the field. So if I think I will be manually blending, I’ll just take 2 exposures in the field at the lowest ISO possible.
I hope this helps. Thanks for reading!
Kate